Dinner · Part 2 of 3: Instructions
Easy One-Pan Hoppin’ John Rice Bake with Ham Step-by-step instructions
- Prep
- Cook
- Total
- Serves
- 6
Before you start
Before beginning, ensure that all ingredients are measured and ready. Dice the ham into uniform half-inch cubes to ensure they cook through at the same rate as the rice. Thinly slice the green onions and set them aside.
Preheat your oven to the required temperature and ensure that your baking dish is clean and dry. Having all components organized on your workspace will allow for a seamless assembly process once you are ready to combine the ingredients in the baker.
Ingredients at a glance (5)
- 2 cups long-grain white rice
- 1 can (15 oz) black-eyed peas, drained
- 1 cup cooked ham, diced
- 4 cups chicken broth, infused with 1 tsp smoked paprika
- 1/4 cup green onions, thinly sliced
Instructions
Assembly of ingredients
- Assemble the basePreheat the oven to 375°F (190°C). In a 9x13 inch enameled rectangular baker, evenly spread the dry long-grain white rice, drained black-eyed peas, and the diced ham cubes across the bottom of the pan.Look for Ensure the rice and beans are distributed in a single, even layer across the entire bottom of the baking dish for uniform cooking.Tip Using a wide, flat baker helps the rice cook evenly without becoming mushy in the center.
The ingredients should be layered evenly across the base of the pan. The rice, peas, and ham should be distributed in a balanced manner so that no single section of the pan has an excess of one component. Ensure the rice is spread into a flat, level surface to promote uniform heat distribution once the liquid is added.
Baking with broth
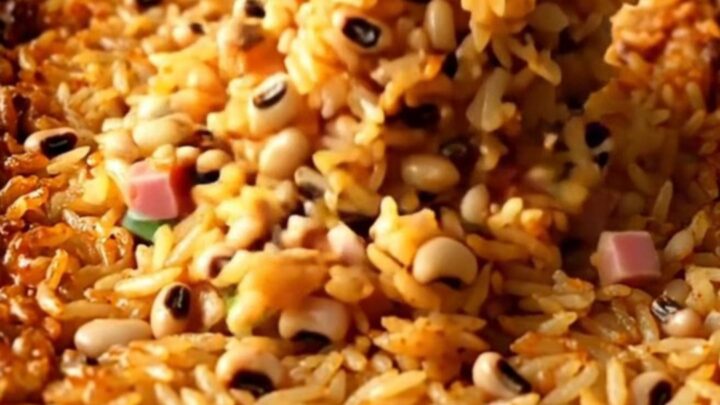
- Add liquid and bakePour the smoked paprika-tinted chicken broth over the rice mixture until it is just covered. Scatter the sliced green onions over the top. Cover the dish tightly with foil and bake for 45 minutes, or until the liquid is absorbed and the rice is tender.Look for The rice should be fluffy and the liquid should be fully absorbed, with the edges showing a slight golden toasted appearance.Tip Make sure the foil is sealed tightly around the edges of the pan to trap the steam, which is essential for cooking the rice through.
The dish should be covered tightly with foil to ensure the rice steams correctly. The liquid should just cover the rice mixture. At the end of this phase, the rice should be fully tender and have absorbed almost all of the seasoned broth, creating a fragrant and moist final product that is ready to be fluffed.
Resting and final service
- Rest and serveRemove the baker from the oven and let it rest, covered, for 5 minutes. This allows the steam to redistribute and ensures the rice remains light and fluffy before serving with a large spoon.Look for The dish is ready when the steam has settled and the rice grains are distinct rather than clumped together.Tip Fluff the rice gently with a fork or serving spoon before scooping to break up any large clusters.
The dish should rest for five minutes after being removed from the oven. This resting period is crucial for the final texture, as it allows the moisture to distribute evenly throughout the rice grains.
The final result should be a warm, cohesive dish with distinct grains and well-integrated flavors that are ready to be scooped and served.
Common mistakes
A common mistake is using too much or too little liquid, which significantly impacts the texture of the rice. Always measure the broth precisely to maintain the correct ratio.
Another frequent error is failing to seal the foil tightly, which allows steam to escape and leads to unevenly cooked, crunchy rice grains. Avoid lifting the foil to check on the progress frequently, as this releases the trapped steam that is essential for the cooking process to occur successfully.
How to tell it’s done
The dish is done when the rice is tender to the bite and all the liquid has been completely absorbed. You can check this by inserting a fork into the center of the dish; if it meets resistance or if there is visible liquid, continue baking for another few minutes.
The surface should appear slightly golden and toasted around the edges, indicating that the heat has effectively caramelized the proteins and rice grains, providing a depth of flavor.
Up next · Part 3 of 3
2 variations · storage & make-ahead · 3 answers · printable card
Tips, FAQ & printable recipe (Part 3)← Back to the ingredients (Part 1)