Desserts · Part 2 of 3: Instructions
Thick Honeycomb Sesame Bark Dark Chocolate Bars Step-by-step instructions
- Prep
- Cook
- Total
- Serves
- 12
Before you start
Before starting, ensure all ingredients are ready: grate the chocolate into a pile, break the honeycomb into chunks, and toast the sesame seeds. Line a metal tray with parchment paper, leaving overhang for easy lifting.
Have a heatproof bowl and a saucepan ready for melting the chocolate. The honeycomb candy should be crisp and not stale; if it is soft, it will not provide the desired crunch. The chocolate should be at room temperature for even melting.
Ingredients at a glance (3)
- 12 oz 72% dark chocolate, chopped
- 1 1/2 cups honeycomb candy (store-bought or homemade), broken into chunks
- 2 tbsp sesame seeds
Instructions
Prep and Melt
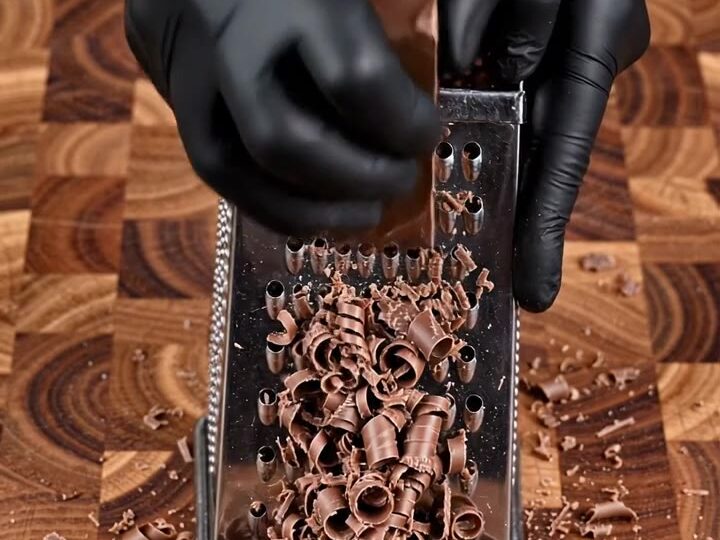
- Prepare the chocolate and candyGrate the solid block of 72% dark chocolate on a box grater into a fresh pile of dark chocolate curls. If using a chocolate bar, chop it finely with a knife instead. Break the honeycomb candy into bite-size chunks, about 1/2-inch pieces. Toast the sesame seeds in a dry skillet over medium heat for 2 to 3 minutes, shaking often, until fragrant and lightly golden. Remove from the heat and let cool.Look for The chocolate curls are light and airy, the honeycomb chunks are crisp and golden, and the sesame seeds smell nutty.Tip Grating the chocolate creates a fluffy texture that melts evenly when heated.
- Melt the chocolatePlace the grated chocolate in a heatproof bowl. Set the bowl over a saucepan of barely simmering water, making sure the bottom does not touch the water. Stir gently with a spatula until the chocolate is completely melted and glossy. Remove the bowl from the heat and let it cool slightly for 2 to 3 minutes, until it is warm but not hot to the touch.Look for The chocolate is smooth, glossy, and fluid, with no lumps.Tip Avoid overheating the chocolate; it should be just melted to keep its shine.
The grated chocolate forms a light, fluffy pile. The honeycomb chunks are evenly sized and crisp. Toasted sesame seeds are fragrant and lightly golden. The melted chocolate is smooth, glossy, and fluid, with no lumps.
Assemble and Set
- Assemble the barkLine a metal tray with parchment paper, leaving overhang on two sides for easy lifting. Pour the melted chocolate into the tray and spread it into an even layer about 1/2-inch thick. While the chocolate is still fluid, press the honeycomb candy chunks into the surface, distributing them evenly. Sprinkle the toasted sesame seeds over the top, gently pressing them in so they adhere.Look for The chocolate layer is even, with honeycomb chunks and sesame seeds visible on top.Tip Work quickly before the chocolate sets, so the toppings stick well.
- Chill to setPlace the tray in the refrigerator for at least 30 minutes, until the chocolate is fully set and firm to the touch. The bark should be solid and lift easily from the parchment. If the chocolate is not set after 30 minutes, continue chilling in 10-minute increments.Look for The chocolate is firm and no longer sticky when touched.Tip Chilling in the fridge speeds up setting; avoid the freezer to prevent condensation.
The chocolate is poured into an even layer, with honeycomb chunks and sesame seeds evenly distributed. The bark is chilled until firm to the touch and lifts easily from the parchment.
Slice and Serve
- Slice into barsLift the chilled bark out of the tray using the parchment overhang. Place it on a cutting board. Using a sharp chef's knife, slice the slab into thick bars, about 2 inches wide and 4 inches long. Cut with a gentle sawing motion to avoid shattering the honeycomb. Wipe the knife clean between cuts for neat edges.Look for The bars are cleanly cut with visible layers of chocolate and honeycomb.Tip Use a heavy knife and cut in one smooth motion for clean edges.
- Snap and serveTake one thick bar and snap it cleanly in half to reveal the layered cross section, showing the crisp honeycomb texture against the dark chocolate. Serve the bars as a rich dessert or snack. Store in an airtight container at room temperature or in the refrigerator.Look for The bar snaps with a clean break, revealing a crisp, airy honeycomb interior.Tip For the best texture, serve at room temperature so the chocolate is slightly tender.
The bark is sliced into thick bars with clean edges. A bar snaps cleanly in half, revealing a crisp honeycomb interior against the dark chocolate. The bars are ready to serve.
Common mistakes
The most common mistake is overheating the chocolate, which can cause it to seize or become grainy. Always melt gently over simmering water and stir frequently. Another issue is using stale honeycomb candy, which will be chewy rather than crisp.
Ensure the honeycomb is fresh and break it into uniform chunks. Pressing the honeycomb too firmly into the chocolate can cause it to sink and lose its texture; press gently so it stays on the surface.
Finally, slicing the bark before it is fully set will result in messy cuts.
How to tell it’s done
The bark is done when the chocolate is fully set and firm to the touch. It should lift easily from the parchment and break with a clean snap. The cross-section should show a crisp honeycomb texture against the dark chocolate.
If the chocolate is still soft or sticky, return it to the refrigerator for additional chilling. The bars are ready to serve when they hold their shape and snap cleanly.
Up next · Part 3 of 3
4 variations · storage & make-ahead · 5 answers · printable card
Tips, FAQ & printable recipe (Part 3)← Back to the ingredients (Part 1)