Desserts · Part 2 of 3: Instructions
Honey-Roasted Holiday Pears with Cranberries and Feta Step-by-step instructions
- Prep
- Cook
- Total
- Serves
- 4
Before you start
Before beginning, ensure the oven is fully preheated to the correct temperature to allow for even roasting. Wash the pears thoroughly and dry them before halving and coring.
Have all the topping ingredients measured and ready to go, as the final assembly happens quickly once the roasting is complete. Organize the baking sheet with parchment paper to prevent sticking and make the final transfer to the plates effortless.
Ingredients at a glance (5)
- 2 large ripe pears, halved and cored
- 2 tbsp honey
- 1/4 cup fresh cranberries
- 1/4 cup feta cheese, crumbled
- 1 tsp fresh thyme leaves
Instructions
Preparing and Glazing
- Prepare the PearsPreheat the oven to 375°F (190°C). Place the pear halves cut-side up on a parchment-lined baking sheet. Drizzle the honey evenly over each pear half, ensuring the cut surfaces are well coated to encourage caramelization during the roasting process.Look for The pears are ready for the oven when the honey is evenly distributed across the surfaces.Tip Using ripe but firm pears ensures they hold their shape while becoming tender during the roasting.
The pears should be arranged in a single layer with the cut sides facing up. Ensure that the honey is spread evenly across the surface of each pear half. The setup should look clean and organized, with the pears ready to be placed directly into the center of the preheated oven for the initial roasting phase.
Roasting and Topping
- Roast and GarnishRoast the pears in the preheated oven for 20 to 25 minutes. During the last 5 minutes of roasting, sprinkle the fresh cranberries, crumbled feta cheese, and fresh thyme leaves over the pears. Continue roasting until the cranberries have softened and the feta is slightly melted.Look for The pears are finished when they are fork-tender and the cranberries look slightly burst.Tip Check the pears frequently during the final minutes to prevent the honey from burning.
The pears should be golden and glistening as they roast. When the cranberries and feta are added, watch for the cranberries to begin softening and the cheese to soften slightly. The kitchen should smell fragrant with the scent of roasted fruit and fresh thyme, indicating that the flavors are developing correctly as the cooking concludes.
Resting and Plating
- Plate and ServeRemove the baking sheet from the oven and allow the pears to rest for 5 minutes. Carefully lift each pear half using a spatula, transferring it to a serving plate. Drizzle any remaining honey glaze from the pan over the pears before serving.Look for The pears should be glossy and steaming when lifted from the pan.Tip Serve while warm to enjoy the best texture and the contrast between the melted cheese and fruit.
The pears should be handled gently with a spatula to maintain their shape during the transfer. The pan drippings, now a concentrated honey glaze, should be drizzled over the pears on the plates.
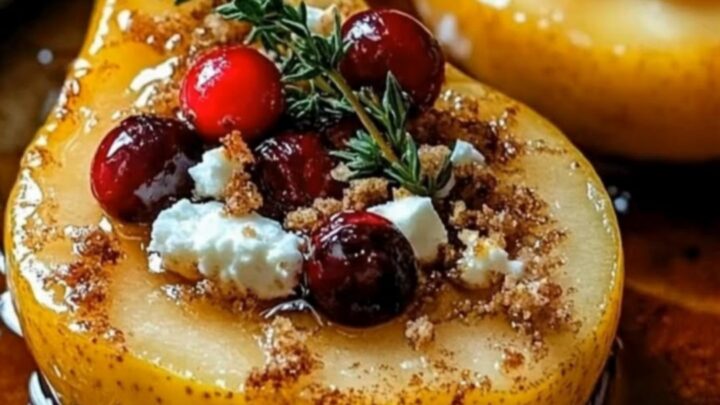
The final dish should look vibrant, with the colors of the cranberries and the white of the feta providing a beautiful contrast against the golden roasted pear halves.
Common mistakes
A common mistake is over-roasting the pears, which can cause them to become mushy and lose their structural integrity. Monitor the oven closely during the final minutes of cooking, especially since honey can scorch quickly.
Another error is adding the feta too early; if the cheese spends too much time in the high heat, it can become overly browned or lose its distinct crumbly texture, which is vital for the desired presentation.
How to tell it’s done
The pears are considered done when they are fork-tender, meaning a fork slides easily into the thickest part of the fruit without resistance.
The honey glaze should be bubbling and slightly thickened in the pan, and the cranberries should appear slightly shriveled and soft. The feta should be warm and have lost its raw, chalky texture, blending seamlessly with the juices of the roasted pears.
Up next · Part 3 of 3
2 variations · storage & make-ahead · 3 answers · printable card
Tips, FAQ & printable recipe (Part 3)← Back to the ingredients (Part 1)