Dinner · Part 2 of 3: Instructions
Honey-Roasted Christmas Chicken with Crispy Skin Step-by-step instructions
- Prep
- Cook
- Total
- Serves
- 6
Before you start
Before beginning the cooking process, ensure the whole chicken is fully thawed if previously frozen. Remove any giblets from the cavity and pat the chicken completely dry with paper towels, both inside and out, as moisture is the enemy of crispy skin.
Chop the baby gold potatoes in half and cut the carrots into uniform chunks. Measure out the honey and melt the unsalted butter so they are ready to be whisked together when the glazing step arrives.
Ingredients at a glance (6)
- 1 whole chicken (approx. 4-5 lbs), patted dry
- 4 tbsp unsalted butter, melted
- 1/4 cup honey
- 1 lb baby gold potatoes, halved
- 4 medium carrots, cut into 2-inch chunks
- 3 sprigs fresh rosemary
Instructions
Preparation and Initial Roast
- Preparing the ChickenHeat the oven to 400°F (200°C). Place the whole chicken in the center of a large baking dish, ensuring the skin is completely dry to promote maximum crispiness.Look for The chicken skin should feel dry and look ready for roasting.Tip Pat the chicken dry with paper towels inside and out before roasting.
- Adding the VegetablesArrange the halved baby gold potatoes and carrot chunks around the chicken in the baking dish, spreading them evenly to ensure they roast uniformly alongside the bird.Look for The vegetables should be spread in a single layer around the bird.Tip Keep the vegetable pieces relatively uniform in size for even cooking.
At the end of this initial roasting phase, the chicken skin should begin to turn a light golden color, and the fat will start rendering into the pan.
The potatoes and carrots will begin to soften slightly and should be sizzling gently in the natural juices of the chicken. There should be no dark brown spots yet, as the sweet glaze has not been applied.
Glazing and Caramelization
- Initial Roast and Glaze PrepRoast the chicken and vegetables in the preheated oven for 50 minutes. While roasting, whisk the melted unsalted butter and honey together in a small bowl until fully combined and smooth to create the glaze.Look for The honey and butter should form a cohesive, glossy, pourable glaze.Tip Keep the honey butter warm so it remains easy to brush over the skin.
- Applying the GlazeCarefully remove the baking dish from the oven. Use a pastry brush to generously coat the entire surface of the chicken with the honey-butter glaze, letting any excess run down into the bubbling pan juices surrounding the vegetables.Look for The chicken skin should look shiny, wet, and thoroughly coated with glaze.Tip Work quickly to prevent the oven temperature from dropping too much.
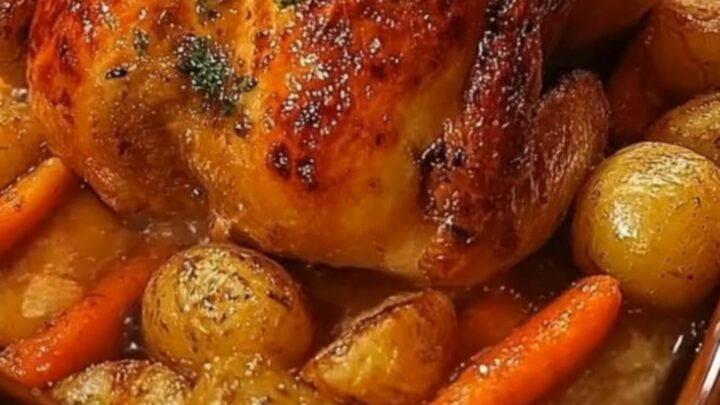
Once the honey-butter glaze is applied and roasted, the chicken skin will rapidly transform into a deep, glossy, mahogany-brown masterpiece. The glaze should bubble vigorously on the surface of the skin, and the sweet aroma of caramelized honey and butter should fill the kitchen. The vegetables will look glazed and deeply golden.
The Final Crisp and Rest
- Final Roast to Safe TemperatureReturn the baking dish to the oven and roast for an additional 15 to 20 minutes, or until the skin is deeply caramelized and crispy, the vegetables are tender, and a meat thermometer inserted into the thickest part of the thigh registers an internal temperature of 165°F (74°C).Look for The skin should be deeply golden brown, bubbling, and firm to the touch.Safe temperature 165°F (74°C) internal temperature (poultry)Tip If the honey glaze begins to darken too quickly, tent the chicken loosely with foil.
- Garnishing and RestingRemove the chicken from the oven and top with fresh rosemary sprigs. Let the roasted chicken rest in the baking dish for 15 minutes before carving to allow the savory juices to redistribute throughout the meat, ensuring every slice is incredibly juicy.Look for The bubbling pan juices will settle and the chicken skin will firm up slightly.Tip Never skip the resting period, or the hot juices will run out onto the cutting board.
After the final roast and resting period, the chicken skin will be firm, crackly, and deeply caramelized. When sliced, hot savory steam and glistening juices should release from the meat. The potatoes will have crispy edges, the carrots will be tender, and the entire dish will be beautifully garnished with fragrant fresh rosemary.
Common mistakes
The most common mistake is applying the honey glaze too early in the roasting process. Because honey contains high amounts of natural sugars, it burns very quickly under heat.
Applying it at the start will result in a blackened, bitter exterior while the inside of the chicken remains raw. Another frequent error is failing to dry the chicken skin thoroughly before roasting, which traps moisture and steams the skin instead of crisping it.
How to tell it’s done
To accurately determine doneness, insert an instant-read meat thermometer into the thickest part of the chicken thigh, taking care not to touch the bone.
The chicken is perfectly cooked and safe to eat when the thermometer registers an internal temperature of 165°F (74°C). At this point, the juices should run clear when the thigh is pierced, and the meat near the bone should no longer be pink.
- Poultry: 165°F (74°C) in the thickest part
Up next · Part 3 of 3
2 variations · storage & make-ahead · 3 answers · printable card
Tips, FAQ & printable recipe (Part 3)← Back to the ingredients (Part 1)