Dinner · Part 2 of 3: Instructions
Honey Garlic Apple Pork Roast for an Easy Dinner Step-by-step instructions
- Prep
- Cook
- Total
- Serves
- 6
Before you start
Before beginning, ensure the pork loin is removed from the refrigerator about 20 minutes prior to cooking so it loses its surface chill.
Prepare the apples by washing, coring, and slicing them into uniform wedges to ensure they roast at the same rate as the pork.
Preheat the oven fully and have all sauce ingredients measured and ready to whisk, which will streamline the assembly process and ensure the pork goes into the oven at the optimal temperature.
Ingredients at a glance (5)
- 3 lb pork loin roast
- 3 apples, sliced into wedges
- 1/2 cup honey
- 4 cloves garlic, minced
- 1/4 cup soy sauce
Instructions
Preparation and Arrangement
- Prepare the Roast and ApplesPreheat the oven to 375°F (190°C). Line a large baking sheet with aluminum foil to ensure easy cleanup. Place the pork loin in the center of the prepared baking sheet and arrange the apple wedges around the meat, ensuring they are spread out in an even layer to allow for proper caramelization during the roasting process.Look for Apples should be sliced into uniform wedges for even cooking.Tip Use a sturdy foil to prevent the sticky honey sauce from leaking onto the baking sheet.
The pork and apples are arranged in an even layer on the baking sheet, and the oven has fully reached the target temperature. Everything is ready for the glaze to be applied.
Roasting and Glazing
- Glaze and RoastIn a small mixing bowl, whisk together the honey, minced garlic, and soy sauce until smooth. Pour the mixture generously over the pork roast and the apple wedges, ensuring everything is well-coated. Place the baking sheet into the oven and roast for approximately 45 to 55 minutes, basting the pork with the pan juices halfway through to build a deep, flavorful crust.Look for The sauce should become glossy and the pork should be golden brown.Tip If the sauce begins to darken too quickly, loosely tent the pork with a piece of foil.
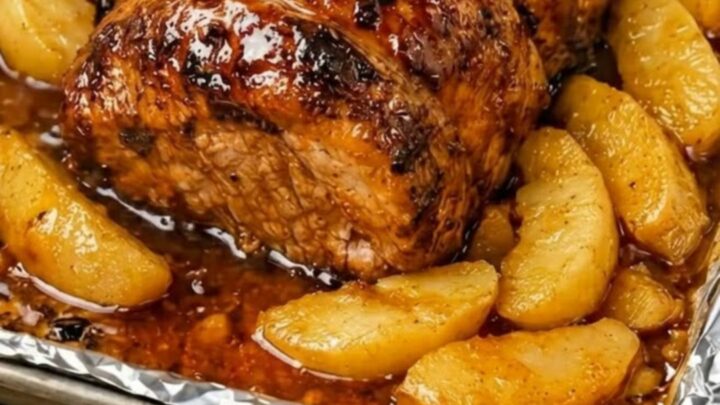
The kitchen smells distinctly of roasted garlic and sweet fruit, and the pan sauce on the baking sheet has thickened into a glossy, dark amber glaze that coats the pork completely while the apple wedges soften and develop caramelized edges.
Resting and Serving
- Check Temperature and ServeRemove the pork from the oven once a meat thermometer inserted into the thickest part of the loin reads 145°F (63°C). Transfer the roast to a cutting board, cover loosely with foil, and let it rest for at least 10 minutes before slicing. This rest period is crucial for the juices to redistribute throughout the meat, ensuring every bite remains moist and tender when served alongside the caramelized apples.Look for Juices should run clear when the pork is sliced.Safe temperature 145°F (63°C) internal temperature (steaks, chops and roasts)Tip Always insert the thermometer into the center of the roast to get an accurate reading.
The pork has reached 145°F (63°C), the juices have redistributed during the rest, and the meat is ready to be carved into thick, juicy slices to serve with apples.
Common mistakes
A common mistake is slicing the pork immediately after it comes out of the oven. Resting the meat for at least 10 minutes is non-negotiable, as it allows the internal juices to stabilize.
Another error is overcrowding the baking sheet; if the apples are piled too high, they will steam instead of roasting, preventing the desired caramelization that gives this dish its signature sweet and savory flavor profile.
How to tell it’s done
The pork is perfectly done when the internal temperature reaches 145°F (63°C) at the thickest point. Using a digital meat thermometer is the most reliable way to ensure the meat is cooked through without becoming dry.
The surface should be deeply glazed and caramelized, and the apples should be soft and tender, having absorbed the delicious pan juices during the roasting time.
- Steaks, chops and roasts: 145°F (63°C) in the thickest part, then a 3-minute rest
Up next · Part 3 of 3
2 variations · storage & make-ahead · 3 answers · printable card
Tips, FAQ & printable recipe (Part 3)← Back to the ingredients (Part 1)