Dinner · Part 1 of 3: Ingredients
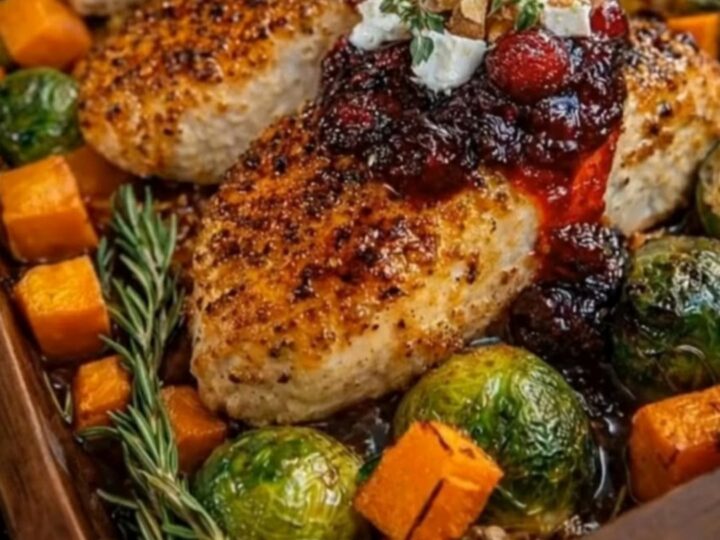
Honey Cranberry Chicken Bake with Roasted Sweet Potatoes
- Prep
- Cook
- Total
- Serves
- 4
Bring a burst of sweet, savory, and tangy flavors to the dinner table with this simple yet elegant honey cranberry chicken bake. This recipe combines tender poultry with caramelized root vegetables and a rich, glossy glaze. It is the ultimate fuss-free meal that requires minimal cleanup while delivering a stunning presentation that looks like it took hours to prepare.
This recipe is designed for busy evenings when you want a satisfying, complete meal without washing multiple pots and pans. By roasting chicken breasts directly alongside sweet potatoes and Brussels sprouts, the ingredients swap flavors as they cook.
The sweet potatoes turn incredibly tender, the Brussels sprouts get beautifully charred around the edges, and the chicken absorbs the savory seasoning blend. A final glaze of honey and cranberry sauce ties everything together, while feta and walnuts add the perfect contrast of creamy and crunchy textures.
Ingredients
- 1 1/2 lb boneless, skinless chicken breasts
- 2 medium sweet potatoes, peeled and cubed
- 1/2 lb Brussels sprouts, trimmed and halved
- 1 tbsp seasoning blend of salt, pepper, garlic powder, and dried thyme
- 1 cup whole berry cranberry sauce
- 1/4 cup honey
- 1/4 cup crumbled feta cheese
- 1/4 cup chopped walnuts
Why this recipe works
Roasting the chicken and vegetables together on a single tray works wonderfully because it maximizes flavor contact. As the chicken cooks, its natural juices baste the surrounding sweet potatoes and Brussels sprouts, preventing them from drying out.
The high roasting temperature of 400 degrees Fahrenheit caramelizes the natural sugars in the sweet potatoes and the edges of the Brussels sprouts, creating deep, complex flavors that complement the tangy cranberry glaze.
Adding the honey cranberry mixture during the last fifteen minutes of baking is a crucial technique. If the sugary glaze were added at the beginning, it would burn under the high heat before the chicken and vegetables finished cooking.
Introducing it later allows the sauce to bubble, thicken, and form a gorgeous, glossy coating over the chicken while keeping the meat incredibly juicy and tender.
Notes and substitutions
When choosing ingredients, opt for whole berry cranberry sauce rather than jellied sauce to provide a rustic texture and chunks of real fruit. For the chicken, select breasts of uniform thickness so they cook evenly without some drying out while others remain undercooked.
If your chicken breasts are exceptionally large, consider cutting them in half horizontally to ensure they cook at the same rate as the cubed vegetables.
A heavy-duty rimmed baking sheet or a ceramic baking dish works best for this recipe. Avoid using thin baking sheets that can warp under high heat, which might cause the sweet cranberry glaze to run to one side and burn. If you do not have feta cheese on hand, goat cheese makes an excellent substitute, offering a similar tangy contrast to the sweet honey and cranberry glaze.
- feta cheese: goat cheese or white cheddar cheese for a different flavor profile
- walnuts: pecans or almonds to maintain the crunchy texture
Equipment
- Baking tray or wooden baking dish
- Small mixing bowl
- Whisk
- Chef's knife
- Cutting board
- Meat thermometer
Up next · Part 2 of 3
4 steps · 35 min of cooking · what to look for at each stage
Step-by-step instructions (Part 2)