Dinner · Part 2 of 3: Instructions
Honey Chipotle Chicken and Rice Bake Step-by-step instructions
- Prep
- Cook
- Total
- Serves
- 6
Before you start
Before you begin, ensure your oven is fully preheated to the correct temperature. Gather all your ingredients and measure them out to keep the assembly process efficient. Have your baking dish cleaned and ready on the counter.
If you need to shred your cheese, do so before you start arranging the rice, as this allows you to assemble the dish immediately without stopping. A clean workspace makes the process seamless and helps you manage the oven timing with precision.
Ingredients at a glance (4)
- 2 cups uncooked white rice
- 6 boneless skinless chicken thighs
- 3 cups honey chipotle broth
- 1 1/2 cups shredded Monterey Jack cheese
Instructions
Assembling the base
- Assemble the basePreheat the oven to 375°F (190°C). Spread the uncooked white rice evenly across the bottom of a large rectangular ceramic baking dish. Arrange the boneless skinless chicken thighs in a single layer directly over the bed of rice.Look for Ensure the rice is spread in an even layer to promote consistent cooking.Tip Use a large enough dish to avoid overcrowding the chicken thighs for even baking.
At this point, the rice should be distributed evenly across the bottom of the dish, forming a solid base for the chicken. The chicken thighs should be placed in a single layer, ensuring they are not stacked on top of each other, which guarantees that they cook at the same rate as the rice beneath them.
Adding sauce and cheese
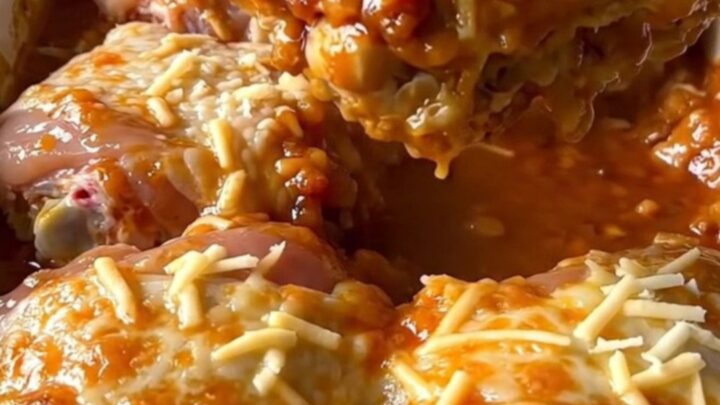
- Add sauce and cheesePour the honey chipotle broth over the chicken and rice, ensuring the rice is fully submerged and the chicken is well-coated. Sprinkle the shredded Monterey Jack cheese evenly over the top of the dish.Look for The broth should just cover the rice layer completely.Tip Pour slowly to keep the rice layer undisturbed as much as possible.
The dish should look cohesive, with the broth covering the rice adequately. The cheese should be sprinkled uniformly over the surface, creating a light layer that will eventually turn into a golden, melty topping.
Ensure the edges of the dish are clean from any spilled sauce to prevent burning during the baking process.
Baking until golden
- Bake until goldenPlace the dish in the preheated oven and bake until the chicken reaches an internal temperature of 165°F (74°C) and the cheese is melted and bubbling at the edges. Remove from the oven and let rest for 5 minutes before serving.Look for Look for a deep golden color on the cheese and bubbling sauce around the edges.Safe temperature 165°F (74°C) internal temperature (poultry)Tip Use a meat thermometer to check the thickest part of the thigh for safety.
The final result should feature a golden, bubbly cheese layer. The sauce should be thick and clinging to the chicken, and the aroma should be savory with a hint of sweetness. Before serving, verify the internal temperature of the chicken has reached 165°F (74°C) to ensure it is fully cooked and safe to consume.
Common mistakes
Avoid over-crowding the baking dish, as this prevents the heat from circulating properly and can result in unevenly cooked rice. Do not add too much liquid, as the chicken and rice will release their own moisture; following the suggested ratios is key to a perfect consistency.
Finally, resist the urge to skip the resting period, as it is essential for the sauce to set and for the meat to remain juicy upon serving.
How to tell it’s done
The dish is ready when the chicken thighs reach an internal temperature of 165°F (74°C) when measured with a meat thermometer. The sauce should be bubbling vigorously, and the cheese should be melted and lightly browned in spots.
The rice should be tender, having absorbed most of the liquid. Once you pull the dish from the oven, let it rest for 5 minutes so the sauce thickens slightly and the flavors settle before you serve.
- Poultry: 165°F (74°C) in the thickest part
Up next · Part 3 of 3
2 variations · storage & make-ahead · 3 answers · printable card
Tips, FAQ & printable recipe (Part 3)← Back to the ingredients (Part 1)