Dinner · Part 2 of 3: Instructions
Hokkaido Miso Butter Corn Ramen with Seared Scallops in 45 Minutes Step-by-step instructions
- Prep
- Cook
- Total
- Serves
- 2
Before you start
Before any heat goes on, set up the whole station. Grate the garlic and the ginger, measure the miso and the sesame oil, and have the whisk and small bowl ready. Pat the scallops dry and keep them cold in the refrigerator.
Measure the broth, the noodles and the corn, and place two deep serving bowls near the stove. Put the cold finishing butter in the refrigerator, not the freezer, so it stays firm but sliceable. If the broth is homemade and cold, warm it slightly before starting so it reaches a simmer in minutes.
Ingredients at a glance (10)
- 60 g fermented red and white miso paste (about 1/4 cup)
- 4 garlic cloves, grated
- 1 tbsp grated ginger
- 1 tbsp toasted sesame oil
- 6 jumbo sea scallops, patted dry
- 2 tbsp butter, for searing
- 2 1/2 cups chicken-dashi broth (600 ml)
- 12 oz curly egg noodles
- 2 cups sweet corn kernels, charred
- 2 tbsp cold butter (30 g), for finishing
Instructions
Build the miso base
- Whisk the miso baseWhisk the miso paste, grated garlic, grated ginger and toasted sesame oil in a small bowl until completely smooth. Press the paste against the side of the bowl to work the aromatics into the oil; it should look thick and glossy, like soft peanut butter, with no streaks of pale miso left.Look for The paste holds its shape on the whisk and smells intensely of garlic, ginger and toasted sesame.Tip Grate the garlic and ginger on a microplane so they melt into the paste instead of staying in fibrous bits.
- Dry and season the scallopsPat the scallops completely dry with paper towels, pressing a fresh towel onto each one until no moisture beads on the surface. Season both sides lightly. Moisture is the enemy of a golden crust, so do not skip this, and keep the scallops cold in the refrigerator until the skillet is ready.Look for The surfaces look matte and dry, never shiny or wet.Tip Remove the small side muscle if any scallop still has one; it toughens when seared.
- Char the cornSet a dry cast-iron skillet over high heat and let it get smoking hot. Add the corn kernels in a single layer and leave them undisturbed for about 2 minutes, until blistered and charred in spots. Stir once and char 1 to 2 minutes more, then scrape the corn onto a plate.Look for Deep golden-brown blisters on at least a third of the kernels, with a toasty, popcorn-like smell.Tip No oil in this step — a dry skillet chars instead of steaming, which is where the sweetness deepens.
At the end of this phase, three components are ready and the kitchen smells toasty. The miso base is a thick, glossy paste with no visible streaks of garlic or pale miso — taste a trace of it; it should be salty, sweet and fragrant all at once. The scallops look matte and dry on the surface, evenly seasoned and back in the refrigerator. The corn is blistered and charred in spots, with a popcorn-like smell and a few blackened kernels that will taste sweet, not burnt.
Sear and simmer
- Sear the scallopsMelt the searing butter in the skillet over high heat, about 410°F (210°C) on an infrared thermometer. Lay the scallops in with space between them and sear 90 seconds per side, without moving them, until deep golden and 145°F (63°C) at the center on an instant-read thermometer. Transfer to a clean plate.Look for A deep golden-brown crust on both flat sides and the edges turning opaque.Safe temperature 145°F (63°C) internal temperature (shellfish)Tip If the butter browns too fast, pull the pan off the heat for a moment; the skillet should stay hot but not blacken the butter.
- Simmer the miso brothPour the chicken-dashi broth into a pot and bring it just to a simmer, then lower the heat so it holds around 194°F (90°C) — steaming, with lazy bubbles at the edges, never a rolling boil. Whisk in the miso base until fully dissolved and let it steep gently for 3 minutes.Look for The broth turns deep amber-red and releases a savory, fermented aroma without bubbling hard.Tip Boiling miso dulls its aroma and can turn the broth grainy, so keep the heat low once the paste goes in.
- Cook the noodlesBring a separate pot of water to a boil and cook the curly egg noodles according to the package directions, usually 4 to 5 minutes, until tender with a slight chew. Drain well in a colander and shake off the water, then divide the noodles between two deep bowls while they are still steaming.Look for The noodles bend without breaking and have a springy bite at the center.Tip Cook the noodles while the broth steeps so everything finishes at the same moment.
This is the transformation phase, and it ends with the two hot elements ready at the same time. The scallops are deep golden on both flat sides, opaque at the edges and at 145°F (63°C) in the center, sitting on a plate with a pat of searing butter glistening on top.
The broth is a deep amber-red, steaming at around 194°F (90°C) with lazy bubbles, and the miso has dissolved completely with no lumps clinging to the whisk. The noodles are drained and divided into the bowls, still steaming.
Assemble the bowls
- Ladle the broth over the noodlesLadle the hot miso broth over the noodles in each bowl, filling them about three-quarters full. Lift the noodles with chopsticks or a fork as the broth goes in so it threads between the strands instead of pooling, and the miso stays evenly distributed from the first slurp to the last.Look for The noodles are submerged but their tips peek through the amber broth.Tip Warm the bowls with hot water first and dry them, so the broth does not cool the second it hits the ceramic.
- Add the corn and scallopsTop each bowl with the charred corn and the seared scallops, arranging the scallops flat side up so the golden crust stays visible. Work quickly here — the bowls should still be steaming when the finishing butter goes on, so the melt happens right in front of the person eating.Look for Steam rising off the bowls and the scallop crusts still glossy from the searing butter.Tip Reserve a few spoonfuls of corn to scatter on top last, so the color stays bright against the red broth.
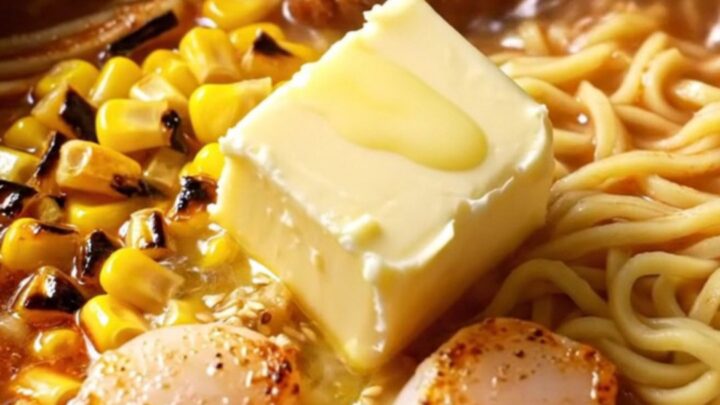
- Finish with cold butterDrop the cold butter over each finished bowl, one pat per bowl, and give it a few seconds to start melting before stirring it gently through the broth. It thickens and glosses the miso broth around the corn and scallops. Serve immediately, while the butter is still visibly melting.Look for A slow, silky swirl of melted butter spreading through the red broth.Tip Cold butter melts slowly and emulsifies smoothly; warm butter would simply pool and separate.
The final phase takes under two minutes and ends at the table. Each bowl holds glossy noodles submerged in amber-red broth, a scatter of charred corn with a few kernels resting on top for color, and scallops flat side up with their golden crusts visible. The cold butter has just been dropped on and is melting into a slow, silky swirl that thickens the broth as it turns. Steam rises off every bowl in visible ribbons.
Common mistakes
The most common failure is boiling the broth hard after the miso goes in, which dulls its aroma and can leave the broth tasting flat and slightly grainy — keep it at a bare simmer. Wet scallops are the second: any surface moisture steams instead of sears, so press them dry twice if needed.
Crowding the skillet drops the temperature and gray scallops follow. Stirring the scallops before the crust sets tears them. Finally, overcooked noodles turn the bowl heavy; pull them a minute early, since the hot broth keeps softening them.
How to tell it’s done
The scallops are done when both flat sides are deep golden, the edges are opaque and an instant-read thermometer reads 145°F (63°C) at the center — the safe temperature for shellfish. They should feel springy, not firm.
The noodles are done when they bend without breaking and have a slight chew; they will soften further in the broth. The broth is ready when it steams at a bare simmer, deep amber-red, and coats a spoon lightly. The butter should still be visibly melting when the bowls reach the table, swirling through the broth in a glossy ribbon.
- Shellfish: 145°F (63°C) in the thickest part
Up next · Part 3 of 3
4 variations · storage & make-ahead · 5 answers · printable card
Tips, FAQ & printable recipe (Part 3)← Back to the ingredients (Part 1)