Dinner · Part 2 of 3: Instructions
Herb-Roasted Chicken with Baby Potatoes: One-Pan Dinner Step-by-step instructions
- Prep
- Cook
- Total
- Serves
- 4
Before you start
Before you begin cooking, gather all your ingredients and equipment to ensure a smooth process. Preheating the oven is essential, so set it to 400°F (204°C) to guarantee a hot environment that immediately starts searing the chicken skin and crisping the potatoes.
Wash the baby potatoes thoroughly to remove any dirt, pat them completely dry with a clean towel, and slice them in half. Finely chop the fresh herbs and mince the garlic. Having these aromatics prepared beforehand will make assembling the dish quick and effortless.
Ingredients at a glance (6)
- 4 bone-in skin-on chicken breasts
- 1 1/2 lb baby red and yellow potatoes, halved
- 6 tbsp olive oil, divided
- 4 cloves garlic, minced
- 1/2 cup chopped fresh herbs, divided
- 1 1/2 tsp salt and black pepper, divided
Instructions
Prep and Seasoning
- Prep the Potatoes and ChickenPreheat your oven to 400°F (204°C). Wash the baby red and yellow potatoes thoroughly and pat them completely dry. Cut the potatoes in half. In a large bowl, toss the halved potatoes with two tablespoons of the olive oil and half a teaspoon of the seasoning until they are evenly coated.Look for The potatoes should be fully coated with oil and seasoning.Tip Drying the potatoes completely is key to getting crispy edges.
- Assemble the Baking DishPat the chicken breasts dry with paper towels. Season both sides generously with one teaspoon of the seasoning. Place the seasoned chicken breasts in the center of a large ceramic baking dish. Arrange the seasoned baby potatoes in a single layer around the chicken, then scatter the minced garlic and half of the chopped fresh herbs over everything.Look for The ingredients should be in a single layer without crowding.Tip Keep the chicken skin facing up to ensure it gets crispy.
By the end of this initial phase, the chicken and baby potatoes should be beautifully arranged in a single layer in your baking dish. The potatoes should be thoroughly coated in olive oil and seasoning, nestled snugly around the seasoned chicken.
You will smell the immediate, sharp aroma of raw garlic and earthy herbs as they are scattered over the ingredients. There should be no standing water in the dish, ensuring the roasting process begins immediately.
The Oven Roast
- Roast to PerfectionPlace the baking dish in the preheated oven and roast for thirty-five to forty minutes. The chicken is cooked through when it reaches a safe internal temperature of 165°F (74°C) on an instant-read thermometer. The baby potatoes should be tender when pierced with a fork and have golden-brown, crispy edges sizzling in the rendered chicken juices.Look for The chicken skin should be golden brown and crisp.Safe temperature 165°F (74°C) internal temperature (poultry)Tip If the potatoes need more browning, leave them in for five more minutes.
At the end of the roasting phase, your kitchen will be filled with an incredible, rich aroma of roasted garlic and savory chicken. The chicken skin should be deeply golden and crisp, and the baby potatoes should be sizzling in the rendered pan juices, showing caramelized, browned edges. When pierced with a fork, the potatoes should feel completely tender, and the chicken must register an internal temperature of 165°F (74°C) at its thickest part.
Slicing and Finishing
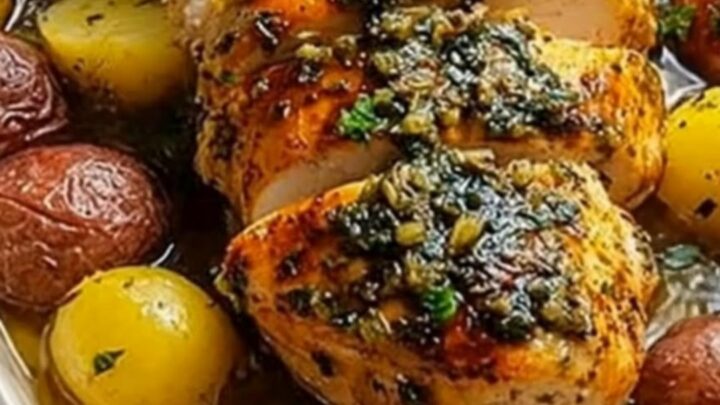
- Prepare Herb Oil and ServeWhile the chicken rests for ten minutes on a cutting board, whisk the remaining four tablespoons of olive oil, the remaining chopped fresh herbs, and a pinch of the minced garlic in a small bowl to create a vibrant green herb oil. Slice the rested chicken breasts, arrange them back in the dish with the tender potatoes, and spoon the fresh herb oil generously over the top before serving.Look for The herb oil should be bright green and fragrant.Tip Resting the chicken keeps it incredibly juicy when sliced.
In this final phase, the roasted chicken has rested to lock in its juices and has been sliced into clean, succulent pieces. The vibrant green herb oil is spooned generously over the warm chicken slices and potatoes, creating a beautiful visual contrast. You will hear a gentle sizzle as the cool herb oil hits the warm chicken, releasing a fresh, herbaceous aroma of raw garlic and herbs that perfectly complements the rich, roasted scents of the dish.
Common mistakes
One of the most common mistakes is crowding the baking dish, which traps steam and prevents the potatoes from getting crispy. Ensure the potatoes are in a single layer around the chicken. Another error is slicing the chicken immediately after taking it out of the oven.
This causes all the delicious juices to run out, leaving the meat dry. Always let the chicken rest for at least ten minutes before slicing to allow the juices to redistribute throughout the meat, ensuring every bite is tender and succulent.
How to tell it’s done
To determine when the dish is perfectly cooked, use an instant-read meat thermometer inserted into the thickest part of the chicken breast, avoiding the bone. The safe internal temperature for poultry is 165°F (74°C).
The potatoes are done when they are easily pierced with a fork and have a golden-brown, crispy exterior. If the chicken reaches the target temperature before the potatoes are fully tender, transfer the chicken to a cutting board to rest and return the potatoes to the oven for a few extra minutes.
- Poultry: 165°F (74°C) in the thickest part
Up next · Part 3 of 3
2 variations · storage & make-ahead · 3 answers · printable card
Tips, FAQ & printable recipe (Part 3)← Back to the ingredients (Part 1)