Dinner · Part 2 of 3: Instructions
Herb-Crusted Prime Rib Roast for a Perfect Holiday Feast Step-by-step instructions
- Prep
- Cook
- Total
- Serves
- 8
Before you start
Before beginning, ensure the prime rib roast is removed from the refrigerator no more than 30 minutes prior to cooking to maintain food safety standards.
Thoroughly pat the entire surface of the meat dry with paper towels, as any excess moisture will create steam and prevent the garlic-herb butter from adhering properly. Measure out the butter, finely chop the fresh rosemary and thyme, and mince the garlic cloves so everything is ready for quick assembly.
Ingredients at a glance (5)
- 1 4-bone frenched prime rib roast (about 8 to 9 pounds)
- 1 cup unsalted butter, softened
- 6 cloves garlic, minced
- 3 tbsp fresh rosemary, finely chopped
- 3 tbsp fresh thyme, finely chopped
Instructions
Herb Butter Preparation and Coating
- Prepare the Garlic-Herb ButterIn a small bowl, combine the softened unsalted butter, minced garlic, finely chopped fresh rosemary, and finely chopped fresh thyme. Mix thoroughly until a smooth, uniform paste forms.Look for The mixture should be creamy and easily spreadable.Tip Ensure the butter is truly at room temperature so it blends easily with the herbs.
- Coat the Prime Rib RoastPlace the 4-bone frenched prime rib roast in a roasting pan with the bones facing down. Pat the meat completely dry with paper towels. Using hands, evenly coat the entire exterior of the roast, except the bones, with the prepared garlic-herb butter paste.Look for The meat should be fully covered in a thick layer of butter.Tip Do not leave the raw roast at room temperature for more than 30 minutes before cooking.
At the end of this first phase, the prime rib roast should be completely enveloped in a thick, uniform layer of pale green garlic-herb butter.
The rich paste should adhere firmly to the dried surface of the meat, with flecks of fresh rosemary and thyme visible throughout the coating. The kitchen will already begin to smell faintly of fresh herbs and garlic before the roast even enters the oven.
High-Heat Searing and Slow Roasting
- Sear and Roast the MeatPreheat the oven to 450°F (230°C). Roast the butter-coated prime rib for 15 minutes to sear the exterior. Reduce the oven temperature to 325°F (163°C) and continue roasting until the internal temperature reaches the safe level.Look for The butter will melt and sizzle, forming a golden crust.Tip Keep the oven door closed to maintain a steady temperature throughout the roasting process.
- Check Temperature and RestInsert a meat thermometer into the thickest part of the roast, away from the bone. Cook until the internal temperature reaches at least 145°F (63°C) for safe consumption of whole cut meat. Remove the roast from the oven, transfer it to a cutting board, and let the meat rest for at least 3 minutes to allow the juices to redistribute.Look for The exterior will be deeply browned and crispy, and the thermometer will read 145°F (63°C).Safe temperature 145°F (63°C) internal temperature (steaks, chops and roasts)Tip Resting is crucial to prevent all the delicious juices from running out when slicing.
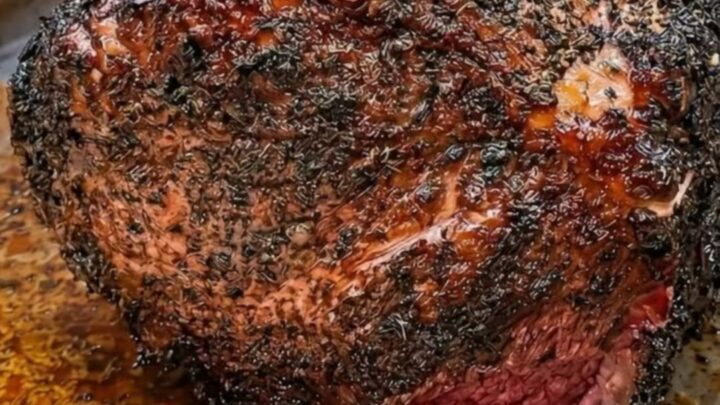
By the end of the roasting phase, the exterior of the prime rib will have transformed into a deep, mahogany-brown crust that sizzles gently. The garlic-herb butter will have melted down the sides of the roast, pooling with the rendered beef fat in the bottom of the pan to create a rich, glistening liquid. The internal temperature must register at least 145°F (63°C) on a meat thermometer.
Resting and Carving
- Carve the Prime RibUsing a sharp carving knife, carefully slice along the curve of the bones to detach the meat from the rack. Place the boneless roast on the board and slice it against the grain into thick, uniform portions. Serve immediately with the glistening pan juices collected in the roasting pan.Look for The knife should glide smoothly through the tender meat, revealing a juicy interior.Tip Save the bones for making beef stock or enjoying separately.
After resting for at least 3 minutes, the meat fibers will have relaxed, allowing the savory juices to settle back into the center of the roast. When sliced, the meat should reveal a beautifully uniform, moist interior that drips with clear juices, while the crispy, herb-flecked crust remains intact on the outer edges of each slice. The roast is now perfectly ready to be served hot.
Common mistakes
One common mistake is failing to pat the meat completely dry before applying the garlic-herb butter. If the surface of the beef is damp, the butter will slide off as it melts in the oven rather than forming a crispy, caramelized crust.
Another frequent error is slicing the roast immediately after removing it from the oven. Skipping the essential resting period causes the hot juices to rush out onto the cutting board, leaving the meat dry and tough.
How to tell it’s done
To ensure the prime rib roast is safe and delicious, always use a reliable meat thermometer inserted into the thickest part of the meat, ensuring it does not touch the bone.
According to food safety guidelines, whole cut meat must reach a minimum internal temperature of 145°F (63°C). Once this temperature is achieved, remove the roast from the oven and let it rest for at least 3 minutes before carving to allow the juices to redistribute.
- Steaks, chops and roasts: 145°F (63°C) in the thickest part, then a 3-minute rest
Up next · Part 3 of 3
2 variations · storage & make-ahead · 3 answers · printable card
Tips, FAQ & printable recipe (Part 3)← Back to the ingredients (Part 1)