Dinner · Part 2 of 3: Instructions
Herb Butter Roasted Chicken Drumsticks for a Quick Dinner Step-by-step instructions
- Prep
- Cook
- Total
- Serves
- 4
Before you start
Before starting, ensure all ingredients are measured and ready. Soften the butter to room temperature so it incorporates easily with the garlic and herbs. Preheat the oven to 400°F (200°C) and prepare a rimmed roasting pan.
Pat the chicken drumsticks thoroughly dry with paper towels; removing surface moisture is the most important step for achieving crispy skin. Have a meat thermometer handy to monitor the internal temperature accurately during the final stages of the cooking process.
Ingredients at a glance (4)
- 8 count chicken drumsticks
- 1/2 cup unsalted butter, softened
- 3 cloves garlic, minced
- 2 tbsp fresh herbs, chopped
Instructions
Creating the Herb Butter
- Prepare the Herb ButterIn a small mixing bowl, combine the softened butter, minced garlic, and chopped fresh herbs. Mix thoroughly until all ingredients are evenly incorporated into the butter.Look for The butter should be smooth and the herbs evenly distributed.Tip Ensure the butter is truly softened to room temperature for easier mixing.
The butter mixture should be soft, uniform, and fragrant. The garlic and herbs must be finely minced so they distribute evenly across the chicken.
Check that the ingredients are fully incorporated into the butter to avoid any uneven seasoning during the roasting process. Once the mixture is smooth and consistent, it is ready to be applied to the chicken pieces.
Seasoning and Initial Roast
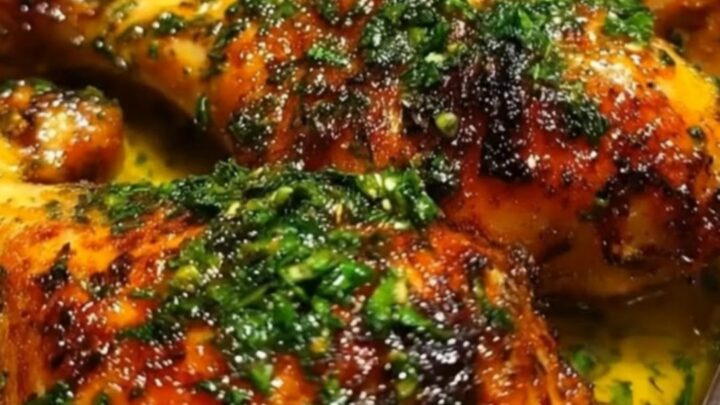
- Season and RoastPat the chicken drumsticks dry with paper towels. Rub the herb butter mixture generously over and under the skin of each drumstick. Place them in a single layer in a roasting pan. Roast in a preheated oven at 400°F (200°C) until the skin is golden brown.Look for The skin should look golden and the butter should be sizzling in the pan.Tip Avoid overcrowding the pan to ensure the skin gets crispy rather than steaming.
The chicken should be coated evenly with the herb butter, ensuring it is tucked under the skin where possible. Arrange the drumsticks in the pan without overlap to allow hot air to circulate freely. As they begin to roast, listen for the sound of the butter sizzling in the pan, which indicates the high heat is working to render the fat and crisp the skin.
Final Roast and Resting
- Check Temperature and ServeContinue roasting until an instant-read thermometer inserted into the thickest part of the meat, avoiding the bone, registers 165°F (74°C). Remove from the oven and let the chicken rest for 5 minutes before serving.Look for The juices should run clear when the meat is pierced with a fork.Safe temperature 165°F (74°C) internal temperature (poultry)Tip Resting is essential to allow the juices to redistribute throughout the meat.
The chicken is ready when the skin is dark golden and the meat is cooked through to 165°F (74°C). The kitchen should smell strongly of roasted garlic and herbs. After removing from the oven, the drumsticks must rest for at least 5 minutes. This allows the internal juices to redistribute, ensuring that the meat remains moist and flavorful when served to guests.
Common mistakes
A common mistake is failing to pat the chicken dry, which results in soggy skin that does not crisp properly. Another error is using cold, hard butter, which makes it difficult to spread evenly over the chicken.
Do not skip the resting period, as this is vital for the juices to settle. Finally, ensure the chicken is not crowded in the pan, as this causes the pieces to steam instead of roast.
How to tell it’s done
The chicken is done when the skin is deep golden brown and crispy. To confirm, insert an instant-read thermometer into the thickest part of the drumstick, making sure not to touch the bone.
The meat should reach an internal temperature of 165°F (74°C). When pierced with a fork, the meat should be tender, juicy, and pull away from the bone easily, with clear juices running from the incision.
- Poultry: 165°F (74°C) in the thickest part
Up next · Part 3 of 3
2 variations · storage & make-ahead · 3 answers · printable card
Tips, FAQ & printable recipe (Part 3)← Back to the ingredients (Part 1)