Dinner · Part 1 of 3: Ingredients
Herb Butter Lemon Capers Sea Scallops: Crockpot Seafood
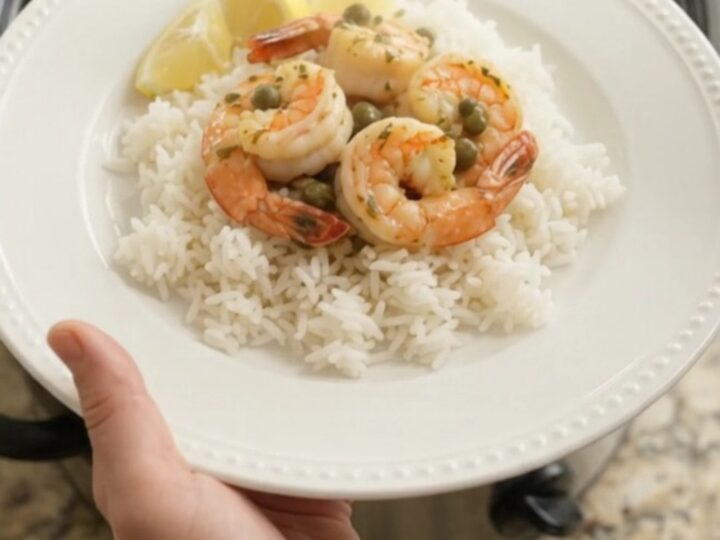
- Prep
- Cook
- Total
- Serves
- 4
This Crockpot seafood recipe delivers tender sea scallops and jumbo shrimp in a bright, buttery lemon-caper sauce with almost no effort. The slow cooker does the work while you go about your day.
A handful of ingredients—scallops, shrimp, lemon, capers, white wine, and a parsley-garlic butter—come together in a rich, golden emulsion that tastes like a special-occasion dinner. Serve it over jasmine rice to soak up every drop. It's the kind of meal that feels indulgent but is surprisingly simple to pull off.
There's something magical about a slow cooker turning a few raw ingredients into a bubbling, fragrant feast. This recipe starts with dry-pack sea scallops and peeled jumbo shrimp layered in the crock, then topped with Meyer lemon slices, briny capers, and a splash of white wine.
Six pats of parsley-garlic scampi butter melt over the top, and after a couple of hours on low, you have a sauce that's rich, tangy, and full of herb flavor. The seafood comes out tender and sweet, never rubbery. It's a hands-off dinner that feels like a coastal restaurant dish, but made in your own kitchen.
Ingredients
- 1 lb dry-pack sea scallops
- 1 lb raw peeled jumbo shrimp
- 2 Meyer lemons, thinly sliced
- 3 tbsp drained capers
- 1/2 cup dry white wine
- 6 tbsp parsley-garlic scampi butter
For serving
- 2 cups cooked jasmine rice, for serving
- Lemon wedges, for serving
Why this recipe works
The slow cooker's gentle, moist heat is ideal for seafood. Scallops and shrimp cook at a low temperature, which keeps them from turning tough and rubbery. The butter and wine create a steaming environment that poaches the seafood gently, allowing the natural sweetness to shine. The lemon and capers cut through the richness, balancing the sauce so it tastes bright and fresh rather than heavy. This method is forgiving—you don't need to watch the pot or stir constantly.
The layering of ingredients is key. Placing the seafood at the bottom, then adding the lemon, capers, and wine, creates a flavorful liquid that the butter enriches as it melts. The capers add pops of saltiness, while the Meyer lemons infuse a gentle citrus aroma.
The parsley-garlic butter brings a savory depth that ties everything together. Because the slow cooker traps steam, the flavors meld and concentrate, resulting in a sauce that's far more complex than the sum of its parts.
Notes and substitutions
Dry-pack sea scallops are essential here. They don't have the chemical bath that wet scallops do, so they sear and cook more evenly. If you can only find wet scallops, pat them very dry and expect them to release more liquid.
Jumbo shrimp are ideal for slow cooking because they hold up well; smaller shrimp may cook faster, so check earlier. Meyer lemons are sweeter and less acidic than regular lemons, but regular lemons work too—just use a bit less if they're very tart.
Parsley-garlic scampi butter is the flavor backbone. You can make it by mixing softened butter with minced garlic and chopped parsley, then chilling it until firm. If you're short on time, store-bought garlic-herb butter is a fine substitute. The white wine should be dry, like a Sauvignon Blanc or Pinot Grigio. If you prefer not to use alcohol, replace it with low-sodium chicken broth and a squeeze of lemon juice. The capers add a briny kick, so don't skip them.
- dry-pack sea scallops: Use bay scallops, but reduce cook time to 1 1/2 hours and check for doneness earlier.
- Meyer lemons: Regular lemons work; use 1 1/2 lemons if they are large and very tart.
- dry white wine: Replace with low-sodium chicken broth and 1 tablespoon lemon juice for a non-alcoholic version.
- parsley-garlic scampi butter: Use 6 tablespoons unsalted butter mixed with 2 minced garlic cloves and 2 tablespoons chopped parsley.
Equipment
- 6-quart slow cooker
- Slotted spoon
- Cutting board
- Chef's knife
- Measuring cups and spoons
- Small bowl (for butter)
Up next · Part 2 of 3
4 steps · 2 h of cooking · what to look for at each stage
Step-by-step instructions (Part 2)