Dinner · Part 2 of 3: Instructions
Herb Butter Cajun Boil Sea Scallops: One-Pot Crockpot Feast Step-by-step instructions
- Prep
- Cook
- Total
- Serves
- 6
Before you start
Before you start, pat the scallops and shrimp dry with paper towels. Halve the corn cobs and scrub the potatoes (no need to peel). Mince the garlic and chop the parsley.
Make the scampi butter by mashing the softened butter with the parsley and garlic. Measure the wine and have the rice cooked and ready to serve. The slow cooker does the rest.
Ingredients at a glance (10)
- 1 1/2 lb dry-pack sea scallops
- 1 lb raw peeled jumbo shrimp (16-20 count)
- 3 ears sweet yellow corn, halved
- 1 1/2 lb baby red bliss potatoes
- 6 tbsp unsalted butter, softened
- 1/4 cup fresh parsley, finely chopped
- 4 cloves garlic, minced
- 1/2 cup dry white wine
- 2 lemon wedges, for serving
- 2 cups cooked white jasmine rice, for serving
Instructions
Layer and Butter
- Layer the Seafood BasePlace the sea scallops and jumbo shrimp in the bottom of a 6-quart slow cooker, spreading them in an even layer. Scatter the halved corn cobs and baby red potatoes around and between the seafood.Look for The seafood and vegetables should be nestled together in the crock.Tip Pat the scallops and shrimp dry with paper towels before adding to the slow cooker.
- Make the Scampi ButterIn a small bowl, combine the softened butter, chopped parsley, and minced garlic. Mash with a fork until well blended.Look for The butter should look like a cohesive, herby paste.Tip Use room-temperature butter for easy mixing.
You should see the seafood and vegetables nestled together in the bottom of the slow cooker, with the butter pats dotting the top. The wine pools around the edges. The raw ingredients look vibrant and fresh.
Slow Cook
- Dot with Butter and WineDrop six thick pats of the parsley-garlic butter evenly over the top of the seafood and vegetables. Pour the white wine around the edges of the slow cooker.Look for The butter pats sit on top and the wine pools at the bottom.Tip Don't stir—the butter will melt and create the sauce as it cooks.
- Slow Cook on LowCover the slow cooker and cook on LOW for 2 1/2 to 3 hours, until the scallops are opaque and the shrimp are pink and curled. The potatoes should be fork-tender.Look for The butter is melted and bubbling, and the seafood is just cooked through.Safe temperature 145°F (63°C) internal temperature (shellfish)Tip Check at the 2-hour mark—cook times vary with the size of the seafood.
After a couple of hours, the kitchen fills with the aroma of garlic, butter, and wine.
The butter has melted into a golden sauce that bubbles gently around the edges. The seafood is just turning opaque and the potatoes are softening.
Serve
- Serve Over Rice with LemonSpoon the seafood, corn, and potatoes over steamed jasmine rice. Serve with lemon wedges on the side for squeezing.Look for The butter sauce glistens and the seafood is tender.Tip Use a slotted spoon to serve, then drizzle extra sauce over the top.
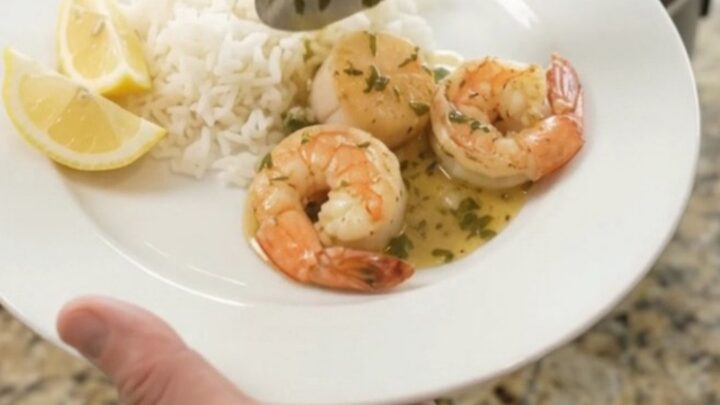
The finished dish is glossy and fragrant. The scallops are golden, the shrimp are pink, and the potatoes are tender. The sauce is rich and buttery, ready to be spooned over rice.
Common mistakes
Avoid stirring the pot during cooking—this can break up the scallops and make the sauce cloudy. Don't use frozen seafood without thawing, as it will release excess water and dilute the sauce.
Also, resist the urge to cook on high; the low temperature is essential for tender results. If the potatoes are not done at 2 1/2 hours, continue cooking and check every 15 minutes.
How to tell it’s done
The dish is done when the scallops are opaque and firm to the touch, the shrimp are pink and curled, and the potatoes are easily pierced with a fork.
The internal temperature of the shellfish should reach 145°F (63°C) on an instant-read thermometer. The butter sauce should be bubbling and slightly thickened. Do not overcook, or the seafood will become tough.
- Shellfish: 145°F (63°C) in the thickest part
Up next · Part 3 of 3
4 variations · storage & make-ahead · 5 answers · printable card
Tips, FAQ & printable recipe (Part 3)← Back to the ingredients (Part 1)