Desserts · Part 1 of 3: Ingredients
Heaven on Earth Layered Dessert Cake
- Prep
- Cook
- Total
- Serves
- 8
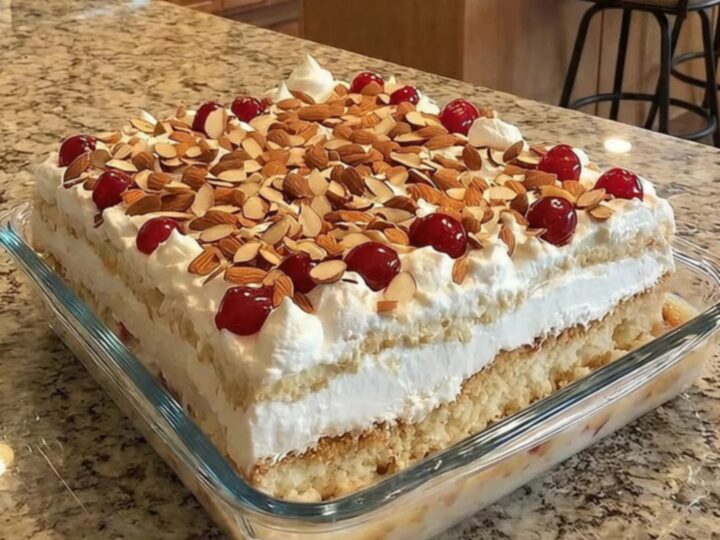
Discover the effortless joy of a classic Heaven on Earth cake, a dessert that perfectly balances sweet fruit, light cake, and airy whipped cream in every single bite. This recipe is designed for those who appreciate a sophisticated dessert that comes together without hours of baking, making it an ideal choice for busy hosts or anyone needing a reliable, crowd-pleasing treat that looks as stunning as it tastes when presented on the table for guests.
The Heaven on Earth cake is a timeless American dessert that relies on the simple assembly of pre-baked cake, fruit filling, and freshly whipped cream. By layering these components, you create a sophisticated-looking dish with minimal effort.
This recipe guide walks you through building these distinct layers to ensure a beautiful presentation and a delicious result every time you serve it to friends or family. Whether you are preparing for a weekend gathering or a special celebration, this dessert provides a perfect finish to any meal, offering a delightful contrast of textures and flavors that will leave everyone asking for the recipe.
Ingredients
Layers
- 1 package yellow cake, baked and cooled
- 21 oz cherry pie filling
- 16 oz cream, whipped
Garnish
- 1/4 cup sliced almonds, for garnish
- cherries, optional, for garnish
Why this recipe works
The method of layering pre-baked cake with fruit filling works because the cake acts as a sponge, absorbing the juices from the pie filling. This process softens the cake cubes, creating a cohesive, moist texture throughout the dessert that mimics a complex trifle without the need for intricate baking techniques.
By allowing the cake to sit, the fruit juices infuse the sponge, ensuring that every bite is packed with flavor and moisture, which is the hallmark of a truly successful layered dessert.
By using a glass baking dish, the layers are visible from the sides, which enhances the aesthetic appeal of the final dish. The cold temperature of the refrigerator helps set the whipped cream and allows the flavors to marry, resulting in a firm yet delicate dessert that is easy to portion and serve. This structural integrity is vital for a clean presentation, ensuring that when you lift a slice, the layers remain distinct and stable, providing a professional finish to your home-cooked creation.
Notes and substitutions
For the cake layer, a standard yellow cake baked according to package instructions is ideal. Ensure the cake is completely cool before cubing, as warm cake will cause the whipped cream to melt and lose its structure.
Alternatively, you can use store-bought pound cake or angel food cake for a quicker assembly process. Always prioritize high-quality ingredients, as the simplicity of this dessert means that the quality of the cake and the fruit filling will be the primary drivers of the final flavor profile.
When choosing your equipment, a clear 9x13-inch glass baking dish is recommended to showcase the layers. A rubber spatula is the most effective tool for spreading the whipped cream without disturbing the cherry layer underneath.
Always use high-quality pie filling for the best flavor, as this is the primary source of sweetness. If you prefer a less sweet dessert, consider using a slightly tart cherry filling to balance the richness of the whipped cream, ensuring a harmonious and enjoyable experience for all your guests.
- yellow cake: pound cake or angel food cake
- cherry pie filling: blueberry or strawberry pie filling
Equipment
- 9x13-inch glass baking dish
- spatula
- mixing bowl
- serving fork