Dinner · Part 2 of 3: Instructions
Hearty Beef and Cheese Brisket Pie Step-by-step instructions
- Prep
- Cook
- Total
- Serves
- 6
Before you start
Before you begin, ensure your brisket is fully cooked and shredded into bite-sized pieces. If the brisket was refrigerated, allow it to sit at room temperature for about 20 minutes so it does not cool down the pie crust prematurely.
Preheat your oven to 375°F (190°C) and clear enough space in your kitchen to assemble the pie comfortably. Have your pie dish and a sharp knife or pie server ready to go.
Preparing your ingredients and workspace in advance ensures a smooth, stress-free cooking process from start to finish.
Ingredients at a glance (3)
- 2 lbs cooked beef brisket, shredded
- 2 cups shredded cheddar cheese
- 2 sheets store-bought or made ahead pie crust
Instructions
Filling preparation
- Prepare the fillingIn a large mixing bowl, combine the shredded cooked beef brisket with the shredded cheddar cheese. Toss the mixture thoroughly until the cheese is evenly distributed throughout the beef fibers. Ensure the brisket is at room temperature before mixing to allow the cheese to melt uniformly during the baking process.Look for The mixture should be well combined and uniform in texture.Tip Use your hands to gently pull the brisket into bite-sized shreds for a better texture.
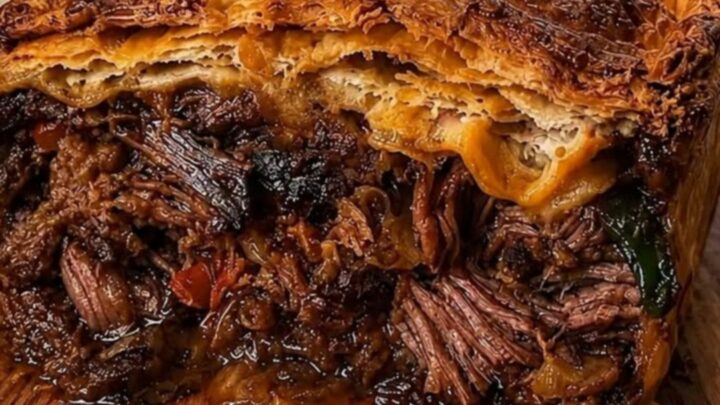
The beef and cheese should be thoroughly mixed, with the cheese distributed evenly throughout the brisket. The mixture should be loose but cohesive, appearing moist and ready to be transferred to the pastry-lined dish.
Assembly of the pie
- Assemble the piePreheat your oven to 375°F (190°C). Line your 9-inch pie dish with the first sheet of pastry. Pour the beef and cheese mixture into the crust, spreading it out evenly to the edges. Cover with the second sheet of pastry and crimp the edges tightly to seal the pie completely. Cut a few small slits in the top to allow steam to escape while baking.Look for The edges should be crimped firmly to prevent any filling from leaking out.Tip Brush the top of the crust with a little milk or egg wash for a deeper golden color.
The pie should be neatly sealed with the top crust, with no gaps along the edges. The surface should be smooth and have small, clean slits cut into the top to allow excess steam to escape during the cooking process.
Final bake and rest
- Bake and servePlace the pie in the center rack of the oven. Bake for 45 minutes or until the crust is deep golden brown and the filling is bubbling hot. Ensure the center reaches an internal temperature of at least 145°F (63°C). Remove from the oven and let the pie rest for 10 minutes before slicing to allow the filling to set properly.Look for The crust should look golden brown and crispy to the touch.Safe temperature 145°F (63°C) internal temperature (steaks, chops and roasts)Tip Place a baking sheet underneath the pie dish to catch any potential drips.
The finished pie will have a deep, golden-brown crust that sounds hollow when tapped lightly. The filling will be hot and fragrant, and the entire structure should feel stable and set after the required resting period.
Common mistakes
A common mistake is failing to crimp the edges of the crust tightly enough, which can lead to leaks. Ensure the top and bottom crusts are pressed firmly together.
Another error is not letting the pie rest after baking; slicing too soon causes the filling to run out. Finally, do not overcrowd the pie dish; leave a small amount of space at the top to prevent the filling from bubbling over onto the floor of your oven.
How to tell it’s done
The pie is considered done when the pastry is uniformly golden brown and appears crispy. A digital thermometer inserted into the center of the pie should register at least 145°F (63°C), indicating that the beef filling is thoroughly heated through.
The cheese should be completely melted and bubbling, and the crust should feel firm when gently pressed with a fork. Always allow the pie to rest for 10 minutes so the filling stabilizes for easier slicing.
- Steaks, chops and roasts: 145°F (63°C) in the thickest part, then a 3-minute rest
Up next · Part 3 of 3
2 variations · storage & make-ahead · 3 answers · printable card
Tips, FAQ & printable recipe (Part 3)← Back to the ingredients (Part 1)