Desserts · Part 2 of 3: Instructions
Hazelnut Espresso Crunch Caramel Dark Chocolate Bars Step-by-step instructions
- Prep
- Cook
- Total
- Serves
- 12
Before you start
Before you begin, set up your workstation: line a metal tray with parchment paper, have all your ingredients measured and prepped, and make sure your chocolate is chopped. If using a chocolate block, grate it into a separate bowl for the topping.
Have a heatproof bowl and a saucepan ready for melting the chocolate. Also, ensure your espresso salted caramel is warm and pourable; if it has cooled and thickened, gently warm it in the microwave or on the stovetop, adding a splash of water if needed.
Ingredients at a glance (5)
- 16 oz 70% dark Belgian chocolate, finely chopped
- 1 cup roasted hazelnuts, roughly chopped
- 1/2 cup golden espresso toffee shards
- 2 tbsp cocoa nibs
- 1/2 cup warm espresso salted caramel
Instructions
Prep the Crunch
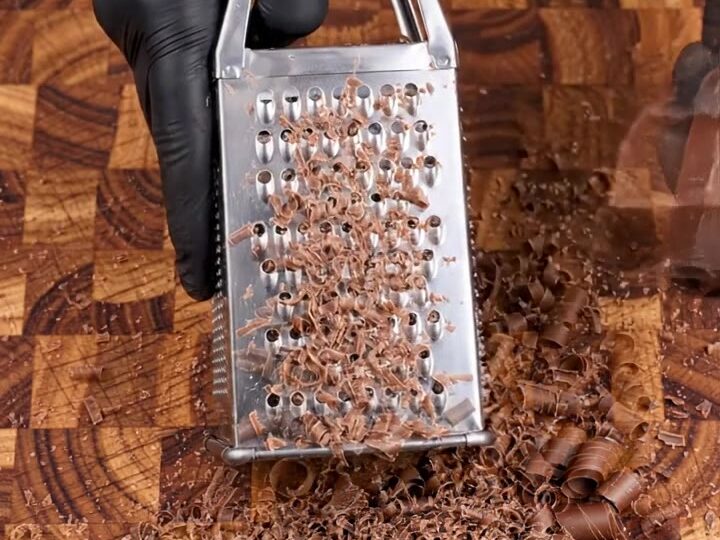
- Prepare the mix-insPlace the roasted hazelnuts on a cutting board and chop them with a sharp chef's knife until you have a coarse, uneven crumble. Transfer to a bowl. Chop the golden espresso toffee shards into smaller, bite-size pieces, and combine them with the cocoa nibs in a separate bowl. Grate the block of 70% dark Belgian chocolate on the large holes of a box grater, creating a pile of chocolate curls. Set all the prepared components aside.Look for The hazelnuts are roughly chopped, the toffee shards are broken into small shards, and the chocolate is grated into fluffy curls.Tip Keep the chocolate curls in a cool, dry place so they don't melt before assembly.
- Melt the chocolatePlace the remaining chopped dark chocolate (not the grated curls) in a heatproof bowl. Set the bowl over a saucepan of barely simmering water, making sure the bottom of the bowl does not touch the water. Stir occasionally until the chocolate is completely melted and smooth. Remove from heat and let it cool slightly until it is still fluid but not hot to the touch.Look for The chocolate is glossy and flows easily from a spoon.Tip Do not let any water get into the chocolate, or it will seize.
- Line the trayLine a metal tray (such as a quarter-sheet pan) with parchment paper, leaving some overhang on two sides for easy removal. Smooth out any wrinkles.Look for The parchment lies flat against the pan, with no ripples.Tip A little butter or oil on the tray before adding the parchment helps it stick.
At the end of this phase, you should have a bowl of roughly chopped hazelnuts, a bowl of small toffee shards mixed with cocoa nibs, and a pile of fluffy chocolate curls.
The hazelnuts should be uniform in size, and the toffee shards should be broken into pieces that are about the size of a pea. The chocolate curls should be light and airy, not melted or clumped. Everything is ready to assemble.
Assemble the Slab
- Pour the chocolate basePour the melted dark chocolate into the prepared tray. Use an offset spatula to spread it into an even layer, about 1/4-inch thick, reaching all the way to the edges.Look for The chocolate layer is uniform and covers the entire tray.Tip Tap the tray gently on the counter to release any air bubbles.
- Swirl the caramelSpoon the warm espresso salted caramel over the melted chocolate in a zigzag pattern. Use a knife or toothpick to gently swirl the caramel into the chocolate, creating a marbled effect. Do not overmix; you want distinct ribbons of caramel.Look for The caramel forms golden ribbons against the dark chocolate.Tip If the caramel is too thick, warm it slightly to make it pourable.
- Scatter the toppingsEvenly scatter the chopped roasted hazelnuts, espresso toffee shards, and cocoa nibs over the surface. Press them gently into the chocolate with your fingers or the back of a spoon so they adhere.Look for The topping is evenly distributed and slightly embedded in the chocolate.Tip Work quickly before the chocolate sets, so the toppings stick.
You have a parchment-lined tray with a smooth, even layer of melted chocolate. The caramel is swirled in a zigzag pattern, creating golden ribbons against the dark chocolate. The toppings are scattered evenly across the surface, with some pieces nestled into the chocolate. The slab looks glossy and inviting, with a beautiful marbled pattern. It is ready to chill.
Set and Slice
- Chill to setPlace the tray in the refrigerator for at least 1 hour, or until the chocolate is completely firm and set. The surface should be hard to the touch.Look for The chocolate is solid and does not yield when pressed gently.Tip Chilling for longer (up to 2 hours) makes slicing cleaner.
- Slice into barsRemove the tray from the refrigerator and lift the chocolate slab out using the parchment overhang. Place it on a cutting board. Use a sharp chef's knife to slice the slab into thick bars, about 2 inches wide. Cut through in one firm motion to get clean edges.Look for The bars are even and have clean, sharp edges.Tip If the chocolate cracks, let it sit at room temperature for a few minutes before slicing.
- Snap to reveal layersTake one bar and snap it in half with your hands to reveal the layered cross-section. The caramel and toppings should create a beautiful, crunchy interior. Serve immediately or store in an airtight container.Look for The bar snaps cleanly, showing distinct layers of chocolate, caramel, and nuts.Tip For the best snap, keep the bars cool until serving.
After chilling, the chocolate is completely firm and the slab can be lifted out of the tray in one piece. The surface is hard and shiny, with no soft spots. When you slice it, the knife cuts through cleanly, revealing a cross-section with distinct layers of chocolate, caramel, and crunchy toppings. The bars are ready to serve and snap beautifully.
Common mistakes
One common mistake is overmixing the caramel into the chocolate, which can make the bars look muddy instead of marbled. Swirl gently and stop while you still see distinct ribbons. Another issue is using warm chocolate that is too hot when you pour it, which can cause the caramel to melt and blend completely.
Let the melted chocolate cool slightly before pouring. Also, be sure to press the toppings gently into the chocolate so they stay in place after slicing; otherwise, they may fall off.
How to tell it’s done
The bars are done when the chocolate is completely set and firm to the touch. To test, press gently on the surface with a fingertip—it should not leave an indentation.
When you slice the slab, the edges should be clean and the bars should snap crisply when broken. There is no internal temperature to check for this recipe, but the chocolate must be fully hardened before slicing to achieve the best texture.
Up next · Part 3 of 3
4 variations · storage & make-ahead · 5 answers · printable card
Tips, FAQ & printable recipe (Part 3)← Back to the ingredients (Part 1)