Desserts · Part 2 of 3: Instructions
Hazelnut Chocolate Ganache Cheesecake with Praline Crunch Step-by-step instructions
- Prep
- Cook
- Total
- Serves
- 12
Before you start
Gather the cream cheese, eggs and sour cream and set them out to soften for about 1 hour so they blend without lumps. Toast and chop the hazelnuts, and set aside a few whole nuts for the ring. Crush the wafer cookies finely and have a clean springform pan ready.
Wrap the outside of the pan in foil if you plan to use a water bath. Chop the ganache chocolate finely so it melts evenly, and have the box grater and parchment ready for the final garnish. Set your oven to 325°F (163°C) before you begin, and clear space in the refrigerator for the cheesecake, which needs several hours to chill.
Ingredients at a glance (12)
- 1 cup crushed wafer cookies
- 3 tbsp unsalted butter, melted
- 24 oz cream cheese, softened
- 3/4 cup granulated sugar
- 2 large eggs
- 1/2 cup sour cream
- 1 tsp vanilla extract
- 1 cup whole hazelnuts, chopped, plus extra whole for the ring
- 4 oz solid milk chocolate, for grating
- 6 oz milk chocolate, finely chopped
- 1/2 cup chocolate hazelnut spread
- 1/2 cup heavy cream
Instructions
Crust and filling ready
- Toast and chop the hazelnutsSpread the whole hazelnuts on a baking sheet and toast them in a 350°F (175°C) oven for 8 to 10 minutes until fragrant. Rub them in a towel to loosen the skins, then chop about 1 cup coarsely on a cutting board with a chef's knife. Keep a few whole nuts aside for the ring on top.Look for Nuts smell toasty and the skins flake off easily when rubbedTip Chop the nuts into rough pieces, not dust, so they stay crunchy on top.
- Mix the crust and set the baseStir the crushed wafer cookies with the melted butter until the crumbs look evenly moistened. Press them firmly and evenly over the bottom of the 9-inch springform pan, then chill the crust while you make the filling.Look for Crumbs hold together when pinched and the press is flat and evenTip Use the flat bottom of a measuring cup to pack the crust firmly.
The crust is packed firmly into the springform pan and the filling is smooth, pale and free of lumps. Before going on, check that the filling sits evenly over the crust and that the batter has no visible air bubbles or streaks.
Smooth the top with a spatula so the cheesecake bakes flat and evenly across the pan. The filling should look thick enough to hold its shape when you lift the spatula, with no sign of separation. If you see lumps, beat the mixture a little longer on low speed before you pour it into the pan and bake it.
Baked and chilled cheesecake
- Beat the cheesecake fillingBeat the softened cream cheese and sugar in a large bowl until smooth and creamy. Add the eggs one at a time, mixing on low just until each is blended, then stir in the sour cream and vanilla. Pour the filling over the chilled crust and smooth the top.Look for Filling is smooth, pale and free of lumps before it goes into the panSafe temperature 160°F (71°C) internal temperature (egg dishes)Tip Beat on low speed after adding eggs to keep air bubbles out of the batter.
- Bake the cheesecake until setBake the cheesecake in a 325°F (163°C) oven until the edges are set and the center barely jiggles, for about 50 to 60 minutes. Eggs must reach 160°F (71°C) in the center to be cooked through. Turn off the oven, crack the door, and let the cheesecake cool inside for 1 hour before chilling it at least 4 hours.Look for Edges are set, the center is only slightly wobbly and the surface looks matteSafe temperature 160°F (71°C) internal temperature (egg dishes)Tip Place the springform pan on a baking sheet to catch any leaks.
- Melt the hazelnut chocolate ganachePut the finely chopped milk chocolate and the hazelnut spread in a heatproof glass bowl. Heat the heavy cream in a medium saucepan until it steams and small bubbles form at the edges, then pour it over the chocolate. Wait 1 minute, then stir slowly until the ganache is smooth and glossy.Look for Ganache is smooth, glossy and pourable with no streaks of creamTip Stir from the center outward so the ganache does not trap air.
The cheesecake has baked until the edges are set and the center only slightly moves, and it has cooled and chilled until firm. Check the surface: it should look matte and evenly colored, with no deep cracks. Before you make the ganache, confirm the center reached 160°F (71°C) and that the filling holds a clean slice when cut. A cheesecake that still wobbles at the center needs more chilling time in the refrigerator before you top it. Keep the pan level in the refrigerator so the top stays flat for the ganache.
Ganache poured and garnished
- Pour and garnish the ganacheLet the ganache cool for 10 minutes until it is thick but still pourable. Pour it in a slow, steady stream from the bowl over the chilled cheesecake, then spread it evenly to the edges with an offset spatula. Sprinkle the chopped hazelnuts over the wet ganache and set the whole hazelnuts in a ring around the edge.Look for Top is glossy and smooth with nuts sitting on the surfaceTip Tilt the pan gently to help the ganache flow evenly into the corners.
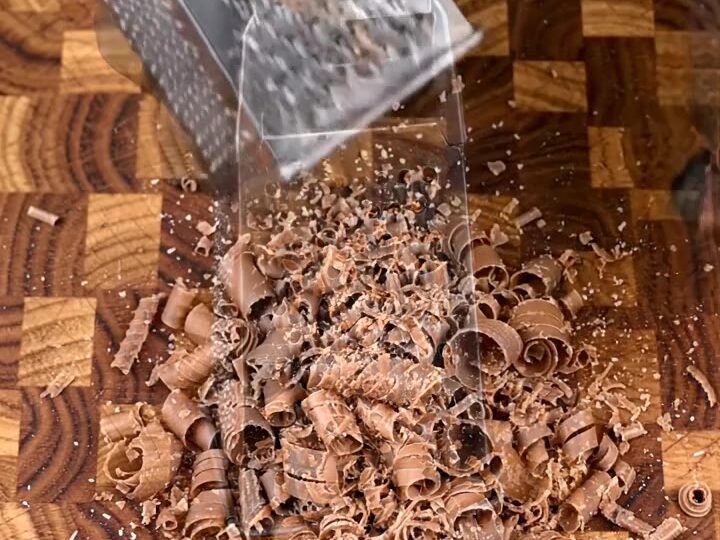
- Grate chocolate and chill to setGrate the solid milk chocolate over a sheet of parchment on a box grater to make fine shavings and curls, then scatter them over the top. Chill the cheesecake for at least 4 hours until the ganache is firm. Release the springform ring, slice with a warm knife, and serve cold.Look for Ganache is firm to the touch and the filling holds a clean sliceTip Chill the chocolate for 10 minutes before grating so it shreds more cleanly.
The ganache is glossy and smooth, spread evenly across the cheesecake top to the edges, with chopped hazelnuts and grated milk chocolate scattered on the surface. Before serving, check that the ganache has firmed up enough to hold the nuts and shavings without sinking.
The ring of whole hazelnuts should sit neatly at the edge, and the top should look even and shiny. Release the springform ring carefully and wipe the knife between slices for clean edges. If the ganache looks soft, return the cheesecake to the refrigerator for 30 minutes before slicing.
Common mistakes
The most common problem is a cracked or sunken top, which usually comes from an oven that is too hot or from overbeating the batter after the eggs go in. Keep the mixer on low once the eggs are added and stop as soon as the batter is smooth. Another common issue is grainy filling caused by cold cream cheese, so let it soften fully first.
A ganache that looks dull or separated usually means the cream was too hot or the chocolate was stirred too fast; stir slowly from the center outward until it is glossy. Avoid pouring the ganache onto a warm cheesecake, because it will melt into the surface and slide off the edges.
How to tell it’s done
The cheesecake is done when the edges look set and the center barely moves when you gently shake the pan, and the surface has lost its wet shine. The eggs must reach 160°F (71°C) in the center to be cooked through. Check with an instant-read thermometer inserted near the center without touching the pan. After baking, let the cheesecake cool in the turned-off oven for 1 hour and then chill it for at least 4 hours. The ganache is ready to slice when it feels firm to a light touch and the filling holds a clean edge when cut.
- Egg dishes: 160°F (71°C) in the thickest part
Up next · Part 3 of 3
4 variations · storage & make-ahead · 5 answers · printable card
Tips, FAQ & printable recipe (Part 3)← Back to the ingredients (Part 1)