Dinner · Part 2 of 3: Instructions
Easy Hawaiian Pizza Slider Bake Step-by-step instructions
- Prep
- Cook
- Total
- Serves
- 12
Before you start
Before beginning, ensure that all ingredients are measured and ready. If you are using a whole block of mozzarella, grate it yourself for better melting consistency. Drain the pineapple tidbits thoroughly in a fine-mesh sieve or colander to remove excess juice. Preheat your oven fully to 350°F (175°C) so the sliders begin baking immediately upon entry, which helps keep the rolls fluffy rather than dried out.
Ingredients at a glance (9)
- 12 count Hawaiian sweet slider rolls, sliced horizontally
- 1/2 cup pizza sauce
- 8 oz deli ham slices
- 1 cup pineapple tidbits, drained
- 1 1/2 cups shredded mozzarella cheese
- 3 tbsp melted unsalted butter
- 1/2 tsp garlic powder
- 2 tbsp grated parmesan cheese
- 1 tsp dried Italian herbs
Instructions
Assembly Phase
- Prepare the BasePreheat the oven to 350°F (175°C). Slice the sheet of Hawaiian rolls in half horizontally to create top and bottom layers. Place the bottom layer into a large rectangular ceramic baking dish. Spread the pizza sauce evenly over the rolls, then layer with the ham slices, pineapple tidbits, and shredded mozzarella cheese. Place the top layer of rolls over the cheese.Look for The base is fully assembled and level in the dish.Tip Ensure the pineapple is well-drained to prevent the bottom rolls from becoming soggy during the baking process.
At the end of this phase, the baking dish should be neatly layered with the bottom rolls, sauce, ham, pineapple, and cheese. The top layer of rolls should be placed securely over the filling, creating a stable slab.
Check that the edges of the rolls are aligned within the baking dish to ensure even heat circulation during the baking process, and confirm that the pineapple is evenly distributed for a balanced flavor in every bite.
Glazing Phase
- Apply Garlic GlazeIn a small bowl, whisk together the melted butter and garlic powder. Pour the garlic butter mixture evenly over the top of the rolls, ensuring each one is coated. Sprinkle the grated parmesan cheese and dried Italian herbs over the buttered tops.Look for The tops of the rolls appear evenly moistened and coated with the parmesan and herbs.Tip Use a pastry brush if necessary to ensure the butter reaches the edges of the rolls for even browning.
Once the glaze is applied, the rolls should appear glossy and fragrant. The butter should have seeped slightly into the crevices between the rolls, and the parmesan and herbs should be distributed evenly across the top.
Ensure there are no large clumps of herbs, which could burn quickly, and verify that the butter has not puddled excessively at the bottom of the dish, which could cause the base of the rolls to become greasy.
Baking Phase
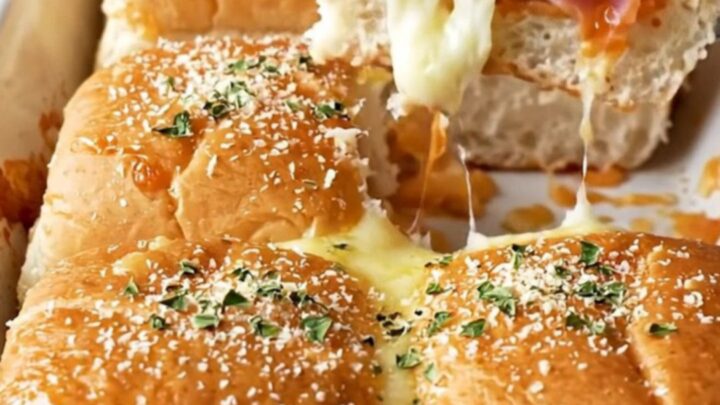
- Bake and ServePlace the baking dish in the preheated oven. Bake for 15 to 20 minutes, or until the rolls are golden brown and the cheese is melted and bubbling at the edges. Remove from the oven and let rest for 5 minutes before using a spatula to lift and serve individual sliders.Look for The sliders are golden brown and the cheese is bubbling.Tip Keep a close watch during the final minutes of baking to prevent the herb-covered tops from burning.
When the baking is complete, the kitchen should be filled with the aroma of toasted garlic and melted cheese. The sliders should be lifted easily with a spatula, with the ham and pineapple visible at the sides. If the cheese is not bubbling or the tops are not golden, return them to the oven for an additional minute, keeping a close watch. The rolls should feel firm to the touch but remain soft inside.
Common mistakes
Avoid over-saturating the bread with too much sauce, as this will lead to a soggy bottom that is difficult to serve. Another common mistake is adding the garlic butter too early or unevenly; ensure the butter is melted completely and poured uniformly to prevent dry spots.
Finally, do not overcrowd the baking dish if your rolls are larger than the vessel, as this will prevent the edges from browning properly and create uneven cooking results throughout the batch.
How to tell it’s done
The sliders are ready when the tops are a deep golden brown and the cheese is fully melted and bubbling between the layers. The internal temperature of the filling should be hot throughout.
Because the ingredients are pre-cooked, the primary indicator of doneness is the appearance of the bread and the state of the cheese. Let the dish rest for at least 5 minutes to allow the cheese to set slightly before serving, which makes lifting the sliders with a spatula much easier.
Up next · Part 3 of 3
2 variations · storage & make-ahead · 3 answers · printable card
Tips, FAQ & printable recipe (Part 3)← Back to the ingredients (Part 1)