Dinner · Part 2 of 3: Instructions
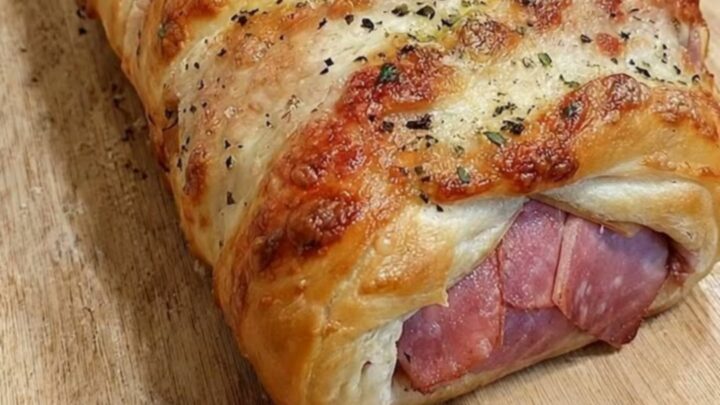
Ham and Cheese Stromboli with a Golden, Cheesy Crust Step-by-step instructions
- Prep
- Cook
- Total
- Serves
- 4
Before you start
Set up before the dough hits the counter: oven rack in the middle position, baking sheet lined with parchment, rolling pin and floured surface ready. Take the pizza dough and the shredded mozzarella out of the refrigerator about twenty minutes ahead — warm dough rolls without fighting back, and cheese at room temperature melts more evenly.
Have the ham slices counted and separated so layering takes seconds, and whisk the egg wash ingredients in a small bowl only when the roll is sealed, since egg wash dries fast. A sharp knife and a spatula standing by means the stromboli can go from oven to board to plate while the cheese is still stretching.
Ingredients at a glance (8)
- 1 lb store-bought pizza dough, at room temperature
- All-purpose flour, to taste, for dusting the counter
- 8 oz thinly sliced deli ham
- 2 cups shredded mozzarella
- 1 large egg
- 1 tbsp water
- 2 tbsp grated parmesan
- 1 tsp Italian seasoning
Instructions
Roll and fill
- Heat the oven and prep the panSet a rack in the middle of the oven and heat it to 375°F (190°C). Line a rimmed baking sheet with parchment paper so the stromboli releases cleanly and the crust browns evenly underneath. Take the pizza dough out of the refrigerator now so it warms while the oven heats.Look for The oven reads 375°F on the display and the dough sits soft on the counter, losing its chill.Tip Cold dough fights the rolling pin and tears at the seams; twenty minutes on the counter makes it stretch without snapping back.
- Roll the dough into a rectangleDust the counter lightly with flour and roll the dough into a 10 by 14-inch rectangle, turning it a quarter turn every few passes so the corners stay even. Aim for about a quarter inch thick; patch any tears by pinching the dough back together.Look for An even rectangle with no thin, see-through spots and no dough springing back at the edges.Tip If the dough keeps shrinking, cover it and wait five minutes; relaxed gluten holds a rectangle without a fight.
- Layer the hamArrange the ham slices in overlapping rows over the dough, leaving a clean 1-inch border free on all sides. Overlap by about half so every bite gets ham, and keep the layer thin enough that the roll can still close around it without bulging.Look for A tidy layer of ham with a visible flour-dusted border running around all four edges.Tip That bare border is the glue line; filling on it keeps the seam from sealing and the cheese will find the exit.
- Add the mozzarellaScatter the shredded mozzarella evenly over the ham, still respecting the border. Spread it edge to edge of the filling in a level layer so each slice gets an even amount of cheese rather than a molten pocket on one side and a dry stretch on the other.Look for A level blanket of cheese covering every bit of ham, with the border still bare.Tip Shredded, low-moisture mozzarella melts smoothly; fresh mozzarella weeps water and can leave a soggy patch under the crust.
- Roll, seal and tuckStarting from a long side, roll the dough up over the filling, keeping it snug but not crushing. Pinch the seam closed along the top, then fold and press the two ends underneath to trap the cheese. Set the log seam-side down on the prepared baking sheet.Look for A tight, even log with no visible filling and the seam line pressed firmly shut underneath.Tip Lift and reposition the roll with the parchment as you go; dragging the dough across the pan drags the filling with it.
By the end of this phase, a tight, sealed log sits seam-side down on the parchment. The dough should look smooth and even, with no visible ham or cheese anywhere along the seam or the tucked ends. Press along the seam one more time before moving on; a seam that lifts now will open in the oven. The log should feel plump but not strained — if it bulges or the dough looks stretched thin over the filling, it holds too much and the bake will fight it.
Wash, top and bake
- Brush with egg washWhisk the egg with the water in a small bowl until completely combined. Brush it over the entire surface of the roll in a thin, even coat, including the ends. This wash is what turns the crust deep golden and glossy in the oven.Look for A uniform, shiny coat of egg wash with no pooled drips running down the sides.Tip Wipe up any wash that puddles at the base; pooled egg bakes into a rubbery patch on the parchment.
- Top with parmesan and herbsSprinkle the grated parmesan evenly over the egg wash, then follow with the Italian seasoning. Cut three short diagonal slashes across the top with a sharp knife so steam can escape while it bakes and the roll keeps its shape instead of splitting at random.Look for A lightly coated top flecked with cheese and herbs, with three clean vents cut along the length.Tip The slashes are more than decoration; without vents, steam builds and blows the seam open mid-bake.
- Bake until deep goldenBake on the middle rack for 22 to 25 minutes, rotating the pan once halfway through, until the crust is deep golden brown and sounds hollow when tapped. If the cheese bubbling out the vents starts to darken, lay a strip of foil loosely over the top.Look for A rich, even golden-brown crust with the slashes open and a faint smell of toasted cheese.Tip Ovens vary by as much as 25 degrees; trust the color and the hollow tap more than the clock.
The stromboli comes out of the oven deep golden brown, with the three slashes open and the parmesan flecks lightly toasted. Tap the bottom: it should sound hollow, a sign the dough has baked all the way through. The kitchen smells of toasted cheese and herbs. If the crust still looks pale or the tap sounds dense, slide it back for three to five more minutes — color and sound, not the clock, decide when this phase is finished.
Rest and slice
- Rest, slice and serveTransfer the stromboli on its parchment to a cutting board and let it rest 5 to 10 minutes so the molten cheese settles back into the layers. Cut crosswise into 1 1/2-inch pieces with a serrated knife, using a gentle sawing motion, and lift the slices onto plates while they still steam.Look for Clean-edged slices with distinct layers of ham and stretchy cheese, steam rising from the cut.Tip A serrated knife sawed gently keeps the crust from shattering; a straight blade just compresses the layers flat.
After five to ten minutes of rest, the cheese has settled back into the layers and the slices cut with clean edges instead of a flood. Each piece should show distinct bands of crust, ham and stretchy mozzarella, with steam rising from the cut.
The crust cracks gently under the serrated knife rather than shattering. If cheese still floods the board, the rest was too short — give the next slices another minute or two and work with a gentle sawing motion.
Common mistakes
The most common failure is a seam that opens in the oven, and it almost always traces back to filling spread over the border. Keep that 1-inch margin bare and press the seam firmly, then tuck the ends under. The second trap is cold dough: rolled straight from the refrigerator, it shrinks back toward its ball shape and tears, letting cheese escape.
Twenty minutes on the counter fixes it. Overfilling is the third — more cheese seems generous, but a packed roll bursts at the slashes and floods the pan. Finally, do not skip the rest after baking; cut too soon and the molten cheese runs out of the slices instead of holding in stretchy ribbons.
How to tell it’s done
The stromboli is done when three signs line up. First, color: the crust should be deep golden brown all over, darker than pale gold, with the parmesan flecks toasting to a light brown. Second, sound: tap the bottom of the loaf with a knuckle and listen for a hollow knock, the classic sign the dough has baked through.
Third, the vents: the slashes should be open and the cheese inside them bubbling, with a toasted-cheese smell filling the kitchen. If the top browns before those signs appear, tent it loosely with foil and give it a few more minutes. Because the ham is fully cooked and the dish contains no raw protein, there is no internal temperature target to chase — the color, the hollow tap and the bubbling vents are the reliable signals.
Up next · Part 3 of 3
4 variations · storage & make-ahead · 5 answers · printable card
Tips, FAQ & printable recipe (Part 3)← Back to the ingredients (Part 1)