Dinner · Part 2 of 3: Instructions
Guinness Onion Brown Gravy Bottom Round Roast Step-by-step instructions
- Prep
- Cook
- Total
- Serves
- 6
Before you start
Before you start, make sure the slow cooker is clean and ready. Peel the pearl onions if they aren't already peeled—this is the most time-consuming part, so you can do it ahead and store them in the fridge.
Measure the gravy and have the butter out to soften slightly. If using brioche slider buns, toast them just before serving. The roast should be at room temperature for no more than 30 minutes before cooking; keep it refrigerated until you're ready to assemble.
Ingredients at a glance (6)
- 3 1/2 lb beef bottom round roast
- 1 lb pearl onions, peeled
- 1 bottle (12 oz) Guinness draught stout
- 2 cups beef brown gravy
- 2 tbsp unsalted butter, cut into pats
- 6 brioche slider buns, toasted
Instructions
Layer and Pour
- Layer the Roast and OnionsPlace the beef bottom round roast in the center of the slow cooker. Scatter the peeled pearl onions around the roast, tucking some underneath for even cooking.Look for The roast sits snugly in the pot with onions nestled around it.Tip If the roast is larger than the pot, trim it slightly to fit without crowding.
- Pour the StoutSlowly pour the Guinness stout over the roast and onions, allowing it to pool in the bottom of the slow cooker. The liquid should come about halfway up the roast.Look for The dark stout creates a deep, malty pool around the meat.Tip Pour gently to avoid excessive foaming; the beer will settle as it mixes with the gravy.
At the end of this phase, the slow cooker contains the roast, onions, beer, and gravy. The liquid should be a deep brown, and the roast should be partially submerged. The aroma is rich and malty. Check that the roast is centered and the onions are evenly distributed.
Slow Cook
- Add Gravy and ButterPour the beef brown gravy over the roast and onions. Dot the top of the roast with the butter pats, distributing them evenly.Look for The gravy and beer form a rich, dark liquid that nearly covers the meat.Tip Use a spatula to scrape every bit of gravy from the measuring cup.
- Slow Cook Until Fork-TenderCover the slow cooker and cook on low for 8 to 10 hours, or on high for 4 to 5 hours, until the beef is fork-tender and shreds easily. The internal temperature should reach at least 145°F (63°C) for safety; for shredding, cook until it exceeds 190°F (88°C). Let it rest for 3 minutes before slicing.Look for The meat is deeply browned, and the gravy is bubbling gently around the edges.Safe temperature 145°F (63°C) internal temperature (steaks, chops and roasts)Tip Do not lift the lid frequently; each peek adds 20 minutes to cooking time.
After several hours, the slow cooker will be bubbling gently. The kitchen will smell of stout and savory beef.
The gravy should be dark and glossy, and the meat should be visibly tender, pulling away from the bone if bone-in. Check that the liquid hasn't reduced too much; if it looks dry, add a splash of beef broth.
Rest and Serve
- Rest the RoastTurn off the slow cooker. Using tongs, transfer the roast to a cutting board and let it rest for at least 10 minutes. This allows the juices to redistribute.Look for The roast holds its shape but is clearly tender.Tip Resist the urge to cut immediately; resting makes the meat juicier.
- Shred the BeefUsing two forks, shred the beef into bite-sized pieces. Return the shredded beef to the slow cooker and stir gently to coat with the gravy.Look for The beef pulls apart easily with little resistance.Tip For chunkier pieces, use a fork to break apart; for finer shreds, use your fingers.
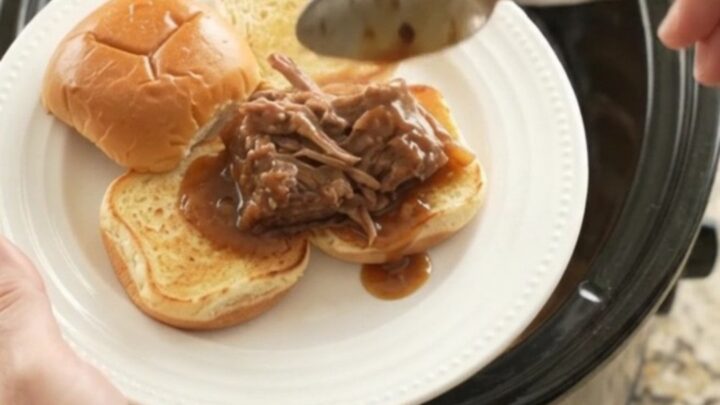
- Serve on Toasted BriocheSpoon the beef and onions onto the toasted brioche slider buns. Drizzle with extra gravy from the slow cooker.Look for The beef is glossy with gravy, and the buns are crisp.Tip Toast the buns just before serving to keep them from getting soggy.
The beef is fork-tender and shreds easily. The gravy is thick and coats the back of a spoon. The onions are soft and sweet. The brioche buns are toasted and ready. Check that the meat is well-coated with gravy before serving.
Common mistakes
One common mistake is lifting the lid too often to check on the roast. Each time you do, heat escapes, and the cooking time increases. Another is using a lean cut without enough marbling; bottom round is ideal, but if you use a very lean roast, it may dry out.
Also, don't skip the resting step—cutting into the roast immediately will cause the juices to run out, leaving the meat dry. Finally, be sure to use a slow cooker that is the right size; too large and the liquid will evaporate too quickly, too small and the roast won't cook evenly.
How to tell it’s done
The roast is done when it is fork-tender and shreds easily. The internal temperature should be at least 145°F (63°C) for safety, but for shredding, it's best to cook it until it reaches 190°F (88°C) or higher.
At that temperature, the collagen has fully broken down, and the meat will pull apart with minimal effort. The gravy should be bubbling gently and have a rich, dark color. The onions should be soft and sweet, almost melting into the sauce.
- Steaks, chops and roasts: 145°F (63°C) in the thickest part, then a 3-minute rest
Up next · Part 3 of 3
4 variations · storage & make-ahead · 5 answers · printable card
Tips, FAQ & printable recipe (Part 3)← Back to the ingredients (Part 1)