Desserts · Part 2 of 3: Instructions
Classic Grandma’s Raisin Bread Pudding Step-by-step instructions
- Prep
- Cook
- Total
- Serves
- 6
Before you start
Before beginning, ensure the oven is preheated to the correct temperature to allow for even baking. Prepare the baking dish by lightly greasing it if desired, though the butter in the recipe often helps prevent sticking.
Gather all ingredients, ensuring the custard is at room temperature for faster absorption. Having the bread already cubed and the raisins measured saves time and ensures the assembly process remains smooth and efficient once the cooking begins.
Ingredients at a glance (5)
- 6 cups day-old white bread cubes
- 1/2 cup raisins
- 2 cups vanilla custard
- 2 tbsp butter, thinly sliced
- 1 tsp ground cinnamon
Instructions
Assembling the Bread
- Assemble the Bread and RaisinsPreheat the oven to 350°F (175°C). In a large baking dish, evenly distribute the cubed bread. Scatter the raisins over the bread cubes, ensuring they are well-mixed so every serving gets a touch of fruit throughout the dish.Look for Bread and raisins are evenly spread.Tip Use bread that is slightly stale or toasted to help it absorb the custard without becoming mushy.
The bread cubes are arranged evenly in the baking dish with the raisins distributed throughout. The dish looks full and uniform, with the raisins tucked between the bread pieces to prevent them from burning on the surface during the baking phase. The bread should be dry enough to feel firm but ready to absorb the liquid.
Soaking and Topping
- Soak and SeasonPour the vanilla custard slowly over the bread and raisins, ensuring all pieces are thoroughly moistened. Top the dish with thin slices of butter and dust the entire surface with ground cinnamon to create a flavorful crust during baking.Look for Bread is fully saturated with custard.Tip Press the bread down gently with a spoon to ensure total saturation for an even texture.
The custard has been poured over the bread, and the top is dotted with butter and cinnamon. The liquid should be visible between the cubes, indicating that the bread is fully saturated. The surface should look moist and fragrant, with the cinnamon providing a warm, spicy aroma that signals the dish is ready for the oven.
Baking to Perfection
- Bake and ServePlace the dish in the oven and bake until the top is golden brown and the custard has set to an internal temperature of 160°F (71°C). Remove from the oven and allow to rest for ten minutes before serving warm.Look for The top is puffed and golden brown.Safe temperature 160°F (71°C) internal temperature (egg dishes)Tip Cover the dish loosely with foil if the top browns too quickly before the center is cooked through.
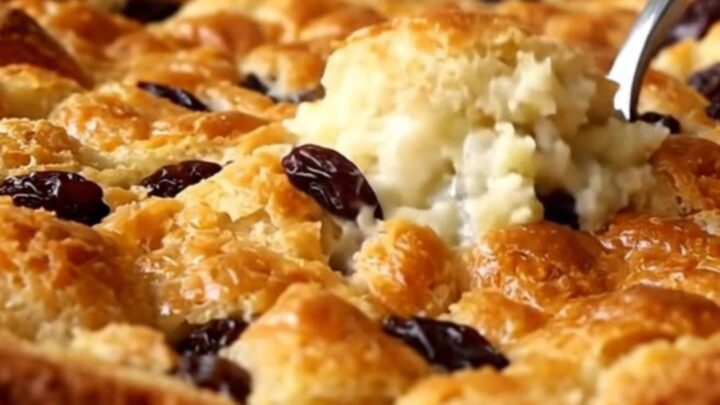
The pudding has risen and reached a rich, golden-brown color. The edges should be firm and slightly crisp, while the center remains soft and custardy. The kitchen should smell like warm cinnamon and baked vanilla, and the center reaches the required temperature, indicating that the custard is fully set.
Common mistakes
A common mistake is using bread that is too fresh, which can lead to a soggy pudding that fails to hold its shape.
Another error is failing to allow the custard enough time to soak into the bread before baking; giving it at least fifteen minutes of resting time before putting it in the oven significantly improves the final texture.
Finally, avoid over-baking, which can cause the custard to separate and create a grainy, unpleasant consistency rather than a smooth, creamy one.
How to tell it’s done
The bread pudding is considered done when the custard is fully set and the top has developed a deep golden-brown hue. Use a food thermometer to check the center of the dish; it must reach an internal temperature of 160°F (71°C) to ensure the eggs are cooked through safely.
The pudding should feel firm to a gentle touch and appear slightly puffed, indicating that the custard has properly coagulated within the bread structure.
- Egg dishes: 160°F (71°C) in the thickest part
Up next · Part 3 of 3
2 variations · storage & make-ahead · 3 answers · printable card
Tips, FAQ & printable recipe (Part 3)← Back to the ingredients (Part 1)