Dinner · Part 2 of 3: Instructions
Grandma’s Crockpot Pork Roast with Creamy Gravy Step-by-step instructions
- Prep
- Cook
- Total
- Serves
- 8
Before you start
Set out everything before touching the pork: the slow cooker on a stable counter with room for steam to escape, the pork roast, the garlic, both gravy packets torn open, the black pepper measured, and the can of soup with the label peeled so it opens cleanly. Pat the pork dry with paper towels — dry meat takes the seasoning better — and have the cutting board and a sharp knife ready. Keep the serving plate nearby for later.
Ingredients at a glance (5)
- 3 lb boneless pork shoulder, cut into 4 large chunks
- 8 garlic cloves, peeled
- 2 pork gravy mix packets (about 0.87 oz each)
- 1/2 tsp black pepper
- 1 can (10.5 oz) condensed cream soup, chicken flavor
Instructions
Load the insert
- Cut the pork into large chunksPat the boneless pork shoulder dry with paper towels and set it on a cutting board. Cut it into four large, even chunks, each roughly the size of a fist. Keeping the pieces big helps them braise slowly instead of drying out, and makes them easy to lift out later. Trim only any thick, hard fat cap; leave the rest for flavor.Look for The chunks should be uniform in size so they finish cooking at the same time.Tip Chill the pork for 15 minutes first and the knife glides through the shoulder far more easily.
- Line the slow cooker with the porkPlace the pork chunks in the ceramic insert of a 6-quart or larger slow cooker, arranging them in a single snug layer. If a piece needs to sit on top, tuck it into a gap rather than stacking high. The meat releases a lot of juice, so leave about an inch of headroom below the rim for the gravy to bubble gently.Look for The insert holds the pork comfortably with room to spare — no heaping mound.Tip No liner needed; the insert rinses clean after a soak in hot soapy water.
- Scatter the garlic over the porkScatter the peeled garlic cloves evenly over and around the pork chunks, letting a few slip down between the pieces. As the roast braises, the cloves soften into the gravy and turn mellow and spreadable. Distribute them now so their flavor infuses the sauce from the very start of the long cook.Look for Every chunk of pork has at least one garlic clove resting against it.Tip Smash each clove lightly with the flat of a knife so the peels slip off fast.
By the end of the first phase the insert holds four evenly cut pork chunks in a single snug layer, each with peeled garlic cloves scattered over and around it. Nothing else is in the cooker yet.
Check that the meat sits below the rim with about an inch of headroom, that the garlic is distributed rather than piled in one spot, and that the chunks are roughly equal in size — uneven pieces finish at different times. If the insert looks crowded or stacked high, redistribute before moving on.
Season and sauce
- Sprinkle on the gravy mix and pepperTear open the pork gravy mix packets and sprinkle the powder evenly over the pork, aiming for the gaps between chunks so it dissolves into the liquid instead of clumping on one spot. Follow with the black pepper. The mix thickens the braising liquid into a proper gravy as the pork cooks down.Look for The powder settles over the meat and begins to look damp where it touches juices.Tip Whisk the powder with a spoonful of the soup first if clumping worries you.
- Pour the cream of chicken soup over everythingOpen the can of condensed cream soup and pour it directly over the pork, scraping the can clean with a spoon. Spread it gently so it blankets the top of the chunks. No extra water is added — the pork releases plenty of its own liquid, which thins the soup into a creamy gravy during cooking.Look for The soup sits on top of the pork in a thick, even layer.Tip Swirl a tablespoon of water inside the empty can and pour that in too, if the insert looks dry.
- Cover and set the slow cookerPut the lid on the slow cooker and set it to Low for 8 hours, or High for 4 hours if the day is short. Resist lifting the lid during cooking — every peek releases heat and adds 20 to 30 minutes to the clock. The insert does all the work from here: braising, thickening and building the gravy.Look for The lid sits flat and a faint ring of steam escapes at the edges.Tip Start it by mid-morning on Low and dinner is ready whenever the family sits down.
Phase two ends with the seasoning and the soup in place. The gravy powder should be spread across the pork and into the gaps, not clumped on a single chunk, and the black pepper scattered evenly with it.
The condensed soup blankets the top in a thick, even layer with no pork showing through. The lid sits flat and the cooker is set — Low for 8 hours or High for 4. Before walking away, confirm the setting and that the lid is seated properly; a tilted lid vents heat all day.
Finish and serve
- Check the pork for donenessNear the end of cooking, check the pork. Insert an instant-read thermometer into the thickest chunk without touching the insert: the pork is safe and tender at 145°F (63°C) with a 3-minute rest, though shoulder braise best well past that, at 195–205°F (90–96°C), where it turns fork-tender. The meat should show no blush pink near the center.Look for A fork twists into the meat with almost no resistance when it is ready.Safe temperature 145°F (63°C) internal temperature (steaks, chops and roasts)Tip If the pork resists, recover and give it another 30 to 60 minutes on the same setting.
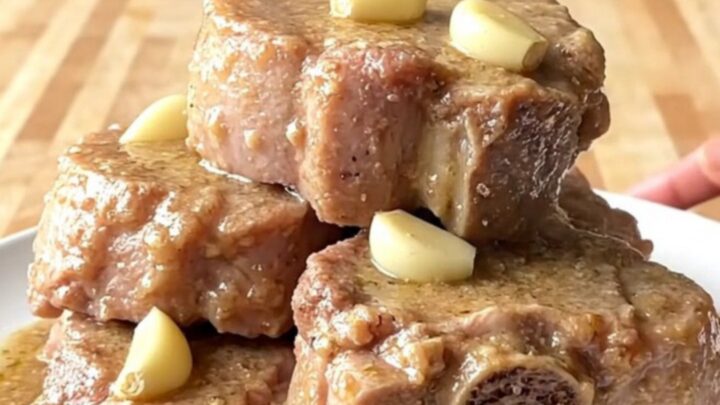
- Rest the pork before servingTurn off the slow cooker, lift the pork chunks onto a warm serving plate with tongs, and let them rest at least 3 minutes so the juices settle back into the meat. Leave the lid ajar on the insert to keep the gravy hot. The chunks will look softbraised and relaxed, glistening under their coating of sauce.Look for No active steam pours off the meat when it is cut into.Tip Tent the plate loosely with foil if the rest runs longer than a few minutes.
- Serve with the thick creamy gravyStir the gravy in the insert, scraping the sides, until it is smooth and thick enough to coat a spoon. Spoon it over the rested pork on the plate, letting it pool around the chunks, and tuck the softened garlic cloves alongside. Serve hot, with extra gravy passed at the table.Look for The gravy falls slowly from the spoon in a glossy ribbon.Tip For an even smoother sauce, whisk it briskly right in the warm insert before spooning.
The final phase ends with the pork fork-tender and the gravy glossy. The thermometer reads past 145°F (63°C) in the thickest chunk — ideally 195–205°F (90–96°C) for pull-apart texture — and the meat has rested at least 3 minutes on a warm plate.
The gravy in the insert coats a spoon in a slow ribbon, smooth and creamy with softened garlic cloves throughout. If the meat resists the fork or the sauce looks thin, recover and give it more time before serving; both fix themselves with patience.
Common mistakes
The most common slip is using a lean cut — loin roasts dry out over a long cook, so stick with shoulder or butt. Cutting the pork too small is the second: bite-size pieces turn stringy and dry before the gravy develops, while fist-size chunks stay juicy.
Adding water or broth dilutes the condensed soup and leaves the gravy thin; the pork's own liquid is all the moisture the recipe needs. Lifting the lid repeatedly costs heat and stretches the cook time by half an hour each time.
How to tell it’s done
The pork is fully cooked and safe at an internal temperature of 145°F (63°C), measured in the thickest chunk away from the insert wall, followed by a 3-minute rest. For the texture this dish is after, cook well past that point: shoulder turns genuinely fork-tender between 195°F and 205°F (90–96°C), when the connective tissue has melted and the meat offers no resistance to a fork.
- Steaks, chops and roasts: 145°F (63°C) in the thickest part, then a 3-minute rest
Up next · Part 3 of 3
4 variations · storage & make-ahead · 5 answers · printable card
Tips, FAQ & printable recipe (Part 3)← Back to the ingredients (Part 1)