Desserts · Part 2 of 3: Instructions
Gooey Levain-Style Chocolate Chip Cookies Step-by-step instructions
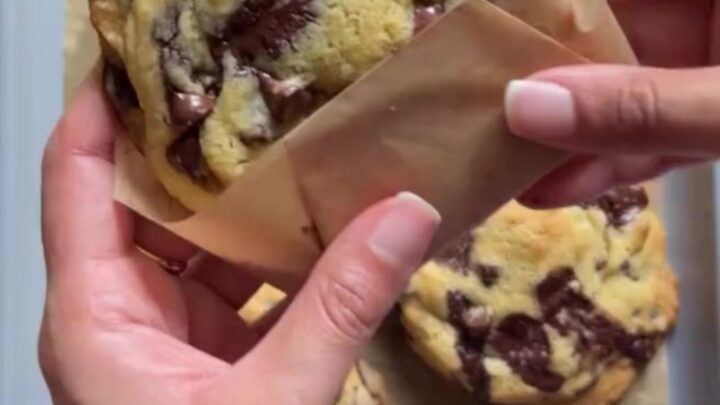
- Prep
- Cook
- Total
- Serves
- 8
Before you start
Before starting, make sure all ingredients are measured and ready. The butter and eggs should be straight from the refrigerator—do not let them come to room temperature. Preheat the oven to 410°F (210°C) and line a large baking sheet with parchment paper.
Have a stand mixer or hand mixer ready, along with a spatula for folding. If using chocolate chunks, chop them into roughly 1/2-inch pieces. The dough comes together quickly, so having everything prepared will make the process smooth and efficient.
Ingredients at a glance (8)
- 1 cup cold unsalted butter, cubed
- 1 cup packed brown sugar
- 1/2 cup white sugar
- 2 large cold eggs
- 2 cups all-purpose flour
- 1 tsp kosher salt
- 1 tsp baking soda
- 2 cups chocolate chips
Instructions
Phase 1: Cream Butter and Sugars
- Cream the Butter and SugarsIn the bowl of a stand mixer fitted with the paddle attachment, combine the cold cubed butter, brown sugar, and white sugar. Beat on medium speed just until the mixture is combined and no large butter chunks remain. Do not over-cream; the dough should remain dense, not fluffy. Scrape down the sides of the bowl as needed.Look for The mixture will look like a coarse, sandy paste with small butter bits still visible.Tip Cold butter is key—it keeps the cookies thick and prevents spreading.
- Add the Cold EggsAdd the cold eggs one at a time, beating just until each is incorporated. The mixture may look slightly curdled—that's fine and expected. Stop mixing as soon as the eggs disappear into the batter.Look for The batter will look a little broken or curdled; this is normal.Tip Do not over-mix after adding eggs—over-mixing can make cookies cakey.
At the end of this phase, the butter-sugar mixture will look like a coarse, sandy paste with small butter bits visible. The eggs will be incorporated, and the mixture may look slightly curdled. This is normal and desired. The texture should be dense, not fluffy. If it looks fluffy, you’ve over-mixed.
Phase 2: Add Dry Ingredients and Shape
- Mix the Dry IngredientsIn a separate bowl, whisk together the flour, salt, and baking soda. Add the dry ingredients to the butter mixture and mix on low speed just until no streaks of flour remain. The dough will be thick and slightly crumbly. Fold in the chocolate chips with a spatula until evenly distributed.Look for The dough holds together when squeezed but is not sticky.Tip Chilling the dough for 30 minutes (if time allows) makes it easier to shape.
- Shape the DoughScoop the dough into 6-ounce portions (about 3/4 cup each) and place them on a parchment-lined baking sheet, spacing them at least 3 inches apart. Do not flatten the dough—keep the mounds tall and craggy.Look for The dough mounds are tall, rough, and uneven on top.Tip For the classic craggy look, pull the dough apart slightly before baking.
After mixing in the dry ingredients, the dough will be thick and slightly crumbly. It should hold together when squeezed but not be sticky.
The chocolate chips should be evenly distributed. When shaping, keep the mounds tall and rough—do not smooth them. The dough mounds should be about 3 inches apart on the baking sheet.
Phase 3: Bake and Serve
- Bake at High HeatBake the cookies in a preheated 410°F (210°C) oven for exactly 10 minutes. The edges will be golden and set, while the centers will still look soft and slightly underdone. Remove from the oven and let cool on the baking sheet for 5 minutes before transferring to a wire rack.Look for The edges are browned and cracked, the centers are puffed and soft.Safe temperature 160°F (71°C) internal temperature (egg dishes)Tip Do not over-bake—the cookies continue to set as they cool.
- Cool and ServeLet the cookies cool on the baking sheet for 5 minutes, then transfer to a wire rack. Serve warm for the best molten chocolate experience. The centers will be gooey, and the chocolate will flow like lava when broken apart.Look for The cookies are slightly crisp on the outside and soft in the middle.Tip For an extra gooey center, enjoy within 15 minutes of baking.
After 10 minutes, the cookies will have spread slightly, the edges will be browned and cracked, and the centers will be puffed and soft. The kitchen will smell of caramelized butter and chocolate. Let them cool for 5 minutes on the baking sheet—they will set as they cool. Serve warm for the best molten texture.
Common mistakes
One common mistake is over-creaming the butter and sugar, which incorporates too much air and makes the cookies cakey. Another is over-baking—even an extra minute can dry out the centers. Also, do not flatten the dough mounds; they need to stay tall to achieve the craggy texture.
If the cookies spread too much, the butter was too warm or the baking sheet was too hot. Use cold butter and a cool baking sheet for best results. Finally, be gentle when transferring the cookies; they are fragile right out of the oven.
How to tell it’s done
The cookies are done when the edges are golden brown and the tops are set but still soft to the touch. The centers will look slightly underdone and may appear glossy or moist—that’s exactly what you want. The internal temperature of the cookies should reach at least 160°F (71°C) to ensure the eggs are fully cooked.
Use an instant-read thermometer inserted into the center of a cookie to check. If the thermometer reads 160°F (71°C) or higher, the cookies are safe to eat. Let them cool on the baking sheet for 5 minutes before serving.
- Egg dishes: 160°F (71°C) in the thickest part
Up next · Part 3 of 3
4 variations · storage & make-ahead · 5 answers · printable card
Tips, FAQ & printable recipe (Part 3)← Back to the ingredients (Part 1)