Desserts · Part 1 of 3: Ingredients
Gooey Bakery-Style Chocolate Chip Cookies in 11 Minutes
- Prep
- Cook
- Total
- Serves
- 12
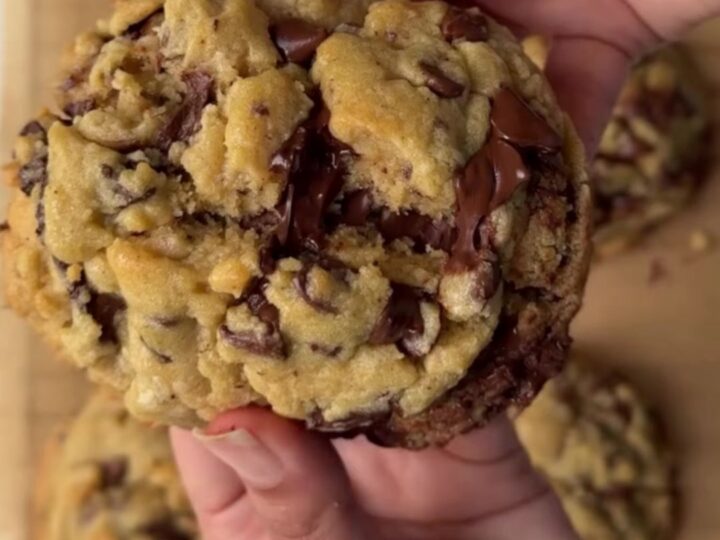
There’s a moment when you break into a warm chocolate chip cookie and the chocolate just pulls—a thick, glossy ribbon that stretches before it snaps. That’s the cookie you’ll make here, with a crackly golden crust and a center that stays soft and gooey.
The secret is cold butter, a hot oven, and a short bake time. In just 11 minutes, you’ll have cookies that taste like they came from a bakery, with caramelized edges and a tender, almost underbaked middle that’s utterly irresistible.
These chocolate chip cookies are engineered for maximum gooeyness. Cold cubed butter is beaten with dark brown sugar and granulated sugar until just combined, keeping the dough dense and preventing excess spread. Two cold eggs add structure without warming the dough.
Then the cookies bake at a high 380°F for exactly 11 minutes—long enough for the edges to caramelize into deep golden brown, but short enough that the centers stay tall and soft. A shower of flaky sea salt right out of the oven adds a savory crunch that makes the chocolate sing. The result is a cookie that’s crisp at the edges, chewy in the middle, and full of molten chocolate in every bite.
Ingredients
- 3/4 cup cold unsalted butter, cubed (170 g)
- 1 cup dark brown sugar, packed (200 g)
- 1/2 cup granulated sugar (100 g)
- 2 cold eggs
- 1 tbsp vanilla bean paste
- 2 cups all-purpose flour (240 g)
- 1 tsp baking soda
- 1/2 tsp salt
- 2 cups dark chocolate chips (340 g)
- Flaky sea salt, for sprinkling, to taste
Why this recipe works
The method hinges on temperature and timing. Cold butter and cold eggs keep the dough chilled, which slows the spread of the cookies in the oven. As the butter melts, it creates steam that lifts the edges, while the center remains dense and underbaked.
The high oven temperature of 380°F (193°C) accelerates caramelization on the outside, producing a deep golden crust before the interior has a chance to set completely. This contrast—crisp exterior, gooey center—is the hallmark of bakery-style cookies.
Dark brown sugar is another key player. It contains more molasses than light brown sugar, which adds moisture and a rich, almost toffee-like flavor. The molasses also attracts and holds water, keeping the cookies tender. Combined with the dense mixing method—beating just until combined rather than whipping air into the dough—the sugar creates a chewy texture that’s perfect for dipping in milk or eating straight from the rack.
Notes and substitutions
Use cold butter straight from the fridge, cubed into small pieces. This is non-negotiable for the dense texture. If the butter warms up, the cookies will spread thin and lose their gooey center. Similarly, cold eggs help maintain the dough’s temperature.
Dark brown sugar is preferred for its deeper flavor, but light brown sugar works if that’s what you have. The vanilla bean paste adds a fragrant, floral note; pure vanilla extract is a fine substitute.
For the chocolate, choose a high-quality dark chocolate chip or chop a bar into chunks for larger pools of melted chocolate. The flaky sea salt is not optional—it’s the finishing touch that balances the sweetness and adds a pleasant crunch. If you don’t have flaky salt, kosher salt can be used, but reduce the amount to about 1/4 teaspoon per batch. The dough can be chilled for up to 24 hours, which deepens the flavor and improves the texture.
- dark brown sugar: Light brown sugar mixed with 1 tablespoon molasses per cup for a similar deep flavor.
- vanilla bean paste: Equal amount pure vanilla extract or the seeds from one vanilla bean.
- dark chocolate chips: Chopped dark chocolate bar (60-70% cacao) for larger puddles of melted chocolate.
- all-purpose flour: Gluten-free all-purpose flour blend that contains xanthan gum, measured the same way.
Equipment
- Electric mixer
- Large mixing bowl
- Baking sheets
- Parchment paper
- Wire rack
- Cookie scoop or spoon
Up next · Part 2 of 3
8 steps · 11 min of cooking · what to look for at each stage
Step-by-step instructions (Part 2)