Dinner · Part 1 of 3: Ingredients
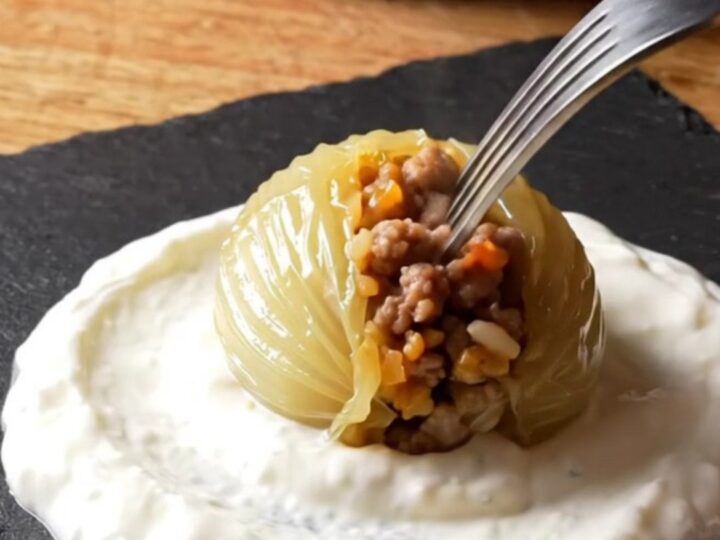
Golden Turkish Stuffed Onions with Garlic Yogurt
- Prep
- Cook
- Total
- Serves
- 4
These golden, glossy stuffed onions are a Turkish classic that turns humble ingredients into a showstopping dinner. Tender onion petals are filled with a fragrant beef-and-rice mixture, simmered in a rich tomato sauce, and served over cool garlic yogurt with a sprinkle of dried mint.
The contrast of warm, savory rolls and cool, tangy yogurt is irresistible. Perfect for a weeknight but impressive enough for guests.
Soğan dolması, or stuffed onions, is a beloved dish across Turkey, especially in the cooler months. The key is to blanch the onions until the layers become pliable, then wrap them around a seasoned filling.
The rolls are simmered gently in a tomato broth until tender and flavorful. Here, they are served over garlic yogurt, a classic pairing that balances the richness of the meat and the sweetness of the onions.
Ingredients
- 4 large yellow onions
Filling
- 250 g ground beef
- 1 cup washed rice
- 1 tbsp tomato paste
- 1/2 cup finely chopped onion
- 1 tbsp dried mint
- 1 tsp ground cumin
- 1 tsp salt
- 2 tbsp olive oil
Cooking liquid
- 1 1/2 cups hot water
- 1 tbsp tomato paste
- 1 tbsp olive oil
For serving
- 1 cup thick Greek yogurt
- 2 cloves garlic, minced
- 1 tsp dried mint, for garnish
Why this recipe works
Blanching the onions in boiling water softens their structure, making the petals easy to peel and roll without breaking. This technique also mellows the raw onion's sharpness, leaving a sweet, mild flavor that complements the savory filling. The brief boil is essential: too little and the petals tear, too much and they become mushy.
Simmering the stuffed onions in a tomato-based liquid gently cooks the rice and beef while infusing the rolls with flavor. The tight packing ensures they hold their shape and cook evenly. The reduction of the cooking liquid becomes a light sauce that clings to the rolls, adding a final layer of savory depth.
Notes and substitutions
Use large yellow onions for the best petals; they are sturdy and sweet. The filling is a simple mix of ground beef, rice, tomato paste, onion, mint, cumin, salt, and olive oil.
The rice absorbs liquid during cooking, so it should be well washed but not pre-cooked. For a vegetarian version, replace the beef with cooked lentils or a mixture of mushrooms and rice.
Greek yogurt is the traditional base here; its thickness holds up to the warm rolls. If you prefer a lighter sauce, use whole-milk yogurt or a mix of yogurt and sour cream.
The dried mint is essential—it adds a bright, herbal note that cuts through the richness. If you don't have dried mint, use fresh mint, but add it just before serving.
- ground beef: Ground lamb or a mix of beef and lamb works beautifully; the extra fat keeps the filling moist.
- Greek yogurt: Use whole-milk plain yogurt or sour cream thinned with a little milk for a similar tangy base.
- rice: Use short-grain or medium-grain rice; avoid long-grain which stays separate and doesn't bind the filling.
- dried mint: Fresh mint can be used, but add it to the filling just before rolling to prevent it from wilting.
Equipment
- Large pot for boiling onions
- Skillet or pan for filling
- Shallow braiser or wide pan with lid
- Mixing bowl
- Slotted spoon
- Serving plate
Up next · Part 2 of 3
8 steps · 55 min of cooking · what to look for at each stage
Step-by-step instructions (Part 2)