Appetizers · Part 2 of 3: Instructions
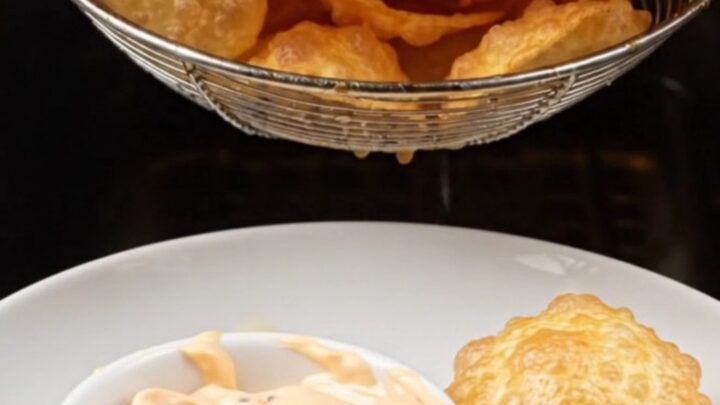
Golden Smiley Face Chips with Your Favorite Dip Step-by-step instructions
- Prep
- Cook
- Total
- Serves
- 4
Before you start
Before starting, gather all your ingredients and equipment. Stack the bread slices and have a sharp knife ready for removing the crusts. Warm the milk in a small saucepan or microwave until it's warm to the touch but not boiling.
Prepare your frying station with a deep skillet or pot and a spider strainer. Make sure you have a kitchen thermometer to monitor the oil temperature. Set up a wire rack or paper towels for draining the fried chips.
Ingredients at a glance (6)
- 8 slices soft white sandwich bread
- 1 cup warm milk
- 3 tbsp cornstarch
- 1 tsp salt
- 1 tsp sweet paprika
- vegetable oil, for frying, to taste
Instructions
Prep the Dough
- Prepare the bread cubesStack the slices of white sandwich bread on a wooden board. Use a sharp knife to slice off the crusts from all sides, then cut the soft bread into small, bite-sized cubes. Place the cubes into a mixing bowl.Look for The bread cubes should be uniform, about 1/2 inch across, with no crust remaining.Tip Use slightly stale bread for easier cutting and better absorption of the milk.
- Soak the breadPour the warm milk over the bread cubes in the mixing bowl. Let the bread soak for 3 minutes, allowing it to absorb the milk completely. The mixture should be soft and mushy, with no dry bread bits remaining.Look for The bread should be fully saturated and hold together when pressed.Tip Warm the milk slightly to help the bread soak faster and more evenly.
- Add the seasoningsSprinkle the cornstarch, salt, and sweet paprika over the soaked bread mixture. Stir well with a spoon or your hands until the ingredients are fully incorporated and the mixture forms a cohesive dough.Look for The mixture should be smooth and pliable, not too sticky or too dry.Tip If the dough feels too wet, add a little extra cornstarch; if too dry, add a splash of milk.
At the end of this phase, you should have a smooth, pliable dough that holds together when pressed. The bread cubes should be fully soaked and seasoned, with no dry spots. The dough should not be sticky or crumbly. If it is too wet, add a little cornstarch; if too dry, add a splash of milk. The dough should be easy to roll and cut.
Shape the Smileys
- Knead the doughTransfer the dough onto a clean surface and knead with your hands for a few minutes until it becomes smooth and pliable. The dough should be soft but firm enough to hold its shape when rolled.Look for The dough should be elastic and not crack when bent.Tip Lightly flour your hands if the dough sticks, but avoid adding too much flour.
- Roll and cut the doughPlace the dough between two sheets of parchment paper. Roll it out to a 1/4-inch thickness. Use a round cookie cutter to stamp out discs from the dough, re-rolling the scraps as needed.Look for The discs should be uniform in size and about 2 inches in diameter.Tip Rolling between parchment prevents sticking and makes the dough easier to handle.
- Create the smiley facesUse a plastic drinking straw to punch two small holes for the eyes on each disc. Then, use the edge of a spoon to press a happy curved smile into each disc, pressing gently to create an indentation.Look for The eyes should be about 1/4 inch apart, and the smile should be a smooth curve.Tip Press the straw straight down to get clean holes; wipe it occasionally to prevent sticking.
After shaping, you should have uniform discs with clear eye holes and a smile indentation. The eyes should be distinct, and the smile should be a smooth curve.
The discs should be about 2 inches in diameter and 1/4-inch thick. If the dough sticks to the cutter or straw, lightly flour them. The faces should be visible and well-defined before frying.
Fry to Golden Perfection
- Heat the oilPour vegetable oil into a deep skillet or pot to a depth of about 2 inches. Heat the oil to 350°F (175°C). Use a kitchen thermometer to ensure the temperature is accurate.Look for The oil should shimmer and a small piece of bread dropped in should sizzle immediately.Tip Maintain the oil temperature between 350°F and 375°F for even frying.
- Fry the chipsCarefully drop a few of the smiley face discs into the hot oil, making sure not to overcrowd the pan. Fry for 1 to 2 minutes per side, until golden brown and puffed. Use a spider strainer to turn and remove them.Look for The chips should be golden brown and crisp, with the faces still visible.Tip Fry in small batches to keep the oil temperature steady and ensure even cooking.
- Drain and serveLift the fried chips out with the spider strainer and let them drain on paper towels or a wire rack. Serve warm with your favorite dip.Look for The chips should be crunchy and slightly puffed, with a golden color.Tip Season with a little extra salt while still warm, if desired.
The chips should be golden brown, puffed, and crispy. They should float in the oil and sizzle gently. The faces should still be visible after frying, though they may puff up slightly. The chips should be crunchy when bitten, with a light, airy interior. Drain them on paper towels to remove excess oil and serve warm.
Common mistakes
One common mistake is not soaking the bread enough, which results in a dough that's too dry and crumbly. Make sure the bread is fully saturated with the milk. Another mistake is rolling the dough too thick, which leads to chips that are doughy inside.
Aim for a consistent 1/4-inch thickness. Overcrowding the pan can also cause the oil temperature to drop, making the chips greasy. Fry in small batches and keep the oil at the right temperature.
How to tell it’s done
The chips are done when they are golden brown and puffed, with a crispy exterior. They should sound crunchy when you bite into them. To check for doneness, remove one chip from the oil and let it cool for a moment – it should be firm and crisp, not soft or chewy.
The internal temperature of the bread is not a concern since it's cooked through, but the oil temperature should stay between 350°F and 375°F for the best results.
Up next · Part 3 of 3
4 variations · storage & make-ahead · 5 answers · printable card
Tips, FAQ & printable recipe (Part 3)← Back to the ingredients (Part 1)