Dinner · Part 2 of 3: Instructions
Golden Herb Roasted Chicken with Crispy Potatoes and Carrots Step-by-step instructions
- Prep
- Cook
- Total
- Serves
- 4
Before you start
Before starting, ensure all ingredients are prepped and ready. Wash the baby potatoes thoroughly and cut them in half. Peel the carrots and cut them into thick, uniform chunks so they cook evenly. Melt the unsalted butter and chop the fresh rosemary.
Most importantly, remove the chicken from the refrigerator about 30 minutes before roasting to take the chill off, which promotes even cooking. Gather your roasting pan, carving knife, and meat thermometer so everything is within arm's reach when the cooking process begins.
Ingredients at a glance (5)
- 1 whole chicken (4 to 5 pounds), patted dry
- 1 1/2 lb baby potatoes, washed and halved
- 1 lb carrots, peeled and cut into 2-inch chunks
- 4 tbsp unsalted butter, melted
- 4 sprigs fresh rosemary, finely chopped, plus extra for garnish
Instructions
Preparation and Seasoning
- Prep and Dry the ChickenPreheat the oven to 400°F (204°C). Pat the whole chicken completely dry with paper towels, ensuring both the skin and the cavity are free of moisture. Place the dried chicken in the center of a heavy ceramic roasting pan. Arrange the halved baby potatoes and carrot chunks around the chicken in a single layer.Look for The chicken skin should feel completely dry to the touch.Tip Dry skin is the most critical factor for achieving maximum crispiness.
- Season the Chicken and VegetablesIn a small bowl, combine the melted unsalted butter and chopped fresh rosemary. Brush half of this herb butter mixture generously over the chicken skin. Drizzle the remaining herb butter over the surrounding baby potatoes and carrots, tossing them gently to ensure they are evenly coated.Look for Ensure the chicken and vegetables are fully coated in herb butter.Tip Tuck the wing tips behind the back to prevent them from burning.
By the end of this phase, the whole chicken sits proudly in the center of the ceramic roasting pan, surrounded by a colorful ring of halved potatoes and carrot chunks. The chicken skin is fully coated with a shimmering layer of melted herb butter, with no dry patches remaining. The vegetables are lightly tossed in the herb butter, ready to absorb the rich chicken fat as it renders during the roasting process.
Roasting and Basting
- Begin Roasting the ChickenPlace the roasting pan in the preheated oven. Roast uncovered for 45 minutes, allowing the chicken skin to begin browning and the vegetables to start softening in the rendering fat. The kitchen will fill with a rich, savory aroma as the pan juices begin to bubble.Look for The skin should start turning a light golden-brown color.Tip Do not open the oven door too often to keep the heat constant.
- Baste with Herb ButterCarefully pull the roasting pan out of the oven. Ladle the remaining herb butter and the bubbling pan juices over the chicken, coating the skin thoroughly. Stir the potatoes and carrots gently to coat them in the flavorful pan juices, then return the pan to the oven.Look for The pan juices should be sizzling actively around the vegetables.Tip Basting adds incredible moisture and helps develop a deep golden color.
- Finish Roasting to Safe TemperatureRoast for an additional 30 to 40 minutes. Insert a meat thermometer into the thickest part of the thigh, avoiding the bone. The chicken is fully cooked when the internal temperature reaches 165°F (74°C). The juices should run clear when the thigh is pierced.Look for The skin will be ultra-crispy, deep golden, and flecked with herbs.Safe temperature 165°F (74°C) internal temperature (poultry)Tip Always verify the temperature in multiple spots for accuracy.
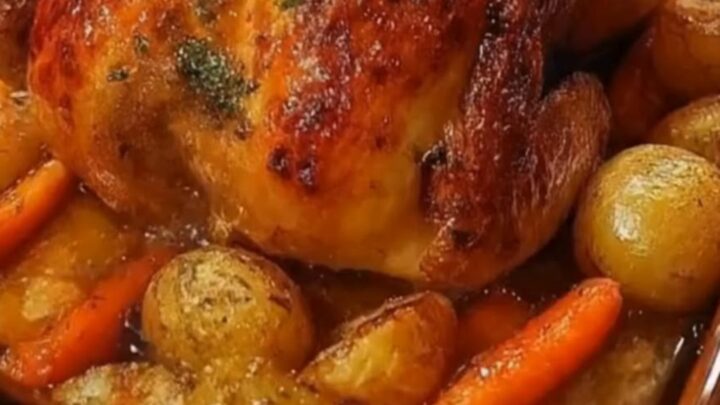
At the end of the roasting phase, the chicken skin has transformed into a gorgeous, ultra-crispy, deep golden-brown crust flecked with toasted rosemary.
The pan juices are bubbling vigorously around the tender baby potatoes and caramelized carrots, which have absorbed the savory flavors. When pierced with a thermometer, the thickest part of the chicken thigh registers a safe internal temperature of 165 degrees Fahrenheit.
Resting and Carving
- Rest and Carve the ChickenRemove the pan from the oven and garnish with a fresh rosemary sprig. Let the chicken rest in the pan for 15 minutes before carving. This allows the juices to redistribute throughout the meat. Use a sharp carving knife to slice the chicken, then serve warm with the roasted potatoes and carrots.Look for Steam and rich juices will release as you carve into the crispy skin.Tip Resting is essential to keep the breast meat tender and juicy.
After resting, the chicken is perfectly juicy and ready to carve. As the sharp knife cuts through the crackling, herb-flecked skin, steam rises and rich juices pool onto the carving board. The meat is tender and easily pulls away from the bone, while the potatoes and carrots are soft and glistening with herb butter. The dish is presented warm, garnished with a fresh rosemary sprig.
Common mistakes
One common mistake is roasting a wet chicken, which causes the skin to steam and turn rubbery rather than crispy. Always pat the skin completely dry with paper towels before applying any fat. Another error is carving the chicken immediately after removing it from the oven.
Without a proper rest period, all the delicious juices will run out onto the cutting board, leaving the meat dry and tough. Finally, avoid cutting the vegetables too small, as they will overcook and mush before the chicken is fully done.
How to tell it’s done
Doneness should never be guessed by time alone. The only reliable method to check if the chicken is fully cooked is using a meat thermometer. Insert the probe into the thickest part of the thigh, making sure not to touch the bone, which can give a false high reading.
The chicken is safe to eat when it reaches an internal temperature of 165°F (74°C). At this point, the juices should run completely clear, and the drumsticks should wiggle easily in their joints.
- Poultry: 165°F (74°C) in the thickest part
Up next · Part 3 of 3
3 variations · storage & make-ahead · 4 answers · printable card
Tips, FAQ & printable recipe (Part 3)← Back to the ingredients (Part 1)