Dinner · Part 2 of 3: Instructions
Golden Greek Chicken Wraps: Quick & Flavorful Step-by-step instructions
- Prep
- Cook
- Total
- Serves
- 4
Before you start
Before starting, whisk together the marinade and slice the chicken breast into thin strips. Grate the cucumber for the tzatziki and squeeze out the excess liquid; you should have about 1/2 cup after draining.
Chop the romaine, halve the tomatoes, dice the cucumber, slice the red onion, and pit the olives. Warm the tortillas just before assembling. Have all the ingredients ready, as the cooking goes quickly.
Ingredients at a glance (21)
- 1 lb boneless skinless chicken breasts, sliced into strips
- 3 tbsp Greek yogurt
- 2 tbsp mayonnaise
- 2 tbsp lemon juice
- 1 tsp garlic powder
- 1 tsp dried oregano
- Salt and pepper, to taste
- 2 tbsp olive oil, divided
- 2 cups crisp romaine lettuce, chopped
- 1 cup cherry tomatoes, halved
- 1 cup diced cucumber
- 1/2 cup thinly sliced red onion
- 1/4 cup kalamata olives, pitted and halved
- 1/2 cup crumbled feta cheese
- 4 large flour tortillas, warmed
- 1 cup Greek yogurt
- 1/2 cup grated cucumber, drained
- 2 cloves garlic, minced
- 2 tbsp fresh dill, chopped
- 1 tbsp lemon juice
- 1/2 tsp sea salt
Instructions
Marinate and Sauce
- Marinate the ChickenIn a medium bowl, whisk together 3 tablespoons Greek yogurt, 2 tablespoons mayonnaise, 2 tablespoons lemon juice, garlic powder, oregano, and a pinch of salt and pepper. Add the sliced chicken breasts and toss to coat evenly. Cover and refrigerate for at least 15 minutes, or up to 2 hours.Look for The chicken is fully coated in a thick, creamy marinade.Tip For deeper flavor, marinate longer, but do not leave at room temperature.
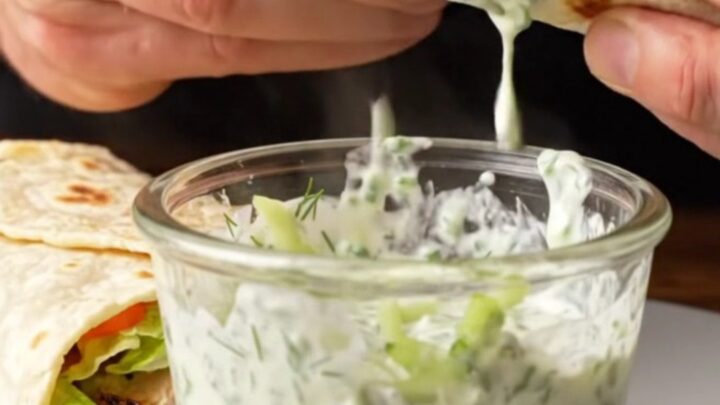
- Make the TzatzikiIn a small bowl, stir together 1 cup Greek yogurt, grated cucumber, minced garlic, fresh dill, lemon juice, and sea salt. Cover and refrigerate until ready to serve.Look for The tzatziki is thick, creamy, and speckled with green dill.Tip Squeeze the grated cucumber well to remove excess water so the sauce stays thick.
At the end of this phase, the chicken is coated in a thick, creamy marinade, and the tzatziki is smooth, thick, and fragrant with dill and garlic.
The grated cucumber should be well-drained, and the sauce should hold a ribbon when stirred. Both should be refrigerated while you prepare the salad.
Char and Sear
- Prepare the SaladIn a large bowl, combine the chopped romaine, cherry tomatoes, diced cucumber, red onion, kalamata olives, and crumbled feta. Drizzle with 1 tablespoon of olive oil and toss gently to combine.Look for The salad is vibrant, crisp, and lightly dressed.Tip Keep the salad undressed until serving if making ahead to prevent sogginess.
- Sear the ChickenHeat a cast-iron grill pan over medium-high heat and add the remaining 1 tablespoon olive oil. Add the marinated chicken strips in a single layer, working in batches if needed. Cook for 4-5 minutes per side, until charred and cooked through, reaching an internal temperature of 165°F (74°C).Look for The chicken has deep golden char lines and is no longer pink in the center.Safe temperature 165°F (74°C) internal temperature (poultry)Tip Do not overcrowd the pan; sear in batches for the best char.
The chicken strips are seared until deeply golden and charred at the edges, with an internal temperature of 165°F (74°C). The kitchen smells of garlic and oregano, and the pan sizzles as the chicken cooks. The salad is crisp and lightly dressed, with the feta and olives adding briny pops.
Wrap and Serve
- Assemble the WrapsWarm the flour tortillas in a dry skillet or microwave. Lay each tortilla flat and layer with crisp romaine, grilled chicken strips, the Greek salad mixture, and a generous drizzle of tzatziki sauce.Look for Each wrap is generously filled and ready to fold.Tip Do not overstuff; leave room to fold the sides.
- Fold and ServeFold the bottom of each tortilla over the filling, then fold in the sides and roll tightly. Slice each wrap in half on a diagonal and serve immediately with extra tzatziki on the side.Look for The wraps are golden, tight, and slice cleanly.Tip Use a sharp knife to slice cleanly without squishing the filling.
The tortillas are warm and pliable, filled with a colorful line of romaine, chicken, salad, and tzatziki. When sliced, the wrap reveals a beautiful cross-section: juicy chicken, crisp vegetables, and creamy sauce. The first bite is a satisfying crunch followed by the cool, tangy tzatziki.
Common mistakes
One common mistake is overcooking the chicken, which dries it out — use a meat thermometer and pull it off the heat at 165°F. Another is not draining the cucumber properly, leading to a watery tzatziki; squeeze it well.
Overfilling the wraps makes them hard to roll and they fall apart; keep the filling to about 1 cup per tortilla. Also, avoid using cold tortillas straight from the fridge — warm them first for easy rolling.
How to tell it’s done
The chicken is done when it reaches an internal temperature of 165°F (74°C) and the juices run clear. The strips should be deeply charred on the outside but still moist inside.
The tzatziki should be thick enough to hold its shape on a spoon. The tortillas should be warm and pliable, and the assembled wraps should be tightly rolled and slice cleanly.
- Poultry: 165°F (74°C) in the thickest part
Up next · Part 3 of 3
4 variations · storage & make-ahead · 5 answers · printable card
Tips, FAQ & printable recipe (Part 3)← Back to the ingredients (Part 1)