Dinner · Part 1 of 3: Ingredients
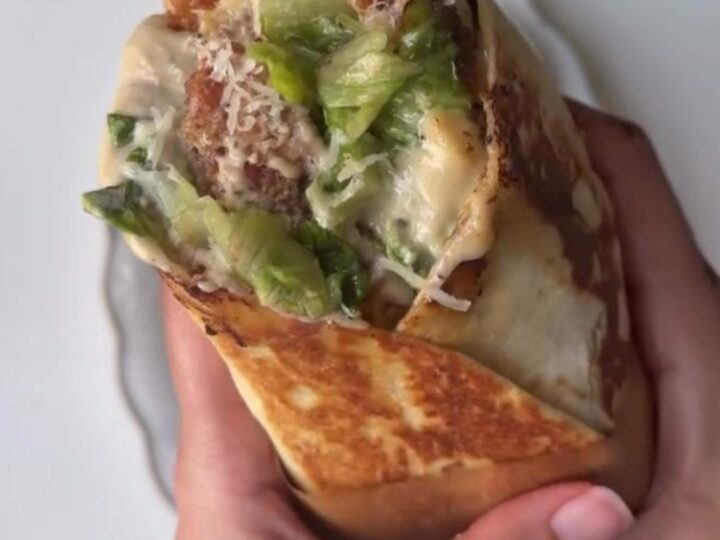
Golden Crispy Chicken Caesar Wrap
- Prep
- Cook
- Total
- Serves
- 4
This crispy chicken Caesar wrap brings together everything you love about a classic Caesar salad—crunchy romaine, shaved parmesan, and creamy dressing—wrapped in a golden, toasted tortilla with crispy seasoned chicken tenders. The contrast of warm, crackling tortilla against cool, crisp lettuce is irresistible.
It's a quick dinner that feels like a treat, ready in under 30 minutes. Each bite delivers a satisfying crunch, savory chicken, and the tangy richness of Caesar dressing. Perfect for a weeknight meal or a lunch that feels special.
The idea is simple: take a classic Caesar salad, add hot crispy chicken tenders, and wrap it all in a flour tortilla, then toast until golden and crackling. The heat from the chicken slightly wilts the lettuce, while the tortilla gets a crunchy exterior.
This recipe uses a quick breading of panko breadcrumbs for extra crispiness, and the seasoning on the chicken—garlic powder, smoked paprika, salt, and pepper—adds a savory depth that pairs perfectly with the Caesar dressing. Serve the wraps with extra dressing for dipping, and you have a meal that's both satisfying and fun to eat.
Ingredients
- 1 lb chicken breast, sliced into strips
- 1 tsp garlic powder
- 1 tsp smoked paprika
- 1/2 tsp salt
- 1/4 tsp black pepper
- 2 large eggs, beaten
- 1 1/2 cups panko breadcrumbs
- 4 cups Caesar salad (romaine, parmesan, dressing)
- 4 large flour tortillas (10-inch)
- 1/2 cup Caesar dressing, for dipping
Why this recipe works
The method of breading the chicken in panko breadcrumbs creates a light, shatteringly crisp coating that holds up well inside the wrap. The panko crumbs are larger and more jagged than regular breadcrumbs, which means they create more surface area for browning and crunch.
Cooking the chicken in a hot skillet with a thin layer of oil ensures even browning and a crisp exterior without deep-frying. The seasoning is applied directly to the chicken before breading, so every bite is flavorful.
Toasting the assembled wrap in a dry skillet is the final step that sets this recipe apart. The direct heat crisps the tortilla, giving it a golden, crackling texture that contrasts with the cool, crunchy romaine and the creamy dressing.
The brief toasting also warms the tortilla, making it pliable and easy to roll. The result is a wrap that holds together beautifully and delivers a satisfying crunch in every bite.
Notes and substitutions
For the best texture, use a good-quality Caesar salad with crisp romaine, shaved parmesan, and a creamy dressing. You can use store-bought Caesar salad kit or assemble your own. The chicken breast should be sliced into strips about 1/2-inch thick so they cook quickly and evenly. If you prefer dark meat, chicken thighs work well too, but adjust the cooking time accordingly.
Panko breadcrumbs are key for the crispiest coating; they are available in most supermarkets. If you only have regular breadcrumbs, they will work but won't be as crunchy. When toasting the wraps, use a large skillet or griddle and work in batches if needed. Press down gently with a spatula to ensure even browning. The wraps are best served immediately after toasting, so the tortilla stays crisp.
- Chicken breast: Chicken tenders or thinly sliced chicken thighs; adjust cooking time as needed.
- Panko breadcrumbs: Regular breadcrumbs or crushed cornflakes for extra crunch.
- Caesar salad: Use chopped romaine, shaved parmesan, and your favorite Caesar dressing.
- Flour tortillas: Whole wheat or gluten-free tortillas; note that gluten-free tortillas may tear more easily.
Equipment
- Large skillet
- Tongs
- Cutting board
- Chef's knife
- Mixing bowls
- Whisk
- Plate for breading
Up next · Part 2 of 3
5 steps · 15 min of cooking · what to look for at each stage
Step-by-step instructions (Part 2)