Appetizers · Part 2 of 3: Instructions
Golden Baked Brie in Puff Pastry with Cranberry Pecan Jam Step-by-step instructions
- Prep
- Cook
- Total
- Serves
- 8
Before you start
Before beginning, ensure the puff pastry is thawed in the refrigerator according to the package instructions. Preheat the oven to 400°F (200°C) well in advance to ensure the pastry puffs instantly upon entering the heat.
Prepare a baking sheet with a piece of parchment paper to prevent the pastry from sticking. Have all your ingredients ready at room temperature for the cheese to melt evenly, but keep the pastry cold until the very moment you are ready to assemble and bake.
Ingredients at a glance (5)
- 1 wheel triple-cream brie (8 ounces)
- 1 sheet puff pastry, thawed
- 3 tbsp cranberry pecan jam
- fresh thyme sprigs, for serving
- toasted baguette crisps, for serving
Instructions
Assembly of the Brie
- Prepare the BriePlace the thawed puff pastry sheet on a parchment-lined baking sheet. Set the brie wheel in the center of the pastry. Spread the cranberry pecan jam evenly over the top of the cheese.Look for The jam is spread in an even layer across the surface of the brie.Tip Ensure the pastry is cold when working with it to maintain a flaky texture.
The brie wheel sits centered on the pastry, neatly topped with the jam. The edges of the pastry are ready to be folded up and sealed. The assembly should look clean and the pastry should remain cool to the touch, ensuring the butter layers inside the dough do not melt before the baking process begins.
Baking to Golden Perfection
- Wrap and BakeFold the edges of the puff pastry up and over the brie, pressing firmly to seal the dough completely. Preheat the oven to 400°F (200°C). Transfer the wrapped brie to the oven and bake for 20 minutes until the pastry is golden brown and the cheese is soft.Look for The pastry turns a deep golden brown and the cheese feels soft when lightly pressed.Tip Seal the pastry seams well to prevent the cheese from leaking during the baking process.
The pastry is now a beautiful, uniform golden brown color, and the kitchen is filled with the aroma of buttery dough and warm berries. The crust should look crisp and airy, with no signs of raw, pale dough. The cheese has expanded slightly and the jam has softened, indicating it is ready to be removed.
Final Garnish and Presentation
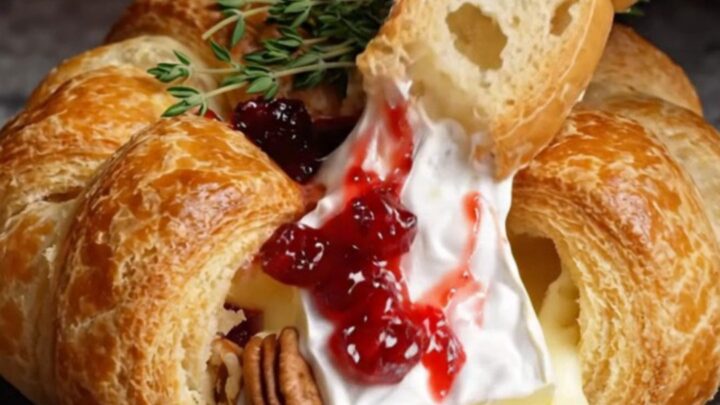
- Garnish and ServeRemove the brie from the oven and let it rest for 5 minutes. Garnish the top with fresh thyme sprigs. Serve warm immediately with toasted baguette crisps for dipping into the molten center.Look for The cheese creates a molten river when sliced, and the crust remains crisp.Tip Resting allows the cheese to firm slightly, making it easier to serve without it running off the plate.
The brie has rested, allowing the cheese to stabilize slightly while remaining perfectly molten. The thyme sprigs add a fresh, aromatic finish.
The dish is now ready to be placed on a serving platter surrounded by crispy baguette slices, inviting guests to break into the warm, gooey center of the cheese.
Common mistakes
A common mistake is failing to seal the pastry seams securely, which allows the cheese and jam to leak onto the baking sheet. Ensure you overlap the edges generously and press them down firmly.
Another error is over-baking the pastry, which can lead to a burnt crust while the center remains cool. Always keep a close eye on the oven during the final minutes. Avoid skipping the resting period, as the brie needs a few minutes to settle before it is sliced.
How to tell it’s done
The baked brie is finished when the puff pastry has puffed significantly and achieved a deep, even golden-brown color across the entire surface. The cheese inside should feel soft and yield slightly to gentle pressure.
When sliced, the center should be molten and flow slowly. If the pastry is brown but the center feels firm, bake for an additional two minutes. The internal temperature of the cheese should reach a soft, molten state, ensuring it is ready for immediate serving.
Up next · Part 3 of 3
2 variations · storage & make-ahead · 3 answers · printable card
Tips, FAQ & printable recipe (Part 3)← Back to the ingredients (Part 1)