Dinner · Part 2 of 3: Instructions
Glossy Pineapple Chicken Stir-Fry Step-by-step instructions
- Prep
- Cook
- Total
- Serves
- 4
Before you start
Preparation is key to a successful stir-fry because the cooking process happens very quickly once the heat is on. Start by cutting your chicken into uniform pieces to ensure even cooking. Dice your bell peppers into similar sizes to allow them to cook at the same rate.
Measure out all your ingredients and place them near the stove. Having everything prepped and within arm's reach prevents the need to step away from the hot skillet, which is vital for maintaining the correct temperature.
Ingredients at a glance (3)
- 1 lb chicken breast, cut into bite-sized pieces
- 2 bell peppers, diced
- 1 cup pineapple chunks
Instructions
Searing the Chicken
- Sear the ChickenHeat a large skillet over medium-high heat. Add the chicken pieces in a single layer and sear until golden brown on all sides. Ensure the chicken is cooked through to an internal temperature of 165°F (74°C).Look for Chicken pieces should be golden and opaque throughout.Safe temperature 165°F (74°C) internal temperature (poultry)Tip Do not overcrowd the pan to ensure the chicken sears rather than steams.
The chicken should be evenly browned on all sides and look appetizingly golden. Check a few larger pieces to ensure they are cooked through and no longer pink in the center. The pan should be hot enough to sizzle when the chicken is added, and there should be no excess liquid pooling at the bottom of the skillet.
Adding Vegetables and Fruit
- Sauté Vegetables and FruitAdd the diced bell peppers to the skillet with the chicken. Sauté for two to three minutes until the peppers are slightly tender but still retain a crisp texture. Stir in the pineapple chunks and cook for one additional minute until warmed through.Look for Peppers should look vibrant and slightly softened.Tip Maintain high heat to keep the vegetables crisp and prevent them from becoming mushy.
The bell peppers should look shiny and have softened slightly while still holding their shape. The pineapple chunks should be heated through, and the overall mixture should look colorful and aromatic. Ensure the peppers are cooked to your desired level of crispness before proceeding to the final step of glazing.
Glazing the Stir-Fry
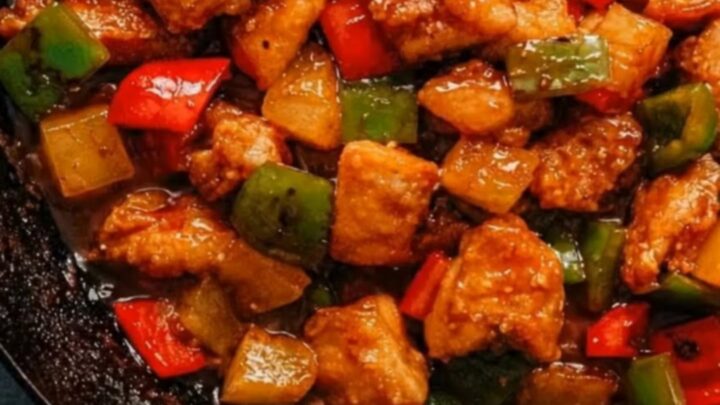
- Glaze and ServeToss everything together continuously until the ingredients are coated in a glossy, uniform layer. Remove from heat and let it rest for 3 minutes before serving.Look for The mixture should be glossy and coated in a natural glaze.Tip Keep stirring constantly to ensure even distribution of the natural juices.
The mixture should be thick, glossy, and clinging perfectly to every piece of chicken and vegetable. There should be no watery liquid left at the bottom of the pan.
Everything should be coated in a rich, caramelized layer that smells savory and slightly sweet. Once this consistency is achieved, remove the pan from the heat immediately.
Common mistakes
One common mistake is overcrowding the skillet. If you add too much chicken at once, the temperature of the pan drops, causing the chicken to release its juices and steam instead of searing. This results in pale, rubbery meat.
Another mistake is overcooking the vegetables. They should only be sautéed for a short time to maintain their crunch. Finally, ensure you do not leave the pan unattended, as the high heat required for stir-frying can lead to burning if not monitored.
How to tell it’s done
The chicken is perfectly cooked when it is opaque throughout and reaches an internal temperature of 165°F (74°C). The pieces should be firm to the touch and golden brown on the outside.
Because the chicken is cut into small, bite-sized pieces, it will cook quite rapidly, so keep a close eye on the pan to avoid overcooking. Once the ingredients are combined, the heat should be just enough to glaze the mixture without drying out the chicken.
- Poultry: 165°F (74°C) in the thickest part
Up next · Part 3 of 3
2 variations · storage & make-ahead · 3 answers · printable card
Tips, FAQ & printable recipe (Part 3)← Back to the ingredients (Part 1)