Breakfast · Part 1 of 3: Ingredients
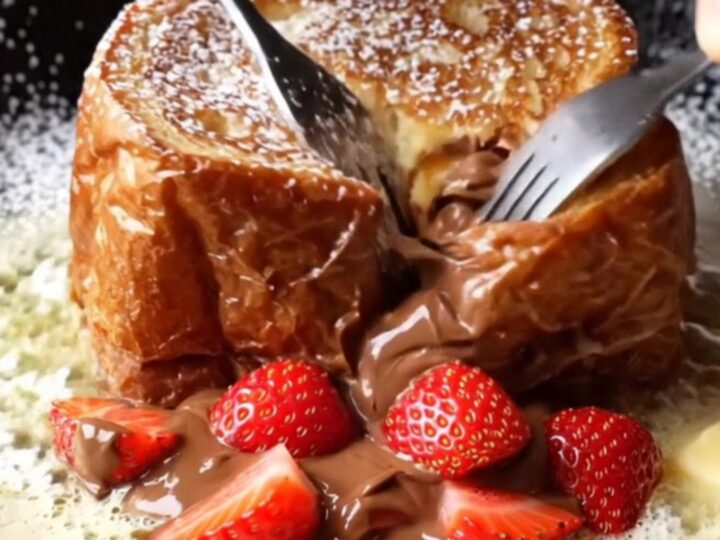
Giant Stuffed Nutella Brioche French Toast with Strawberries
- Prep
- Cook
- Total
- Serves
- 2
Imagine a thick slice of brioche, golden and crisp on the outside, hiding a molten core of Nutella and sweet strawberries. This giant stuffed French toast takes brunch to a new level. It's simple to make, yet looks and tastes like a special occasion.
The custard soak ensures a tender, rich interior, while the pan-sear creates a caramelized crust that crackles with every bite. Perfect for a weekend treat or a celebratory breakfast.
This recipe transforms humble French toast into an indulgent showstopper. Thick brioche slices are cut with a pocket, stuffed with Nutella and fresh strawberries, then soaked in a vanilla-cinnamon custard.
Pan-seared in butter until deeply golden, each slice emerges with a crisp exterior and a luscious, molten center. Dusted with powdered sugar and served with maple syrup, it's a brunch dish that feels decadent yet surprisingly easy to make at home.
Ingredients
- 2 slices thick brioche bread (2-inches thick)
Filling
- 1/2 cup Nutella spread
- 1/2 cup fresh strawberries, sliced
Custard
- 3 large eggs
- 1/2 cup milk
- 1/4 cup heavy cream
- 1 tsp vanilla extract
- 1/2 tsp ground cinnamon
For cooking
- 3 tbsp unsalted butter
For serving
- Powdered sugar, for dusting, to taste
- Maple syrup, for serving
Why this recipe works
The key to this recipe is the brioche. Its rich, buttery crumb is sturdy enough to hold a pocket and absorb the custard without turning mushy.
The thick cut ensures a substantial bite, and the custard soak creates a custardy interior that contrasts beautifully with the crisp, caramelized exterior. Pan-searing in butter adds a nutty flavor and deep golden color.
Stuffing the bread before soaking allows the Nutella and strawberries to stay contained, melting into a gooey filling as the bread cooks. The custard acts as a glue, sealing the pocket and preventing leaks. The result is a perfectly integrated dish where every bite has a balance of sweet chocolate, tart berries, and rich, eggy bread.
Notes and substitutions
For the best results, use a high-quality brioche that is slightly stale or day-old; it will hold up better during soaking. If your brioche is very soft, chill it for 15 minutes before cutting the pocket.
The strawberries should be ripe but firm, sliced thinly so they heat through quickly. Nutella spreads easily at room temperature; if it's too stiff, warm it slightly.
A shallow dish, like a pie plate, works best for soaking the bread. Use a large skillet to avoid crowding; cooking in batches ensures even browning. If you don't have a piping bag, a zip-top bag with a corner cut works perfectly. The custard can be made ahead and refrigerated for up to 2 days, but the bread should be stuffed and soaked just before cooking.
- Brioche bread: Challah or thick-cut white bread works well; use a sturdy loaf that can hold a pocket.
- Nutella: Any chocolate-hazelnut spread can be used; for a different flavor, try a chocolate almond spread.
- Heavy cream: Whole milk or half-and-half can replace heavy cream; the custard will be slightly less rich.
- Strawberries: Raspberries, blueberries, or sliced bananas are all delicious alternatives.
Equipment
- Large skillet
- Mixing bowl
- Whisk
- Paring knife
- Piping bag or zip-top bag
- Spatula
- Cutting board
Up next · Part 2 of 3
7 steps · 8 min of cooking · what to look for at each stage
Step-by-step instructions (Part 2)