Desserts · Part 1 of 3: Ingredients
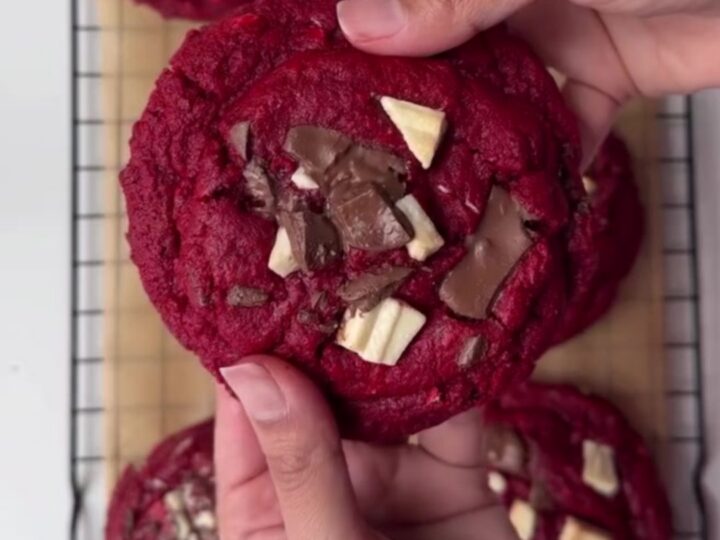
Giant Bakery-Style Red Velvet Chocolate Chunk Cookies
- Prep
- Cook
- Total
- Serves
- 6
These giant bakery-style red velvet chocolate chunk cookies are everything a cookie should be: crisp at the edges, chewy in the center, and loaded with pockets of melted white and dark chocolate.
The deep crimson color and towering height make them look straight from a high-end bakery, yet they come together with simple pantry staples.
Using cold butter and cold eggs is the key to getting that thick, gooey texture without any spreading. Whether for a holiday treat or a weekend baking project, these cookies are sure to impress.
Red velvet desserts have a special place in American baking, and these cookies capture all the classic charm in a handheld form. The combination of tangy buttermilk-like flavor (though here achieved with vanilla and a touch of sugar) and rich chocolate chunks creates a balanced sweetness that isn't overwhelming.
The recipe uses cold butter and cold eggs, which help the dough stay thick and tall in the oven, resulting in cookies that are soft and chewy rather than flat and crispy. They bake quickly at a high temperature, so you get that perfect contrast between caramelized edges and a molten center.
Ingredients
- 1 cup cold unsalted butter, cubed
- 3/4 cup dark brown sugar, packed
- 1/2 cup granulated sugar
- 2 large cold eggs
- 2 tsp vanilla extract
- 1 tbsp red food coloring
- 2 1/4 cups all-purpose flour
- 1 tsp baking soda
- 1/2 tsp salt
- 1 cup white chocolate chunks
- 1 cup dark chocolate chunks
Why this recipe works
The method starts with cold butter and cold eggs, which are beaten together until creamy but not overly aerated. This ensures the cookies spread minimally in the oven, keeping them tall and thick. The cold fat also creates pockets of steam as it melts, contributing to a tender, chewy crumb rather than a dense one.
Shaping the dough into tall, rough mounds rather than flat discs is another crucial step. As the cookies bake, they spread just enough to create craggy edges while the centers remain thick and soft.
The high oven temperature of 380°F sets the edges quickly, forming a slight crust while the inside stays gooey—exactly what you want in a bakery-style cookie.
Notes and substitutions
Use good-quality chocolate chunks for the best flavor. White chocolate adds sweetness and creaminess, while dark chocolate provides a rich, slightly bitter contrast. If you prefer, you can use all of one type or mix in chopped nuts or dried fruit. Make sure the chocolate is in chunks rather than chips for those melty pools.
The dough needs to be chilled before baking. This is not just for flavor—chilling solidifies the butter, which prevents excessive spreading and allows the cookies to bake up thick. You can chill the dough for as little as 30 minutes, but for the best texture, aim for at least 2 hours or overnight.
- cold unsalted butter: Salted butter can be used; reduce the added salt to 1/4 teaspoon.
- red food coloring: Use gel food coloring for a more intense color without thinning the dough.
- white chocolate chunks: White chocolate chips or chopped white chocolate bars work well.
- dark chocolate chunks: Semi-sweet or bittersweet chocolate chips can replace the dark chunks.
Equipment
- Stand mixer or hand mixer
- Large mixing bowls
- Baking sheet
- Parchment paper
- Wire rack
- Cookie scoop or spoon
Up next · Part 2 of 3
8 steps · 11 min of cooking · what to look for at each stage
Step-by-step instructions (Part 2)