Dinner · Part 2 of 3: Instructions
Garlic Parmesan Chicken Vodka Pasta with Golden Cutlets Step-by-step instructions
- Prep
- Cook
- Total
- Serves
- 4
Before you start
Before starting, slice the chicken breasts into cutlets and pat them dry. Grate the cheeses and set aside. Measure out the tomato paste, cream, vodka, and seasonings.
Bring a large pot of salted water to a boil for the pasta. Have all ingredients ready so the cooking process goes smoothly.
Ingredients at a glance (13)
- 1 1/2 lb boneless, skinless chicken breasts
- 2 tsp dried Italian herbs
- 1/2 tsp red pepper flakes
- 1 tsp kosher salt
- 1/2 tsp black pepper
- 2 tbsp olive oil
- 1 oz aged pecorino cheese, grated
- 1 oz parmigiano-reggiano cheese, grated
- 3 tbsp tomato paste
- 1 1/2 cups heavy cream
- 1/4 cup vodka
- 12 oz rigatoni pasta
- 4 cloves garlic, minced
Instructions
Prepare and Sear
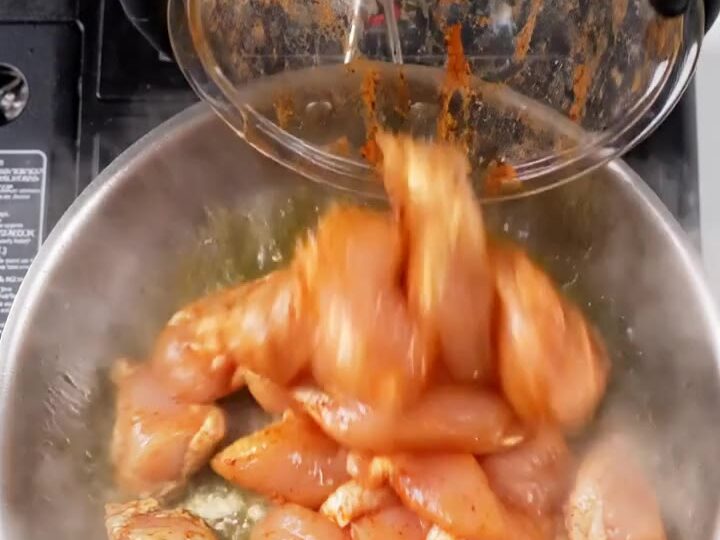
- Prepare the Chicken and CheeseSlice the chicken breasts horizontally into cutlets about 1/2 inch thick. Season both sides with Italian herbs, red pepper flakes, salt, and black pepper. Grate the pecorino and parmigiano on the fine holes of a metal grater; set aside.Look for The cutlets are evenly seasoned and the cheese is finely grated.Tip Pounding the cutlets to an even thickness helps them cook uniformly.
- Sear the ChickenHeat the olive oil in a large skillet over medium-high heat. Add the chicken cutlets in a single layer (work in batches if needed) and cook until golden brown and cooked through, about 3-4 minutes per side. Transfer to a plate and cover loosely with foil.Look for The cutlets are golden brown on both sides and no longer pink in the center.Safe temperature 165°F (74°C) internal temperature (poultry)Tip Avoid overcrowding the pan so the chicken sears, not steams.
The chicken cutlets are seasoned with herbs and chili flakes, and the cheese is finely grated. The cutlets are seared until golden brown on both sides and cooked through to 165°F (74°C). The pan has browned bits that will flavor the sauce.
Build the Sauce
- Start the Vodka SauceReduce the heat to medium. Add the minced garlic to the same skillet and cook until fragrant, about 30 seconds. Stir in the tomato paste and cook for 1 minute, scraping up any browned bits.Look for The garlic is aromatic and the tomato paste has darkened slightly.Tip Cooking the tomato paste removes its raw taste and deepens the flavor.
- Deglaze with VodkaPour in the vodka and stir, scraping the bottom of the skillet to release any browned bits. Let it bubble for 1-2 minutes until the alcohol mostly evaporates.Look for The vodka has reduced slightly and the pan is deglazed.Tip The alcohol cooks off, leaving behind a subtle depth of flavor.
- Simmer the Cream SaucePour in the heavy cream and bring to a gentle simmer. Cook, stirring occasionally, until the sauce thickens slightly, about 3-4 minutes. Season with a pinch of salt and pepper if needed.Look for The sauce coats the back of a spoon and has a silky texture.Tip Do not let it boil hard or the cream may curdle.
The garlic is fragrant, the tomato paste has deepened in color, and the vodka has been deglazed.
The cream has been added and simmered until the sauce is slightly thickened and coats a spoon. The sauce is smooth and creamy with a hint of spice.
Finish and Serve
- Cook the PastaMeanwhile, bring a large pot of salted water to a boil. Cook the rigatoni according to package directions until al dente. Reserve 1/2 cup of pasta water, then drain the pasta.Look for The rigatoni is tender but still has a slight bite.Tip Reserve pasta water before draining to adjust the sauce consistency.
- Combine Pasta and CheeseAdd the drained rigatoni to the skillet with the sauce. Sprinkle in the grated pecorino and parmigiano, and toss everything together until the cheese melts and the pasta is evenly coated. Add a splash of pasta water if the sauce is too thick.Look for The cheese has melted into a creamy sauce that clings to the pasta.Tip Toss gently to coat without breaking the pasta.
- Serve with ChickenSlice the seared chicken cutlets and place them on top of the pasta. Serve immediately, lifting a steaming cheesy scoop for each plate.Look for The chicken is juicy and the pasta is glossy with sauce.Tip For extra cheese, pass more grated cheese at the table.
The rigatoni is cooked al dente and tossed with the sauce and grated cheeses until melted and glossy. The chicken cutlets are sliced and placed on top. The pasta is creamy, cheesy, and steaming, with golden chicken ready to serve.
Common mistakes
Avoid overcooking the chicken, which makes it dry and tough. Use a meat thermometer to ensure it reaches 165°F (74°C) but no higher. Do not let the cream sauce boil aggressively, or it may curdle.
When adding the cheese, remove the skillet from the heat to prevent it from separating. Also, be sure to season the pasta water well; it’s the only chance to flavor the pasta itself.
How to tell it’s done
The chicken is done when it reaches an internal temperature of 165°F (74°C) and the juices run clear. The sauce should be thick enough to coat the back of a spoon but still pourable.
The pasta should be al dente, with a slight bite in the center. When tossed with the cheese, the sauce should cling to the rigatoni without being dry or runny.
- Poultry: 165°F (74°C) in the thickest part
Up next · Part 3 of 3
4 variations · storage & make-ahead · 5 answers · printable card
Tips, FAQ & printable recipe (Part 3)← Back to the ingredients (Part 1)