Dinner · Part 2 of 3: Instructions
Garlic Parmesan Chicken Meatloaf for a Quick and Juicy Dinner Step-by-step instructions
- Prep
- Cook
- Total
- Serves
- 6
Before you start
Before beginning the cooking process, ensure that all ingredients are measured and ready to use. Preheat the oven to 375°F (190°C) well in advance so it reaches the correct temperature before the meatloaf is inserted.
Prepare the loaf pan by lightly greasing it with oil or non-stick spray to prevent sticking. Having the garlic minced and the cheese grated ahead of time will make the assembly process smooth and efficient, allowing for a stress-free cooking experience in the kitchen.
Ingredients at a glance (6)
- 2 lb ground chicken
- 1/2 cup parmesan cheese, grated
- 3 cloves garlic, minced
- 1 cup marinara sauce
- 1 cup mozzarella cheese, shredded
- 2 tbsp fresh parsley, chopped
Instructions
Mixing the Base
- Prepare the meatloaf mixtureIn a large mixing bowl, combine the ground chicken, grated parmesan cheese, and minced garlic. Mix until well incorporated, then shape the mixture into a loaf and place it into a greased loaf pan.Look for The mixture should be uniform and easy to handle without being overly sticky.Tip Avoid overworking the meat to ensure the finished texture remains light and tender.
The mixture should be well combined with the garlic and parmesan evenly distributed. The texture should feel slightly tacky but cohesive enough to hold its shape when formed into a loaf. Ensure the garlic is minced finely so there are no large chunks that could affect the texture.
Baking the Loaf
- Bake the meatloafPlace the loaf pan into an oven preheated to 375°F (190°C). Bake until the chicken is cooked through to an internal temperature of 165°F (74°C).Look for The loaf should be firm and golden brown on the surface.Safe temperature 165°F (74°C) internal temperature (poultry)Tip Check the temperature at the thickest part of the meatloaf.
The meatloaf should be baked until it is firm to the touch and reaches the safe internal temperature.
It should look browned on the outside and smell savory from the cooking garlic and parmesan. It is crucial that the center is fully cooked through before adding the final toppings.
Topping and Finishing
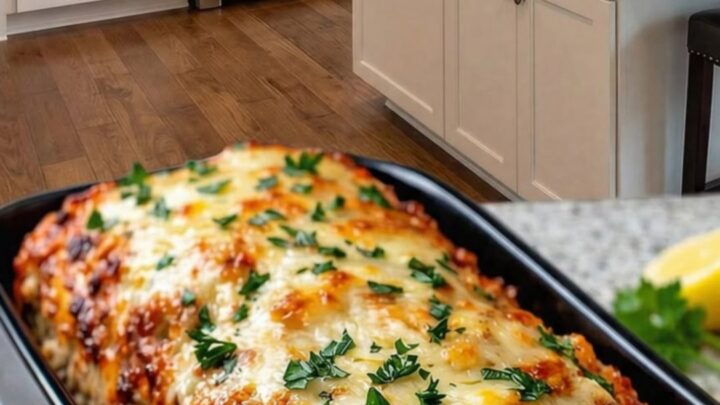
- Apply toppings and finishRemove the pan from the oven. Spread the marinara sauce evenly over the top of the baked loaf, then sprinkle with shredded mozzarella cheese. Return to the oven until the cheese is melted and bubbling. Garnish with fresh parsley before serving.Look for The cheese should be completely melted and slightly browned in spots.Tip Let the meatloaf rest for ten minutes before slicing so it holds its shape.
The marinara should be heated through and the mozzarella cheese should be fully melted and bubbling. The edges of the cheese may show slight browning, which adds a pleasant texture. Garnish with the fresh parsley immediately before serving to ensure it stays bright and flavorful.
Common mistakes
A common mistake is over-mixing the chicken, which can lead to a tough or rubbery texture. Handle the mixture just enough to combine the ingredients evenly. Another error is failing to reach the proper internal temperature, which impacts both safety and texture.
Ensure the thermometer is placed in the thickest part of the loaf. Finally, do not skip the resting period, as cutting into the loaf too soon will cause it to lose its juices and fall apart on the plate.
How to tell it’s done
The meatloaf is considered fully cooked when it reaches an internal temperature of 165°F (74°C). Use a meat thermometer inserted into the center of the loaf to verify this. The texture should be firm but tender when sliced, and the juices should run clear.
If the loaf is still soft or the temperature is below the required threshold, return it to the oven for a few more minutes. Always allow the meatloaf to rest for at least ten minutes after removing it from the oven.
- Poultry: 165°F (74°C) in the thickest part
Up next · Part 3 of 3
2 variations · storage & make-ahead · 3 answers · printable card
Tips, FAQ & printable recipe (Part 3)← Back to the ingredients (Part 1)