Dinner · Part 2 of 3: Instructions
Garlic Herb Roast Pork with Baby Potatoes in One Pan Step-by-step instructions
- Prep
- Cook
- Total
- Serves
- 6
Before you start
Set yourself up before the oven goes on. Take the pork loin roast out of the refrigerator up to 30 minutes ahead so it loses the chill and roasts evenly; keep it in the refrigerator if you need longer than that.
Gather paper towels, a carving board, a sharp knife, a large mixing bowl, and an instant-read thermometer. Halve the baby potatoes and mince the garlic, chop the rosemary and thyme, and measure the oil, salt, and pepper into easy reach.
Ingredients at a glance (8)
- 3 lb boneless pork loin roast, at room temperature for 30 minutes
- 1 1/2 lb baby potatoes, halved
- 1/4 cup olive oil
- 8 cloves garlic, minced
- 1 tbsp chopped fresh rosemary
- 1 tbsp chopped fresh thyme
- 2 tsp kosher salt
- 1 tsp freshly ground black pepper
Instructions
Season and coat
- Dry and salt the porkPat the pork loin roast completely dry on every side with paper towels, then set it on a carving board. Sprinkle the kosher salt and black pepper evenly over the surface, pressing gently so the seasoning adheres. A dry surface is what lets the herb crust grip and brown instead of steaming in its own moisture.Look for The surface looks matte and dry, with no damp shine anywhere on the roast.Tip Take the roast out of the refrigerator up to 30 minutes before cooking so it roasts evenly from edge to center.
- Mix the garlic herb pasteIn a small bowl, stir the olive oil, minced garlic, chopped rosemary, and chopped thyme into a fragrant, spoonable paste. Let it sit for a few minutes so the garlic flavors the oil. This paste does double duty: it seasons the pork crust and coats the potatoes as they roast.Look for The oil turns pale green flecked with garlic and smells strongly of rosemary and thyme.Tip Chop the garlic finely and evenly; large pieces burn in a hot oven and turn bitter.
- Coat the pork and potatoesRub about two-thirds of the garlic herb paste all over the salted pork, working it into every crevice. In a large mixing bowl, toss the halved baby potatoes with the remaining paste until each piece glistens. Keep the two apart for now so the potatoes can hit the hot pan and crisp on their cut sides.Look for The roast is evenly coated in a dark green flecked layer, and no bare potato halves remain in the bowl.Tip Halve the potatoes to similar sizes so they finish roasting at the same moment as the pork.
By the end of the first phase, the roast should look completely dry and evenly coated in a dark green, flecked paste, with no bare patches of pale pork showing through. The potatoes should glisten with the same herb oil, each half cut side ready for the pan.
The kitchen should smell sharply of raw garlic and rosemary when you lean over the bowls. Check that the salt and pepper were applied before the paste, since the paste alone will not season the meat deeply.
Roast together
- Heat the oven and start the roastHeat the oven to 425°F (220°C). Place the coated pork loin roast fat side up in a metal roasting pan and slide it onto the lower-middle rack. Roasting fat side up lets the melting fat baste the meat as it cooks. Set a timer for 30 minutes and leave the oven door closed.Look for After 30 minutes the top is lightly golden and the pan is starting to sizzle and smell of garlic.Tip Position the rack in the lower-middle so the roast browns without the herbs scorching on top.
- Add the potatoes to the panPull the pan out carefully and scatter the coated baby potatoes around the roast in a single layer, cut sides down. Return the pan to the oven. The potatoes roast in the pork drippings and herb oil, picking up golden edges and garlic flavor while the meat finishes cooking through.Look for The potatoes sit in one snug layer, each touching the pan surface, not stacked on top of each other.Tip Cut sides down means maximum contact with the hot pan, which is where the crispiest edges come from.
- Roast to a safe temperatureContinue roasting for another 35 to 45 minutes, until an instant-read thermometer inserted into the thickest part of the pork reads 145°F (63°C). The potatoes should be deep golden and tender when pierced. Once the temperature is reached, the pork is cooked through and must rest for at least 3 minutes before carving. If the potatoes finish early, lift them out with tongs and keep them warm while the pork finishes.Look for The thermometer reads 145°F (63°C), the juices run clear, and the crust is deep golden brown.Safe temperature 145°F (63°C) internal temperature (steaks, chops and roasts)Tip Check the temperature in two spots; the thick end always lags behind the thin tip of the roast.
At the end of the roasting phase, the pan should sound like a quiet sizzle when you bring it to the counter, and the smell of roasted garlic and pork fat should fill the kitchen. The crust should be deep golden brown, and the potatoes deep gold with crisp-looking cut sides. The decisive check is the thermometer: 145°F (63°C) in the thickest part of the roast, checked in two spots because the thick end lags behind.
Rest, carve, plate
- Rest the roastTransfer the pork to a clean carving board and let it rest for at least 3 minutes, ideally 10, loosely tented with foil. Resting lets the juices settle back into the meat instead of running onto the board with the first cut. Leave the potatoes in the warm pan so they stay crisp until serving.Look for The surface of the roast looks slightly relaxed and a faint glisten of juice appears where it rests.Tip Tent loosely; sealing the foil tight traps steam and softens the herb crust you worked for.
- Carve into thick slicesUsing a sharp carving knife, slice the roast into thick, even pieces about 3/4 inch wide, cutting across the grain. The exterior should show a dark herb crust and the interior a pale, juicy pink. Lift each slice with tongs so the crust stays intact on the plate.Look for Slices hold their shape, glisten with juice, and show an even color from edge to center.Tip A long, thin slicing knife glides through the crust; a short blade drags and tears it.
- Plate with the potatoesArrange the carved slices on warm plates with a generous spoonful of roasted baby potatoes alongside. Spoon any pan juices left in the roasting pan over the pork just before it reaches the table. Serve right away while the crust is crisp and the potatoes are still hot from the oven.Look for Steam rises from the plates, the crust glistens, and the potatoes look deep gold with crisp edges.Tip Warm plates in a low oven for a few minutes first; cold plates dull the crust quickly.
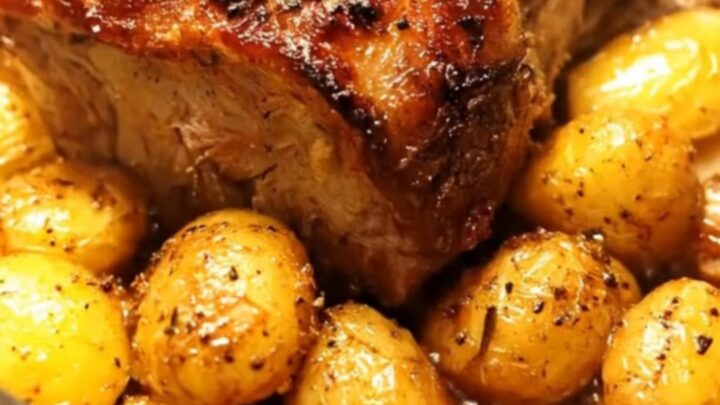
The final phase ends with a roast that slices cleanly into thick pieces, each showing a dark crust outside and a pale, juicy interior with a faint blush at the center. The board should be wet with only a little juice, not a puddle, which tells you the resting did its job.
The potatoes should still be hot and crisp-edged from the pan. Before plating, look at the slices: if juice floods out of the meat at the first cut, the rest was too short.
Common mistakes
The most common mistake is overcooking pork loin out of old habit; at 160°F it turns chalky, so trust the thermometer and pull at 145°F (63°C). Skipping the drying step is the second: a wet surface steams instead of browning, and the herb crust never forms. Crowding the potatoes on top of each other traps steam and gives you soft, pale halves instead of crisp ones, so keep them in a single layer.
How to tell it’s done
The roast is done when an instant-read thermometer inserted into the thickest part of the pork reads 145°F (63°C), the safe internal temperature for whole cuts of pork, with a rest of at least 3 minutes afterward.
Visually, the crust should be deep golden with visible flecks of roasted garlic and herb, and the juices should run clear, not pink. The potatoes are done when their cut sides are deep gold and a fork or the tip of a knife slides into the center with no resistance.
- Steaks, chops and roasts: 145°F (63°C) in the thickest part, then a 3-minute rest
Up next · Part 3 of 3
4 variations · storage & make-ahead · 5 answers · printable card
Tips, FAQ & printable recipe (Part 3)← Back to the ingredients (Part 1)