Dinner · Part 2 of 3: Instructions
Garlic Herb Honey Hickory Beef Short Ribs: Slow-Cooker Dump Dinner Step-by-step instructions
- Prep
- Cook
- Total
- Serves
- 4
Before you start
Before you start, take the short ribs out of the refrigerator and let them sit at room temperature for about 30 minutes. This helps them cook more evenly. Smash the garlic cloves with the flat side of a chef's knife, and rinse the rosemary sprigs and pat them dry.
Measure the barbecue sauce. You do not need to sear the ribs—the slow cooker does all the work—but you can pat them dry with paper towels to help the sauce adhere.
Ingredients at a glance (4)
- 4 lb bone-in English-cut beef short ribs
- 10 cloves garlic, smashed
- 4 sprigs fresh rosemary
- 2 cups honey hickory barbecue sauce
Instructions
Layer and Sauce
- Layer the Ribs and AromaticsPlace the beef short ribs in the bottom of a 6-quart slow cooker in a single layer, overlapping slightly if needed. Scatter the smashed garlic cloves and fresh rosemary sprigs evenly over the ribs, tucking some garlic under the meat for even flavor.Look for The ribs should cover the bottom of the insert; the garlic and rosemary should be evenly distributed.Tip Smashed garlic releases more flavor than whole cloves; use the flat side of a chef's knife to crush each clove lightly.
- Pour the Sauce Over EverythingPour the honey hickory barbecue sauce over the ribs, using a spatula to spread it into an even coating. Make sure the sauce reaches the sides of the slow cooker and covers the top surface of the meat.Look for The ribs are fully coated in a thick, glossy layer of sauce.Tip Do not stir; the sauce will mingle with the meat juices as it cooks.
You have placed the ribs in the slow cooker, scattered the garlic and rosemary over them, and poured the sauce on top. The ribs should be evenly coated, and the garlic and rosemary should be visible between the pieces.
The sauce should cover the surface of the meat, but it does not need to submerge it completely—the meat will release juices as it cooks.
Slow Cook
- Cook Low and SlowCover the slow cooker and cook on low for 8 hours, or until the meat is fork-tender and easily pulls away from the bone. Avoid opening the lid during cooking to keep the heat steady. Let it rest for 3 minutes before slicing.Look for The sauce is bubbling gently around the edges and the meat has pulled back from the bone.Safe temperature 145°F (63°C) internal temperature (steaks, chops and roasts)Tip Low heat is key; high heat can make the meat tough instead of tender.
- Check for TendernessTest the ribs with a fork: the meat should shred easily and the bone should slide out cleanly. If not tender, continue cooking for another 30 minutes and check again. Let it rest for 3 minutes before slicing.Look for The meat yields easily to the fork and the bone is loose.Safe temperature 145°F (63°C) internal temperature (steaks, chops and roasts)Tip For extra-thick ribs, the cooking time may extend to 9 hours.
After 8 hours on low, the kitchen smells like a barbecue. The sauce is bubbling gently around the edges, and the meat has visibly pulled back from the bones. When you press the meat with a fork, it feels soft and yielding. The sauce has darkened and thickened slightly. Check that the meat is fork-tender before moving on.
Rest and Serve
- Rest the RibsTurn off the slow cooker and let the ribs rest in the sauce for 10 minutes. This allows the juices to redistribute and the meat to set slightly for easier handling.Look for The sauce has settled and the meat is glistening.Safe temperature 145°F (63°C) internal temperature (steaks, chops and roasts)Tip Resting is essential for whole-cut meat; it keeps the ribs moist.
- Serve the RibsUsing a carving fork, lift each rib out of the sauce, letting the excess drip back into the slow cooker. Place the ribs on a serving platter or individual plates. Spoon a little extra sauce over the top if desired.Look for The ribs are glistening and the sauce is thick and caramelized.Tip Serve with a side of the extra sauce for dipping.
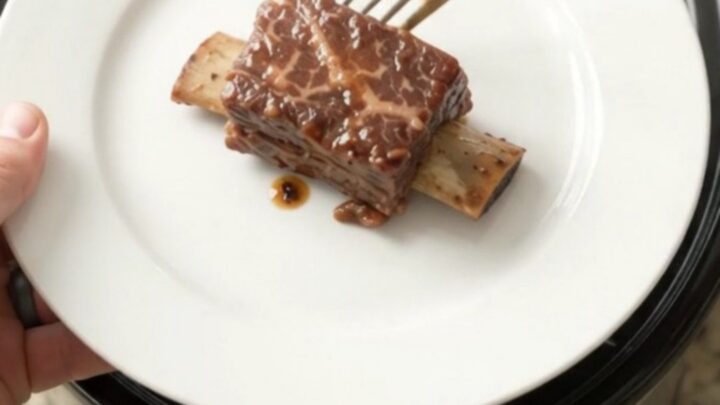
After resting, the ribs are glistening and the sauce is thick enough to cling to the meat. When you lift a rib with a fork, the meat stays on the bone but is clearly falling-apart tender. The garlic has softened into a sweet, spreadable confit, and the rosemary leaves have wilted into the sauce. Serve hot, with extra sauce spooned over.
Common mistakes
A common mistake is lifting the lid too often to check on the ribs. Every time you open the slow cooker, heat escapes and adds up to 20 minutes of extra cooking time.
Another mistake is using a barbecue sauce that is too thin; it will not caramelize properly. Stick with a thick, high-quality sauce. Finally, do not skip the rest time after cooking—it helps the meat hold together when you lift it out of the pot.
How to tell it’s done
The ribs are done when the meat is fork-tender and easily pulls away from the bone. Insert a fork into the thickest part of the meat and twist; it should shred with little resistance.
The internal temperature should read at least 145°F (63°C) for food safety, but because of the long, slow cook, it will likely be much higher and the meat will be falling apart. Let the ribs rest in the sauce for 10 minutes before serving to allow the juices to redistribute.
- Steaks, chops and roasts: 145°F (63°C) in the thickest part, then a 3-minute rest
Up next · Part 3 of 3
4 variations · storage & make-ahead · 5 answers · printable card
Tips, FAQ & printable recipe (Part 3)← Back to the ingredients (Part 1)