Dinner · Part 2 of 3: Instructions
Garlic Butter Steak Bites and Potatoes in One Cast-Iron Skillet Step-by-step instructions
- Prep
- Cook
- Total
- Serves
- 4
Before you start
Before turning on the heat, gather and prepare all your ingredients to ensure a smooth cooking process. Dice the potatoes into uniform half-inch cubes so they cook evenly. Mince the garlic finely and cut the steak into one-inch cubes.
Use paper towels to thoroughly pat the steak cubes completely dry; any moisture on the surface of the meat will create steam, preventing a proper sear. Measure out the butter so it is ready to go when needed.
Ingredients at a glance (4)
- 1 1/2 lbs steak, cut into 1-inch cubes
- 1 lb potatoes, diced
- 6 tbsp butter, divided
- 4 cloves garlic, minced
Instructions
Searing the Potatoes to Golden Perfection
- Prep the IngredientsUse paper towels to pat dry the steak cubes and diced potatoes thoroughly. Ensure they are completely dry to achieve a perfect sear and crispy edges when they hit the hot skillet.Look for The potatoes and steak should be completely dry before cooking.Tip Drying the ingredients prevents steaming in the hot pan.
- Cook the PotatoesHeat a cast-iron skillet over medium-high heat and melt 2 tablespoons of butter. Add the diced potatoes in a single layer. Cook, stirring occasionally, for 10 to 12 minutes until they are fork-tender and beautifully golden brown. Remove the potatoes from the skillet and set aside on a plate.Look for Look for a deep golden brown crust on all sides of the potatoes.Tip Avoid stirring too often so the potatoes can develop a nice crust.
At the end of this first phase, the diced yellow potatoes should be beautifully browned and crispy on the outside, with a fork-tender, creamy interior.
You will hear a steady sizzling sound as they cook in the skillet, and the kitchen will fill with the comforting aroma of roasted potatoes. Check that they slide easily off the spatula before transferring them to a plate.
Achieving a Deep, Caramelized Sear on the Steak
- Sear the Steak BitesMelt another 2 tablespoons of butter in the hot skillet over high heat. Add the steak bites in a single, uncrowded layer. Sear without moving for 2 minutes to develop a rich, caramelized crust, then flip and cook for another 2 minutes.Look for A dark brown caramelized crust should form on the bottom of the steak bites before flipping.Tip Sear in batches if your skillet is not large enough to keep space between the pieces.
As the steak bites sear, you should hear a loud, aggressive sizzle. A deep, dark brown crust should form on the bottom of the meat before you flip them. The steak cubes will release easily from the skillet surface once a proper crust has developed. The aroma of caramelized beef should be intense and savory.
Infusing with Foaming Garlic Butter
- Create the Garlic Butter SauceReduce the heat to medium-low. Add the remaining 2 tablespoons of butter and the minced garlic to the skillet with the steak, stirring constantly for about 1 minute until the butter is foaming and the garlic is fragrant.Look for The butter should be bubbling and foaming, and the garlic should smell fragrant without turning dark brown.Tip Stir continuously to prevent the garlic from burning.
- Combine and FinishReturn the cooked potatoes to the skillet. Toss everything together to coat the steak and potatoes in the rich garlic butter. Cook for 1 to 2 minutes until heated through. Ensure the steak reaches an internal temperature of 145°F (63°C). Remove from the heat and let the meat rest in the pan for 3 minutes before serving.Look for The dish is ready when the potatoes are hot and everything is glossy with garlic butter.Safe temperature 145°F (63°C) internal temperature (steaks, chops and roasts)Tip Letting the steak rest for 3 minutes keeps the juices locked inside.
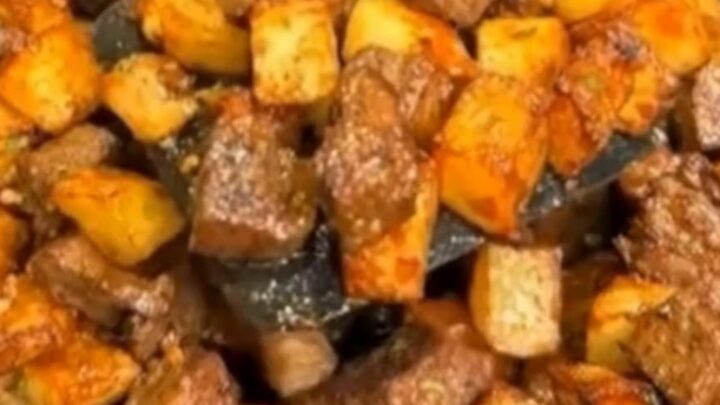
In this final phase, the butter will foam and bubble rapidly in the skillet, turning a light golden color. The minced garlic will become highly fragrant within seconds, without turning dark brown or bitter. When the potatoes are tossed back in, they should glisten with the melted butter, and the entire dish will look cohesive, glossy, and incredibly appetizing.
Common mistakes
One of the most common mistakes is crowding the skillet when cooking the steak bites. If the meat is packed too tightly, the moisture released will steam the beef instead of searing it, resulting in a tough, gray texture.
Cook the steak in batches if your skillet is not large enough to keep space between the pieces. Another frequent error is burning the garlic; garlic cooks very quickly and bitter burnt garlic can ruin the entire dish. Always lower the heat before adding the butter and garlic, and stir constantly.
How to tell it’s done
To ensure the steak is perfectly cooked and safe to eat, use an instant-read digital meat thermometer. The steak bites are done when they reach an internal temperature of 145°F (63°C) for a medium doneness.
Once this temperature is reached, remove the skillet from the heat source and let the meat rest for at least 3 minutes. This resting period is critical as it allows the delicious juices to redistribute throughout the steak bites, ensuring every piece remains tender and succulent.
- Steaks, chops and roasts: 145°F (63°C) in the thickest part, then a 3-minute rest
Up next · Part 3 of 3
3 variations · storage & make-ahead · 4 answers · printable card
Tips, FAQ & printable recipe (Part 3)← Back to the ingredients (Part 1)