Dinner · Part 2 of 3: Instructions
Garlic Butter Roasted Chicken Thighs with Crispy Skin Step-by-step instructions
- Prep
- Cook
- Total
- Serves
- 4
Before you start
Before beginning the cooking process, organize your workspace and gather all ingredients to ensure a smooth workflow. Remove the chicken thighs from the refrigerator about twenty to thirty minutes prior to roasting to take the chill off, which helps them cook more evenly.
Thoroughly pat the skin of each chicken thigh dry using paper towels, as removing surface moisture is the absolute key to achieving ultra-crispy skin. Melt the butter in a small bowl, mince the garlic cloves finely, and measure out your fresh rosemary sprigs so everything is ready for assembly.
Ingredients at a glance (4)
- 4 bone-in, skin-on chicken thighs (approx. 2 lbs)
- 4 sprigs fresh rosemary
- 4 tbsp unsalted butter, melted
- 4 cloves garlic, minced
Instructions
Preparation and Drying
- Dry the ChickenPreheat your oven to 400°F (200°C). Pat the chicken thighs completely dry with paper towels to remove all surface moisture. Place the dried chicken thighs skin-side up in a dark baking pan or a large cast-iron skillet, ensuring there is space between each piece to allow proper air circulation.Look for The chicken skin should feel dry and have a matte appearance before roasting.Tip Do not skip patting the chicken dry; moisture is the enemy of crispy skin.
At the end of this initial preparation phase, the chicken thighs should be completely dry to the touch. They should sit neatly spaced in the baking pan, skin-side up, with enough room between them to allow hot air to circulate.
The oven should be fully preheated to the correct temperature, and the pan is prepared for roasting. This careful setup ensures that the dry skin can begin rendering its fat immediately once exposed to the high heat of the oven.
Initial Roasting and Herb Infusion
- Add Rosemary and Begin RoastingPlace the baking pan in the preheated oven and roast the chicken thighs for twenty-five minutes. During the last five minutes of this roasting period, scatter the fresh rosemary sprigs around the chicken thighs directly into the pan juices. The rosemary will begin to sizzle and release its aromatic oils into the rendered chicken fat, infusing the meat with flavor.Look for The chicken skin should start to turn pale gold and the rosemary should sizzle.Tip Tuck the rosemary sprigs slightly under the chicken to prevent them from burning too quickly.
At the end of this roasting phase, the chicken skin will begin to render its fat, turning a light golden color and starting to firm up. The fresh rosemary sprigs nestled in the pan will sizzle gently in the rendered chicken juices, releasing a deep, piney, and woody herbal aroma that fills the kitchen. The kitchen should smell intensely of roasted poultry and toasted herbs, signaling that the chicken is ready for the butter basting.
Garlic Butter Basting and Crisp Finishing
- Baste with Garlic Butter and FinishIn a small bowl, combine the melted butter and minced garlic. Carefully remove the pan from the oven and brush the garlic butter mixture generously over the chicken thighs, ensuring the minced garlic is distributed evenly on the skin. Return the pan to the oven and roast for an additional fifteen minutes, or until the skin is blistered and golden-brown, and the internal temperature reaches 165°F (74°C). Allow the chicken to rest for five minutes in the pan before serving.Look for The skin should be ultra-crispy, crackling when scraped, and golden-brown.Safe temperature 165°F (74°C) internal temperature (poultry)Tip Spoon the collected pan juices over the chicken right before serving for extra richness.
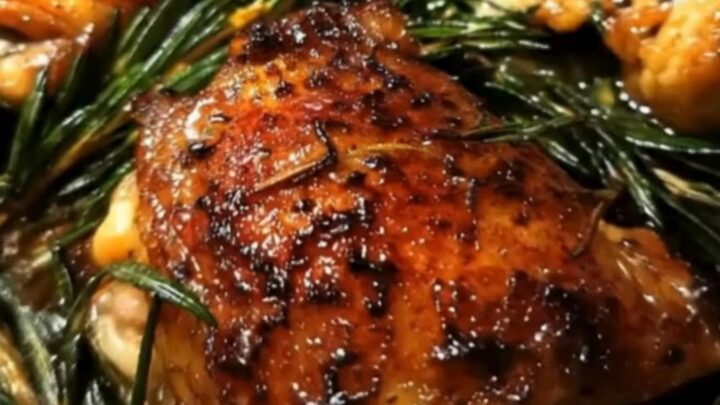
By the end of this final phase, the chicken thighs will sport a gorgeous, deeply blistered, golden-brown skin that crackles when scraped with a knife. The minced garlic in the butter will be beautifully toasted and fragrant without being burnt, and the rosemary will be crisp. A rich, bubbling steam will rise from the pan, carrying the irresistible scent of caramelized garlic, melted butter, and roasted chicken.
Common mistakes
One of the most common mistakes when roasting chicken thighs is overcrowding the baking pan. If the thighs are packed too tightly together, they will steam instead of roast, resulting in soft, rubbery skin rather than a crispy texture. Always leave at least an inch of space between each piece of chicken.
Another frequent error is applying the garlic butter too early in the cooking process. Garlic burns easily under high heat, so brushing it on during the final fifteen minutes ensures the garlic toasts perfectly and releases its sweet, savory flavor without turning bitter or black.
How to tell it’s done
To accurately determine the doneness of the chicken thighs, always use an instant-read meat thermometer inserted into the thickest part of the thigh, making sure not to touch the bone. Chicken thighs are safe to eat when they reach an internal temperature of 165°F (74°C).
However, because thighs contain a high amount of connective tissue, they actually become more tender and flavorful when cooked to an internal temperature of 175°F (79°C) to 180°F (82°C), which allows the collagen to fully break down while the meat remains incredibly juicy.
- Poultry: 165°F (74°C) in the thickest part
Up next · Part 3 of 3
2 variations · storage & make-ahead · 4 answers · printable card
Tips, FAQ & printable recipe (Part 3)← Back to the ingredients (Part 1)