Dinner · Part 2 of 3: Instructions
Garlic Butter Ribeye Steak with Rosemary Step-by-step instructions
- Prep
- Cook
- Total
- Serves
- 2
Before you start
Before beginning, ensure the ribeye steaks are brought out of the refrigerator about 30 minutes prior to cooking to reach a cooler room temperature. This helps the meat cook more evenly throughout. Ensure the cast iron skillet is clean and dry.
Prepare the garlic by smashing it with the flat side of a knife and have the rosemary sprigs ready. Keep a pair of long-handled tongs ready to safely turn the meat and manage the basting process without splashing hot butter.
Ingredients at a glance (4)
- 2 pieces ribeye steak, about 1-inch thick
- 3 tbsp unsalted butter
- 3 cloves garlic, smashed
- 2 sprigs fresh rosemary
Instructions
High Heat Searing
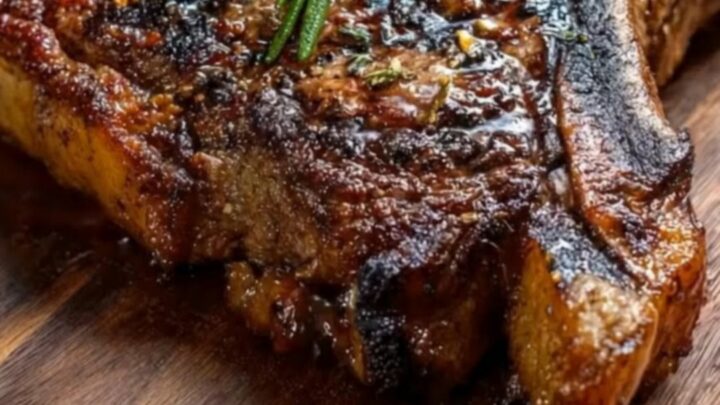
- Sear the SteaksHeat a heavy cast iron skillet over high heat until smoking. Carefully place the steaks in the hot pan and sear until a deep brown crust develops, about 3 to 4 minutes per side.Look for The steak should have a deep mahogany-brown crust on the surface.Tip Ensure the pan is very hot before adding the meat for the best sear.
The steak should be dark brown and crusted on the outside after searing. Ensure you have achieved a uniform color across the entire surface before moving on to the basting phase. If the steak is pale or gray, the pan was not hot enough or the surface was too moist before it entered the skillet.
Aromatic Basting
- Baste with AromaticsReduce the heat to medium. Add the butter, smashed garlic cloves, and fresh rosemary sprigs to the pan. Once the butter is melted and foaming, tilt the pan slightly and use a large spoon to continuously baste the steaks until they reach an internal temperature of 145°F (63°C). Once done, remove from the pan and let the meat rest at least 3 minutes.Look for The butter should be foaming and smell intensely of toasted garlic and rosemary.Safe temperature 145°F (63°C) internal temperature (steaks, chops and roasts)Tip Basting helps cook the interior evenly while infusing the meat with flavor.
The butter should be golden and foaming, with the garlic and rosemary softening and releasing their fragrance. The butter will turn a nutty brown color as it cooks.
Ensure the butter reaches all sides of the steak during the basting process to fully incorporate the aromatics and achieve a consistent finish.
Final Resting and Slicing
- Slice and ServeTransfer the rested steaks to a cutting board. Slice the steak against the grain into thick pieces. This allows the juices to remain within the meat, ensuring every bite remains moist and tender when served.Look for The juices should settle, and the steak will be firm to the touch.Tip Do not skip the resting time, as it is essential for the texture.
The steak must rest undisturbed on a cutting board for at least 3 minutes. During this time, the juices stabilize within the meat fibers. The exterior should remain warm, and the internal temperature will reach its target. If you cut into the steak too early, the juices will escape, leaving the meat dry.
Common mistakes
A common mistake is overcrowding the pan, which lowers the temperature and causes the meat to steam instead of sear. Always cook in batches if necessary to maintain high heat.
Another mistake is forgetting to pat the surface of the steak dry before adding it to the pan; excess moisture prevents the formation of a good crust. Finally, rushing the resting period will result in juices running out the moment the steak is sliced, which leads to a drier, less flavorful piece of meat.
How to tell it’s done
To check for doneness, use an instant-read meat thermometer inserted into the thickest part of the steak. Aim for an internal temperature of 145°F (63°C) for a medium-rare to medium finish.
The steak should feel firm yet yielding when pressed with a finger. Remember that the temperature will continue to rise slightly while the meat rests on the cutting board, which is why it is important to remove it from the heat at the appropriate time.
- Steaks, chops and roasts: 145°F (63°C) in the thickest part, then a 3-minute rest
Up next · Part 3 of 3
2 variations · storage & make-ahead · 3 answers · printable card
Tips, FAQ & printable recipe (Part 3)← Back to the ingredients (Part 1)