Dinner · Part 2 of 3: Instructions
Garlic Butter Chicken with Creamy Parmesan Spaghetti Step-by-step instructions
- Prep
- Cook
- Total
- Serves
- 4
Before you start
Before starting the cooking process, carefully organize the entire workspace to ensure a smooth, efficient flow. Slice the chicken breasts into even cutlets, pat them dry with paper towels, and apply the seasoning mixture.
Mince the fresh garlic cloves and finely grate the parmesan cheese so they are ready to go immediately. Fill a large pot with water and set it on the stove to boil, keeping all measured ingredients within arm's reach of the cooktop to prevent any delays while cooking.
Ingredients at a glance (7)
- 12 oz spaghetti
- 1 1/2 lb boneless, skinless chicken breasts, sliced horizontally into cutlets
- 1 tbsp garlic-herb seasoning
- 4 tbsp unsalted butter
- 4 cloves garlic, minced
- 1 cup heavy cream
- 1 cup parmesan cheese, freshly grated
Instructions
Pasta Preparation
- Boil the SpaghettiBring a large pot of water to a rolling boil over high heat. Add the spaghetti and cook according to the package instructions until it reaches an al dente texture, which usually takes about 8 to 10 minutes. Drain the pasta, reserving at least one cup of the starchy cooking water for the sauce later.Look for The pasta should be tender but still have a slight bite in the center.Tip Never rinse the pasta after draining, as the natural starches help the creamy sauce cling to the noodles.
At the end of this first phase, the spaghetti should be cooked to a perfect al dente texture. The noodles will be tender but retain a firm, slightly chewy center when bitten.
The boiling water should look cloudy and starchy, which is exactly what is needed to help emulsify the sauce later, so ensure at least one cup of this valuable liquid is reserved before draining.
Searing the Chicken
- Season the ChickenPat the chicken breast cutlets dry with paper towels to ensure a good sear. Season both sides evenly with the garlic-herb seasoning. Ensure the seasoning is pressed gently into the meat so it adheres during cooking.Look for The cutlets should be evenly coated with the herb mixture.Tip Keep the chicken in the refrigerator until ready to season, and do not leave it at room temperature for more than 30 minutes.
- Sear the Chicken in Garlic ButterMelt the unsalted butter in a large skillet over medium-high heat until it is frothy. Add the minced garlic and sauté for about 30 seconds until fragrant. Carefully place the seasoned chicken cutlets into the skillet and sear for 5 to 6 minutes per side. Cook until the exterior is golden-brown and the internal temperature reaches 165°F (74°C) on a meat thermometer. Transfer the chicken to a plate to rest.Look for The chicken will develop a deep golden-brown crust and the butter will turn slightly brown.Safe temperature 165°F (74°C) internal temperature (poultry)Tip Avoid overcrowding the skillet; cook the chicken in batches if necessary to maintain a high heat for searing.
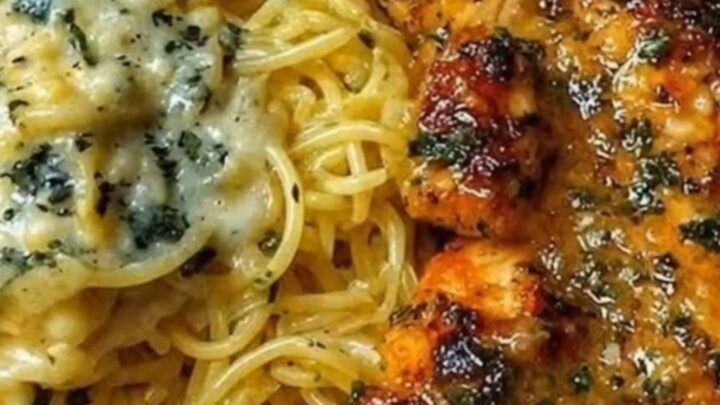
The chicken cutlets should emerge from the skillet with a beautiful, deep golden-brown crust, glistening with caramelized garlic butter. The kitchen will be filled with an incredibly rich, savory aroma.
When tested with a meat thermometer, the thickest part of the chicken must read exactly 165°F (74°C) to ensure it is completely safe to eat while remaining tender and juicy.
Sauce Emulsification and Assembly
- Simmer the Cream and CheeseReduce the skillet heat to medium. Pour the heavy cream into the same skillet, scraping up any browned bits from the bottom with a wooden spoon. Bring the cream to a gentle simmer and let it cook for 2 minutes. Stir in the freshly grated parmesan cheese until it melts completely into the sauce.Look for The sauce will thicken slightly and become smooth and uniform.Tip Using freshly grated parmesan cheese instead of pre-packaged cheese ensures a smooth, lump-free sauce.
- Toss the SpaghettiAdd the drained spaghetti directly into the simmering cream sauce. Toss the pasta continuously for 1 to 2 minutes until every strand is thoroughly coated. If the sauce is too thick, splash in a little of the reserved pasta cooking water to reach your desired consistency.Look for The pasta should look glossy and be fully coated in the velvety sauce.Tip Stir gently to avoid breaking the spaghetti noodles while tossing.
- Combine and ServeSlice the rested garlic butter chicken cutlets into strips. Arrange the warm, creamy parmesan spaghetti on serving plates and place the sliced chicken cutlets right alongside or on top of the pasta. Serve immediately while the dish is hot and steaming.Look for The steam rising from the hot, creamy pasta and the golden chicken creates an inviting presentation.Tip Garnish with a little extra grated parmesan or chopped fresh herbs if desired.
The final checkpoint reveals a glossy, cohesive dish where the spaghetti is completely enveloped in a velvety, smooth cream and parmesan sauce. There should be no separation of oil or liquid in the pan. The sliced garlic-herb chicken cutlets sit proudly alongside the steaming pasta, ready to be served immediately while the sauce is at its creamiest.
Common mistakes
One of the most common mistakes is discarding all of the pasta cooking water. This starchy liquid is essential for adjusting the consistency of the cream sauce and helping it bind to the noodles. Another error is cooking the chicken over heat that is too low, which steams the meat instead of searing it, resulting in a pale exterior and dry, overcooked poultry.
How to tell it’s done
To determine the perfect doneness, the chicken cutlets must reach an internal temperature of 165°F (74°C) when checked with a digital meat thermometer inserted into the thickest portion. The exterior should be deeply golden-brown and firm to the touch.
The spaghetti is done when it is al dente, meaning it is cooked through but still offers a slight, pleasant resistance when bitten, ensuring it does not become mushy when tossed in the hot cream sauce.
- Poultry: 165°F (74°C) in the thickest part
Up next · Part 3 of 3
2 variations · storage & make-ahead · 3 answers · printable card
Tips, FAQ & printable recipe (Part 3)← Back to the ingredients (Part 1)