Appetizers · Part 2 of 3: Instructions
Garlic Butter Beef Sliders on Hawaiian Rolls Step-by-step instructions
- Prep
- Cook
- Total
- Serves
- 6
Before you start
Before starting, take the ground beef out of the refrigerator to let it sit at room temperature for about 15 minutes (but no more than 30). Preheat the oven to 375°F (190°C) when you begin assembling.
Have all ingredients measured and ready: dice the onion, mince the garlic, chop the parsley, and slice the rolls horizontally if not already done. Set out a large skillet, a small saucepan, a pastry brush, and a 9x13-inch baking dish.
Ingredients at a glance (8)
- 1 lb 80/20 ground beef
- 1 diced onion
- 2 tbsp Worcestershire sauce
- 4 tbsp butter
- 2 cloves minced garlic
- 1 tbsp chopped fresh parsley
- 12 sweet Hawaiian rolls (one 12-pack)
- 12 slices sharp cheddar cheese
Instructions
Brown and Flavor
- Brown the beefHeat a large skillet over medium-high heat. Add the ground beef and diced onion. Cook, breaking up the meat with a spoon, until the beef is browned and the onion is soft, about 6 to 8 minutes. Stir in the Worcestershire sauce and cook for 1 minute more. Remove from heat and set aside.Look for Beef is browned, onions are translucent, and the pan smells savory.Safe temperature 160°F (71°C) internal temperature (ground meat)Tip Drain excess fat if the mixture looks greasy, but keep a little for flavor.
- Make the garlic herb butterIn a small saucepan over low heat, melt the butter with the minced garlic and parsley. Stir until the garlic is fragrant, about 1 to 2 minutes. Do not let the butter brown. Remove from heat.Look for Butter is melted, garlic is aromatic, and the mixture is smooth.Tip Keep the heat low so the garlic infuses without burning.
The beef should be fully browned with no pink remaining, and the onions should be soft and translucent. The Worcestershire sauce will have darkened the meat and added a savory aroma.
The garlic butter should be melted and fragrant, with the garlic softened but not browned. The kitchen will smell of toasting garlic and herbs.
Assemble and Brush
- Assemble the slidersPreheat the oven to 375°F (190°C). Slice the entire pack of Hawaiian rolls horizontally through the middle, keeping the rolls connected. Place the bottom half in a 9x13-inch baking dish. Spread the beef mixture evenly over the bottom layer. Top with the cheddar slices, covering the beef completely. Place the top half of the rolls over the cheese.Look for All 12 rolls are stacked with beef and cheese between the layers.Tip If the rolls are very tall, press down gently to fit the dish.
- Brush with garlic butterUsing a pastry brush, generously brush the entire top surface of the rolls with the garlic herb butter. Make sure to get the butter into the crevices between the rolls. Reserve a little butter for brushing after baking if desired.Look for The tops are glistening with butter and flecked with garlic and parsley.Tip Brush evenly so every roll gets a buttery crust.
The rolls should be neatly stacked with the beef layer even and the cheese covering every bit of meat. The top layer of rolls should sit flat, and the butter should be brushed on generously, coating every surface. The dish will look glossy and inviting, with bits of garlic and parsley visible on the tops.
Bake and Serve
- Bake the slidersBake the assembled sliders in the preheated oven for 15 minutes, or until the cheese is melted and the tops are golden brown. The internal temperature of the beef should reach 160°F (71°C). If the tops brown too quickly, cover loosely with foil.Look for The tops are golden, the cheese is bubbling, and the butter is sizzling.Safe temperature 160°F (71°C) internal temperature (ground meat)Tip Check the center with an instant-read thermometer to ensure doneness.
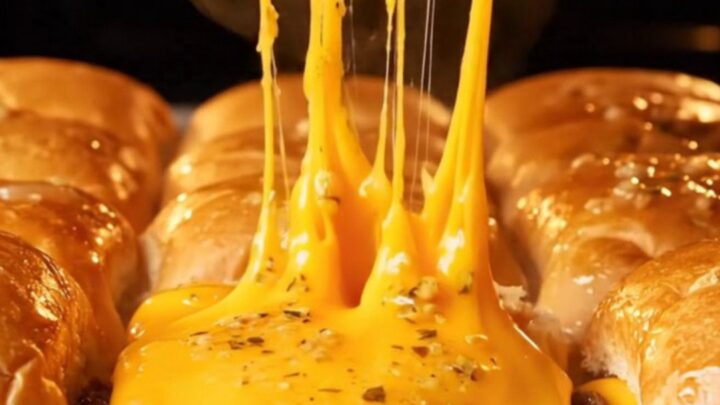
- Rest and serveRemove the baking dish from the oven and let the sliders rest for 5 minutes. Use a sharp knife to cut between the rolls to separate them. Serve warm, pulling apart the sliders to reveal the cheesy stretch.Look for The cheese stretches as the sliders are pulled apart.Tip Letting them rest helps the cheese set slightly for cleaner cuts.
The rolls should be golden brown on top, with the cheese bubbling at the edges. The butter will have created a slightly crisp, shiny crust. When pulled apart, the cheese should stretch in long ribbons. The sliders should be hot throughout, with the beef heated to at least 160°F (71°C).
Common mistakes
A common mistake is overbaking, which can dry out the rolls and make the cheese tough. Keep an eye on the oven and check at 12 minutes.
Another pitfall is not seasoning the beef well enough—the Worcestershire and onion add flavor, but you can also add a pinch of salt and pepper if you like. Also, be sure to brush the butter generously; skimping can result in dry tops.
How to tell it’s done
The sliders are done when the tops are golden brown and the cheese is fully melted and bubbly. The internal temperature of the beef should reach at least 160°F (71°C) for food safety.
If you don't have a thermometer, you can check by inserting a knife into the center—the cheese should be molten and the rolls should feel warm and slightly crisp on top. Letting the sliders rest for a few minutes makes them easier to cut and serve.
- Ground meat: 160°F (71°C) in the thickest part
Up next · Part 3 of 3
4 variations · storage & make-ahead · 5 answers · printable card
Tips, FAQ & printable recipe (Part 3)← Back to the ingredients (Part 1)