Desserts · Part 2 of 3: Instructions
Fudgy Chocolate Mug Brownie for a Quick Sweet Fix Step-by-step instructions
- Prep
- Cook
- Total
- Serves
- 1
Before you start
Before starting, ensure the mug is clean, dry, and microwave-safe. Set out the chocolate brownie batter and measure the chocolate chips so they are ready to add immediately.
Have a dessert spoon and a small white serving plate set on the counter next to the microwave. Clearing a clean work area keeps the process smooth, fast, and organized from start to finish.
Ingredients at a glance (2)
- 1 chocolate brownie batter, store-bought or made ahead
- 1 tbsp chocolate chips
Instructions
Batter placement
- Fill the mugPour the chocolate brownie batter into a microwave-safe red mug, making sure to leave at least an inch of headspace at the top so it does not overflow.Look for The batter sits evenly in the bottom of the mug without spilling over the sides.Tip Use a mug with straight sides to encourage even cooking throughout.
At the end of this phase, the batter should sit evenly in the bottom half of the mug with a smooth surface. Check that there is ample empty space above the batter so it can expand freely without spilling. Ensure no batter is smeared high along the inner rim of the mug, which could burn during heating.
Topping and heating
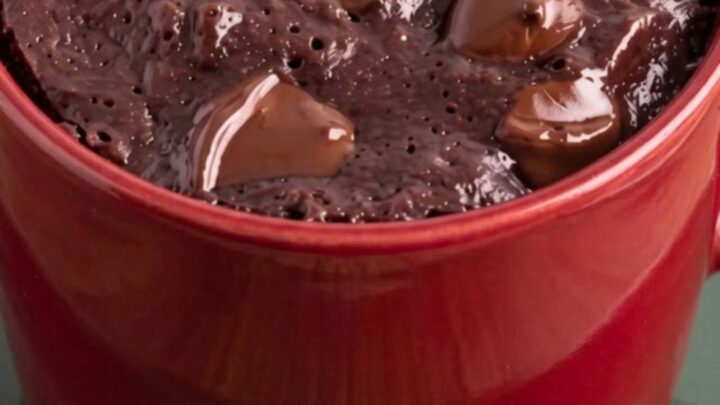
- Top with chocolate chips and microwaveScatter the chocolate chips over the top of the batter. Microwave on high power for 60 to 90 seconds until the edges are set and the chocolate chips on top begin to look glossy and melted.Look for The edges look firm while the center remains slightly soft and the top chips glisten.Tip Keep a close eye on the mug during the last 15 seconds to prevent overbaking.
Once the cooking cycle finishes, the surface of the brownie should appear puffed, with the chocolate chips melted into glossy, molten pools.
The edges should look firm while the center gives slightly when the mug is gently moved. The rich aroma of warm chocolate should fill the microwave immediately upon opening the door.
Resting and scooping
- Rest, scoop, and serveLet the mug sit for 1 minute to settle. Use a dessert spoon to scoop deeply into the warm, fudgy center, lifting a steaming portion and setting it directly onto a small white plate to serve warm.Look for Steam rises as the spoon scoops into the rich, molten center.Tip Serve immediately while the brownie is still warm and the melted chips are soft.
After resting, the brownie settles slightly, locking in its fudgy density. As the dessert spoon presses into the core, it should glide smoothly through the tender crumb, revealing a warm, steaming center that holds together on the spoon before being transferred onto the plate.
Common mistakes
The most common mistake is overcooking the brownie in the microwave, which turns the fudgy crumb into a dry, rubbery sponge within seconds. Always stop heating when the top is just set and still slightly shiny.
Another frequent misstep is failing to let the brownie rest for a minute after cooking; this short resting period allows the steam to distribute and stabilizes the delicate fudgy texture.
How to tell it’s done
The mug brownie is done when the outer edges are set and pull slightly away from the sides of the mug, while the center looks glossy and yields gently to light pressure.
Because microwave wattages differ widely, check the brownie at the 60-second mark to evaluate progress. The center should look moist and tender, not liquid, with melted chocolate chips resting on the warm surface.
Up next · Part 3 of 3
2 variations · storage & make-ahead · 3 answers · printable card
Tips, FAQ & printable recipe (Part 3)← Back to the ingredients (Part 1)