Dinner · Part 2 of 3: Instructions
French Onion Mushroom Pot Roast with Rich Gravy Step-by-step instructions
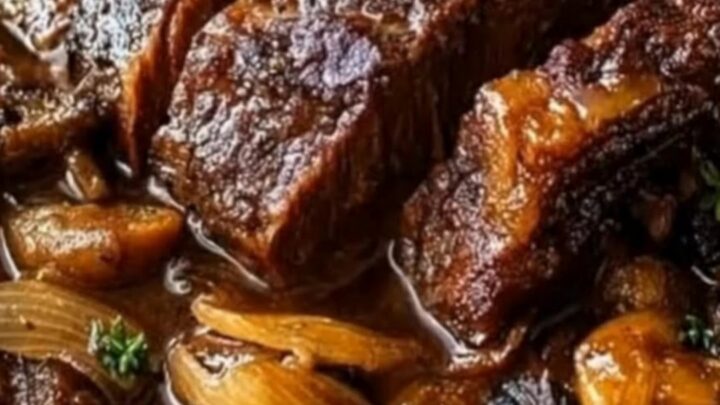
- Prep
- Cook
- Total
- Serves
- 6
Before you start
Before starting, ensure all ingredients are prepped and ready. Measure out the beef broth and dry red wine. Slice the yellow onions thinly and clean the cremini mushrooms, slicing them evenly.
Take the chuck roast out of the refrigerator about 20 to 30 minutes before cooking to take the chill off, allowing for a more even sear. Gather your heavy Dutch oven, a sturdy pair of tongs, and a wooden spoon for scraping the pan.
Ingredients at a glance (6)
- 3 lb boneless chuck roast
- 3 large yellow onions, thinly sliced
- 8 oz cremini mushrooms, sliced
- 1/2 cup dry red wine
- 2 cups beef broth
- 4 fresh thyme sprigs
Instructions
Searing the Beef and Caramelizing Vegetables
- Sear the Chuck RoastHeat a large Dutch oven over medium-high heat. Place the chuck roast directly into the hot pan. Sear the beef until a deep, golden-brown crust forms on all sides, about 4 to 5 minutes per side, letting the natural fats render. Carefully remove the roast from the pot and set it aside on a plate.Look for The beef should have a dark golden-brown crust on all sides.Tip Searing the meat in its own rendered fat builds a rich flavor base.
- Sauté the Onions and MushroomsLower the heat to medium. Add the sliced yellow onions and cremini mushrooms directly into the same Dutch oven, using the rendered beef fat in the pan. Sauté, stirring frequently, until the onions are deeply caramelized and sweet, and the mushrooms are tender and browned, about 15 to 20 minutes.Look for The onions should be soft, sweet, and a rich golden-amber color.Tip If the vegetables start to stick, lower the heat slightly.
At the end of this phase, the chuck roast should have a deep, beautiful golden-brown crust on all sides, and the onions should be soft, sweet, and caramelized to a rich golden-amber color.
The mushrooms will be tender and browned, and the entire kitchen will smell incredibly savory and sweet. Make sure the vegetables are nicely browned and have absorbed the rich flavors from the pan before moving to the next step.
Deglazing the Pot and Assembling the Roast
- Deglaze with Red Wine and BrothPour the dry red wine and beef broth into the Dutch oven to create the red-wine broth. Use a wooden spoon to scrape up all the flavorful browned bits stuck to the bottom of the pot. Bring the mixture to a simmer, allowing the liquids to combine and begin to reduce.Look for The liquid should bubble gently and the browned bits should dissolve.Tip Scraping the bottom of the pan releases incredible flavor into the gravy.
- Assemble and Braise the RoastReturn the seared chuck roast and any accumulated juices back into the Dutch oven, nestling the beef into the caramelized onions and sautéed mushrooms. Place the fresh thyme sprigs on top of the roast. Cover with a tight-fitting lid and transfer to an oven preheated to 325°F (163°C).Look for The roast should be nestled deeply into the bubbling broth.Tip A tight lid keeps the moisture trapped, ensuring a juicy roast.
The red wine and beef broth should be fully integrated, and all the browned bits from the bottom of the Dutch oven should be scraped up and dissolved into the sauce. The liquid will look slightly thickened and glossy. Once the beef broth and fresh thyme sprigs are added, the pot should come to a gentle boil, creating a rich, aromatic base for the braise.
Slow Braising and Resting the Meat
- Braise, Rest, and ServeBraise the roast for 3 to 3.5 hours, or until the beef is tender enough to pull apart with a fork. Ensure the internal temperature of the beef reaches at least 145°F (63°C) for food safety. Remove the roast and let the meat rest for at least 3 minutes before slicing. Serve warm, ladling the rich onion and mushroom gravy over the beef.Look for The meat should be tender enough to pull apart effortlessly with a fork.Safe temperature 145°F (63°C) internal temperature (steaks, chops and roasts)Tip Resting the meat is essential to keep the juices locked inside.
After hours in the oven, the beef should be exceptionally tender, yielding easily when pressed with a fork. The gravy will be thick, glossy, and deeply flavorful. The internal temperature of the roast must reach a safe 145°F (63°C). Allow the meat to rest for at least 3 minutes before slicing, which lets the juices redistribute throughout the roast, keeping every slice incredibly succulent.
Common mistakes
One common mistake is rushing the onion caramelization process. True caramelization takes time; cooking them too fast on high heat will burn the edges and leave them bitter instead of sweet and jammy.
Another pitfall is not searing the beef long enough. A pale sear will result in a less flavorful roast and a lackluster gravy. Finally, do not skip resting the meat after braising, or all the delicious juices will run out, leaving the roast dry.
How to tell it’s done
The pot roast is done when a fork slides into the center of the meat with absolutely no resistance and the beef easily pulls apart. To ensure food safety, the internal temperature of the beef must reach a minimum of 145°F (63°C) when measured with a meat thermometer.
After reaching this temperature, the meat must rest for at least 3 minutes. However, for the ultimate tender texture, the roast is typically cooked until it reaches around 195°F to 205°F (90°C to 96°C).
- Steaks, chops and roasts: 145°F (63°C) in the thickest part, then a 3-minute rest
Up next · Part 3 of 3
2 variations · storage & make-ahead · 3 answers · printable card
Tips, FAQ & printable recipe (Part 3)← Back to the ingredients (Part 1)