Dinner · Part 2 of 3: Instructions
French Dip Roast Beef Skillet Sandwiches with Melted Provolone Step-by-step instructions
- Prep
- Cook
- Total
- Serves
- 4
Before you start
Before you start, gather all your ingredients and equipment. Slice the onions thinly, and have the roast beef, provolone, and rolls ready to go.
Preheat your broiler and have a baking sheet or broiler-safe pan ready for toasting the rolls and melting the cheese. The entire process moves quickly once the onions are caramelizing, so having everything prepared will make the cooking seamless.
Ingredients at a glance (8)
- 14 oz thinly shaved deli roast beef
- 4 hoagie or French rolls, split
- 8 slices provolone cheese
- 2 large onions, sliced thin
- 2 tbsp butter
- 2 cups beef consommé au jus
- 1 tbsp Worcestershire sauce
- 1 tsp thyme
Instructions
Caramelize and Simmer
- Caramelize the OnionsMelt the butter in a large skillet over medium heat. Add the sliced onions and cook, stirring occasionally, until deeply caramelized, about 10 minutes. They should be soft, golden brown, and sweet.Look for Onions are deeply browned and fragrant, with a sweet caramelized aroma.Tip Do not rush this step—low and slow gives the best flavor. Stir occasionally to prevent burning.
- Build the Au JusPour the beef consommé au jus into the skillet with the onions. Stir in the Worcestershire sauce and thyme. Bring to a simmer and cook for 15 minutes, allowing the flavors to meld and the liquid to reduce slightly.Look for The au jus is steaming and fragrant, with a deep savory aroma.Tip Keep the au jus at a gentle simmer, not a rolling boil, to avoid reducing too much.
The onions are deeply golden and sweet, and the au jus is simmering with a rich, savory aroma. The flavors are melding together, and the kitchen smells like a cozy steakhouse. The beef is warming in the broth, and the rolls are ready to toast.
Toast and Assemble
- Warm the Roast BeefAdd the shaved roast beef to the simmering au jus. Let it warm through for about 30 seconds, using tongs to gently separate the slices so they soak up the savory liquid.Look for The beef is heated through and glistening with au jus.Tip Do not boil the beef—just warm it gently to keep it tender.
- Toast the RollsWhile the beef warms, split the hoagie or French rolls and place them cut-side up on a baking sheet. Toast under the broiler for 1–2 minutes until golden and crisp.Look for Rolls are golden brown and crisp on the cut sides.Tip Watch closely—broilers vary, and rolls can burn quickly.
The rolls are crisp and golden, the beef is tender and juicy, and the onions are piled high. The provolone is placed on top, and the sandwiches are ready for the broiler. The cheese is about to melt into a gooey, golden layer.
Broil and Serve
- Assemble the SandwichesUsing tongs, pile the warm roast beef onto the bottom halves of the toasted rolls. Top with the caramelized onions from the au jus, then place 2 slices of provolone cheese over each sandwich.Look for Sandwiches are generously filled with beef and onions, topped with cheese.Tip Use a slotted spoon to lift the onions, letting excess au jus drip back into the skillet.
- Broil Until MeltedPlace the assembled sandwiches under the broiler for about 3 minutes, until the provolone is molten and bubbling and the edges of the bread are crisp.Look for Cheese is melted, bubbly, and lightly browned in spots.Tip Keep an eye on the sandwiches—broilers vary, and the cheese can go from melted to burnt quickly.
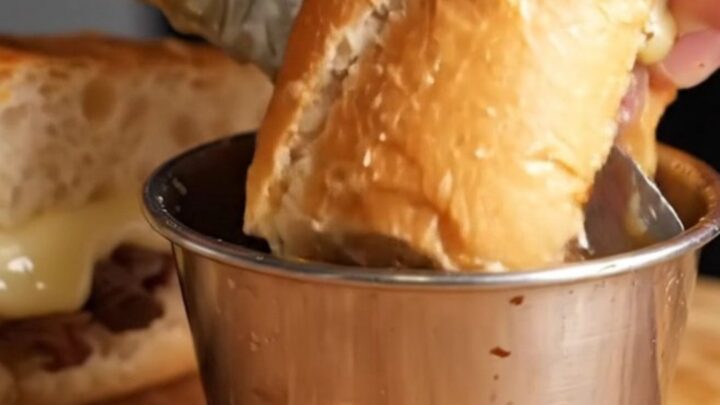
- Serve with Au JusTransfer each sandwich to a plate. Pour the remaining au jus into small cups or bowls for dipping. Slice the sandwiches in half and serve hot, encouraging everyone to plunge each bite into the savory broth. Let it rest for 3 minutes before slicing.Look for The au jus is hot and ready for dipping, and the sandwiches are oozing with melted cheese.Safe temperature 145°F (63°C) internal temperature (steaks, chops and roasts)Tip For the best experience, serve immediately while the bread is crisp and the cheese is stretchy.
The cheese is molten and bubbling, with a few golden spots. The sandwiches are sliced in half, revealing the juicy beef and melted cheese. The au jus is steaming in bowls, ready for dipping. The first bite is crunchy, savory, and utterly satisfying.
Common mistakes
One common mistake is overcooking the onions—they should be caramelized slowly to bring out their natural sweetness, not rushed over high heat, which can make them bitter.
Another is overheating the roast beef, which can make it tough and chewy; just warm it gently in the au jus.
Also, be careful not to over-toast the rolls under the broiler—they can go from golden to burnt in seconds. Finally, don’t skip the dipping—the au jus is what makes this sandwich truly special.
How to tell it’s done
The sandwiches are done when the cheese is fully melted and bubbling, and the edges of the rolls are golden and crisp. The roast beef should be heated through and tender, not dried out.
If you want to check the internal temperature, the beef should reach at least 145°F (63°C) if it’s raw, but since it’s pre-cooked deli meat, it just needs to be hot. The au jus should be simmering and flavorful.
- Steaks, chops and roasts: 145°F (63°C) in the thickest part, then a 3-minute rest
Up next · Part 3 of 3
4 variations · storage & make-ahead · 5 answers · printable card
Tips, FAQ & printable recipe (Part 3)← Back to the ingredients (Part 1)