Desserts · Part 1 of 3: Ingredients
Fluffy Chocolate-Glazed Ring Donuts: Bakery-Soft at Home
- Prep
- Cook
- Total
- Serves
- 12
Imagine biting into a donut that's so soft it practically melts—golden-fried, with a crisp exterior giving way to an airy, pillowy crumb.
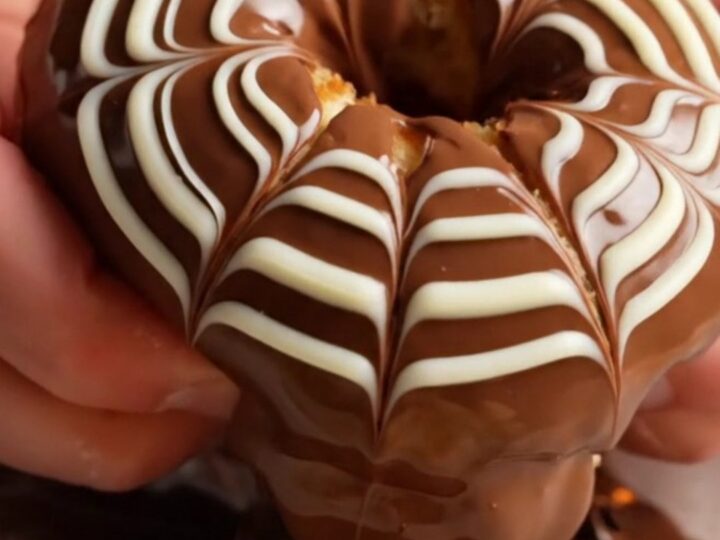
This recipe delivers exactly that: fluffy chocolate-glazed ring donuts that taste like they came from a high-end bakery, but are made right in your own kitchen. The glossy milk chocolate glaze and delicate white chocolate feather design make them almost too pretty to eat—almost.
These homemade ring donuts are a weekend project worth every minute. The dough comes together quickly with basic pantry staples: warm milk, water, oil, sugar, yeast, an egg, and flour.
After a short rise, the donuts are fried until golden, then dipped in a rich milk chocolate ganache and finished with an elegant white chocolate feather. The result is a donut that's crisp on the outside, cloud-soft inside, and utterly irresistible.
Ingredients
- 1 cup warm milk
- 1/2 cup warm water
- 1/2 cup vegetable oil, plus more for frying
- 2 tbsp granulated sugar
- 1 packet (2 1/4 tsp) active dry yeast
- 1 large egg
- 4 cups all-purpose flour, plus more for rolling
Glaze
- 1 1/2 cups milk chocolate ganache (melted)
- 1/2 cup white chocolate, melted
Why this recipe works
The secret to these donuts' incredible texture lies in the dough. Using warm milk and water activates the yeast, while the oil in the dough keeps the crumb tender and moist.
The short proofing time—just 20 minutes after cutting—allows the donuts to puff up light and airy without becoming dense. Frying at the right temperature ensures a quick, even cook that leaves the center fully set and the exterior perfectly golden.
The glaze is equally important. Dipping the warm donuts into melted milk chocolate ganache creates a thin, glossy coating that hardens to a satisfying snap. The white chocolate feather adds visual appeal and a subtle vanilla sweetness that complements the rich chocolate. Every element works together to create a donut that's both beautiful and delicious.
Notes and substitutions
For the best results, use whole milk and a good-quality active dry yeast. The dough should be soft and slightly sticky—resist the urge to add too much flour, as that will make the donuts tough.
If you don't have a donut cutter, use a round cookie cutter and a smaller one for the hole. The parchment squares are essential: they make transferring the proofed donuts to the oil much easier.
The milk chocolate ganache can be store-bought or homemade. To make your own, melt 1 1/2 cups of milk chocolate chips with 1/2 cup of heavy cream until smooth. For a darker flavor, use dark chocolate. The white chocolate for the feather can be melted in the microwave in 15-second intervals, stirring between each. If the chocolate is too thick, add a teaspoon of vegetable oil to thin it.
- active dry yeast: instant yeast: use the same amount, but dissolve in the warm liquid with the sugar and let sit for 5 minutes until foamy.
- vegetable oil: canola or sunflower oil: any neutral oil with a high smoke point works for frying.
- milk chocolate ganache: dark chocolate ganache: use 1 1/2 cups dark chocolate chips melted with 1/2 cup heavy cream for a less sweet glaze.
Equipment
- Large mixing bowl
- Whisk
- Rolling pin
- Round donut cutter
- Parchment paper squares
- Deep skillet or pot for frying
- Wire rack
- Toothpick
Up next · Part 2 of 3
7 steps · 20 min of cooking · what to look for at each stage
Step-by-step instructions (Part 2)