Breakfast · Part 2 of 3: Instructions
Flaky Chocolate Swirl Brioche Feuilletée Loaf Step-by-step instructions
- Prep
- Cook
- Total
- Serves
- 10
Before you start
Before starting, ensure the brioche dough is chilled but pliable. If it’s too firm, let it sit at room temperature for 10 minutes. Prepare the cocoa butter block: if it’s not already a flat block, shape it into a rectangle about 1/2 inch thick.
Have a greased 9-inch loaf pan ready. Gather a rolling pin, sharp knife or bench scraper, pastry brush, and plastic wrap. Clear a cool work surface, as a warm kitchen can make the butter soften too quickly.
Ingredients at a glance (3)
- 500 g rich brioche dough, made ahead
- 250 g dark cocoa butter block
- vanilla bean syrup, for brushing, to taste
Instructions
Laminate and Braid
- Laminate the doughOn a lightly floured surface, roll the brioche dough into a large rectangle about 1/4 inch thick. Place the cocoa butter block in the center and fold the dough over it, pinching the edges to seal. Roll the dough into a long rectangle, then perform a letter fold (fold into thirds). Wrap in plastic and chill for 20 minutes. Repeat the rolling and folding process two more times, chilling between folds.Look for The dough should be smooth and the cocoa butter evenly distributed in thin layers.Tip Keep the dough and butter at the same cool temperature to prevent the butter from breaking through.
- Cut and braidAfter the final chill, roll the laminated dough into a rectangle about 1/2 inch thick. Using a sharp knife or bench scraper, cut the dough into long strips about 2 inches wide. Braid the strips together vertically, then place the braid into a greased 9-inch loaf pan, tucking the ends under.Look for The braid should fill the pan evenly, leaving some room for proofing.Tip If the dough becomes too soft, chill it briefly before braiding.
After laminating, the dough should be smooth with visible chocolate streaks. When you cut the strips, you’ll see distinct layers. The braid should hold its shape in the pan. If the dough feels too soft, chill for 10 minutes before proceeding. The braid should fill the pan evenly, with the ends tucked under neatly.
Proof and Bake
- Proof the loafCover the loaf pan loosely with plastic wrap or a clean kitchen towel. Let the dough proof in a warm, draft-free place until it has doubled in height. This can take 1 to 1 1/2 hours, depending on your kitchen temperature.Look for The loaf should look puffy and about twice its original size.Tip For a consistent proof, place the pan in an oven with the light on and the door closed.
- Bake the loafPreheat the oven to 360°F (182°C). Place the proofed loaf in the oven and bake for 30 minutes, until the crust is glossy mahogany and crisp. If the top browns too quickly, tent loosely with aluminum foil.Look for The loaf should sound hollow when tapped on the bottom.Safe temperature 160°F (71°C) internal temperature (egg dishes)Tip Rotate the pan halfway through baking for even browning.
The loaf should have doubled in height and look puffy. When you gently press the dough, it should spring back slowly. In the oven, the crust will turn glossy and deep brown.
The kitchen will smell of chocolate and butter. The loaf should sound hollow when tapped, and the internal temperature should reach 160°F (71°C).
Glaze and Pull Apart
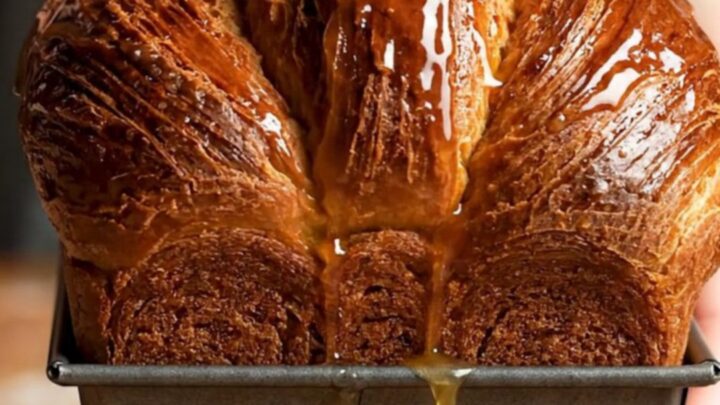
- Brush with syrupRemove the baked loaf from the oven and let it cool in the pan for 5 minutes. While still warm, brush the top generously with vanilla bean syrup. The syrup will soak into the crust, adding sweetness and shine.Look for The syrup should create a glossy, sticky finish on the crust.Tip Brush in two coats for extra gloss, letting the first coat absorb.
- Cool and pull apartTransfer the loaf to a wire rack and let it cool for at least 20 minutes before serving. Pull apart the warm layers to reveal the feathery, chocolate-buttered interior.Look for The layers should separate easily and look flaky and tender.Tip Serve warm for the best texture, or reheat slices gently.
After brushing with vanilla syrup, the crust should be shiny and slightly sticky. Let the loaf cool for at least 20 minutes. When you pull apart a piece, the layers should separate easily, revealing tender, chocolate-buttered strands. The interior should be moist but fully set, with no raw dough.
Common mistakes
Skipping the chilling between folds can cause the butter to break through the dough, resulting in a greasy, less flaky loaf. If the dough tears during rolling, press it back together and chill.
Over-proofing can cause the loaf to collapse in the oven; it should double but not triple in size. Baking at too high a temperature can burn the crust before the interior is done — stick to 360°F (182°C). Finally, don’t skip the syrup brush; it adds essential moisture and shine.
How to tell it’s done
The loaf is done when the crust is glossy mahogany and sounds hollow when tapped on the bottom. The internal temperature should reach 160°F (71°C) for any egg-rich dough. If you insert an instant-read thermometer into the center, it should read at least 160°F (71°C).
The layers should be fully baked and not doughy. Let the loaf cool for at least 20 minutes before slicing to allow the layers to set, but serve warm for the best pull-apart texture.
- Egg dishes: 160°F (71°C) in the thickest part
Up next · Part 3 of 3
4 variations · storage & make-ahead · 5 answers · printable card
Tips, FAQ & printable recipe (Part 3)← Back to the ingredients (Part 1)