Desserts · Part 1 of 3: Ingredients
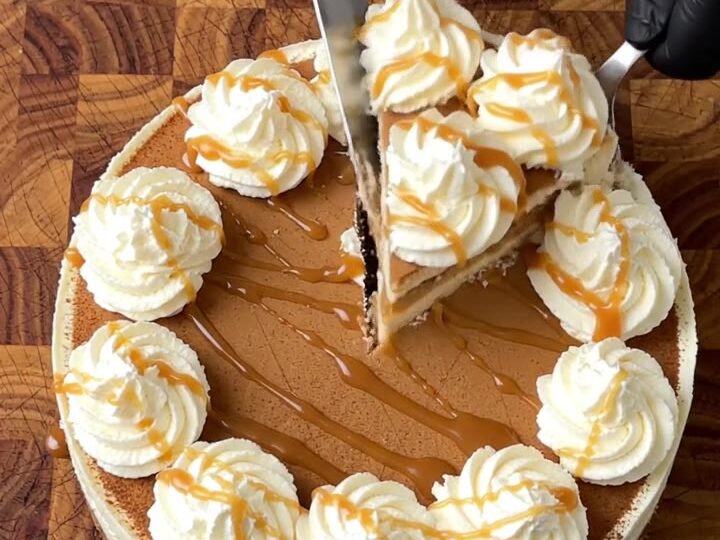
Espresso Caramel Macchiato Cheesecake with Mascarpone
- Prep
- Cook
- Total
- Serves
- 12
This cheesecake takes the beloved caramel macchiato and turns it into a stunning dessert.
A creamy espresso-mascarpone filling is swirled with salted caramel, studded with crunchy espresso beans and chewy caramel bits, then crowned with whipped cream rosettes and a warm caramel drizzle. It's a coffee lover's dream and a showstopper for any gathering.
Caramel macchiato meets cheesecake in this indulgent dessert. The batter is enriched with mascarpone for extra silkiness, while instant espresso powder delivers a deep coffee flavor.
Crushed espresso beans and diced caramel squares add texture, and a generous swirl of salted caramel creates beautiful ribbons throughout. After baking and chilling, the cheesecake is topped with piped whipped cream and more caramel for a picture-perfect finish.
Ingredients
- 1/4 cup espresso beans
- 1/2 cup diced golden caramel squares
- 2 oz dark coffee-coverture chocolate
Cheesecake Batter
- 32 oz cream cheese, softened
- 1 cup mascarpone cheese
- 1 1/4 cups granulated sugar
- 4 large eggs
- 2 tsp vanilla extract
- 2 tbsp instant espresso powder
Swirl and Topping
- 1 cup salted caramel sauce, divided
Whipped Cream
- 1 1/2 cups heavy cream
- 1/4 cup confectioners' sugar
Why this recipe works
The combination of cream cheese and mascarpone creates an exceptionally smooth, velvety texture. Mascarpone has a higher fat content and lower tang than cream cheese, which makes the filling luxuriously rich and creamy. This duo ensures a dense yet silky cheesecake that slices cleanly and melts on the tongue.
The salted caramel swirl is added after the batter is poured, so it stays in distinct ribbons rather than blending in completely.
This technique gives every bite pockets of gooey caramel that contrast beautifully with the tangy, coffee-flavored cheesecake. The crushed espresso beans and caramel squares add a pleasant crunch and chew, making the texture as exciting as the flavor.
Notes and substitutions
Use full-fat cream cheese and mascarpone for the best texture; low-fat versions can make the cheesecake watery.
Instant espresso powder is ideal because it dissolves easily; regular coffee grounds will not provide the same concentrated flavor. The golden caramel squares are soft, chewy candies that can be found near other baking supplies.
A 9-inch springform pan is essential for easy removal. The cheesecake is baked at a moderate temperature and cooled slowly in the oven to prevent cracking. If the top browns too quickly, tent it loosely with foil. The whipped cream rosettes are best piped just before serving, but the cheesecake itself can be made a day ahead.
- mascarpone cheese: Use an equal amount of full-fat cream cheese or a mixture of cream cheese and sour cream for a similar tangy richness.
- espresso beans: Use dark chocolate-covered espresso beans, or omit and add an extra teaspoon of instant espresso powder to the batter.
- dark coffee-coverture chocolate: Use any high-quality dark chocolate (60-70% cacao) and add 1/2 teaspoon instant espresso powder to the grated chocolate.
- golden caramel squares: Use soft caramels or chewy caramel candies, diced small.
Equipment
- 9-inch springform pan
- Box grater
- Electric mixer
- Piping bag with star tip
Up next · Part 2 of 3
7 steps · 1 h 15 min of cooking · what to look for at each stage
Step-by-step instructions (Part 2)