Desserts · Part 2 of 3: Instructions
Elegant Earl Grey and Honey Poached Pears Step-by-step instructions
- Prep
- Cook
- Total
- Serves
- 6
Before you start
Ensure the slow cooker basin is clean and dry before beginning. Prepare the pears by peeling them completely using a vegetable peeler, being careful to remove all tough skin while keeping the shape intact.
If the pears are unstable, trim the base slightly. Have the honey and warm tea ready in a measuring vessel, and ensure the cinnamon stick and lemon zest are within easy reach for immediate assembly in the cooker.
Ingredients at a glance (5)
- 6 whole peeled raw pears
- 1 strip lemon zest
- 1 whole cinnamon stick
- 2 cups warm Earl Grey tea
- 3 tbsp honey
Instructions
Preparation and Arrangement
- Prepare the slow cookerPlace the six peeled raw pears upright into the basin of the slow cooker. Ensure they are arranged snugly so they remain stable during the poaching process. Add the strip of fresh lemon zest and the whole cinnamon stick into the spaces between the pears to ensure the flavors distribute evenly throughout the cooking liquid.Look for The pears should sit firmly on the bottom of the slow cooker.Tip Peel the pears carefully, leaving the stems intact for a more elegant presentation when serving.
At the end of this phase, the pears should be standing upright in the slow cooker with the lemon and cinnamon tucked in. The arrangement must be snug to prevent the fruit from tipping over during the poaching process. Verify that the pears are stable and that the lemon and cinnamon are evenly distributed among the fruit for balanced infusion.
Infusion and Poaching
- Infuse with tea and honeyIn a glass measuring cup, dissolve the honey into the warm Earl Grey tea until fully incorporated. Pour this mixture carefully over the pears in the slow cooker, ensuring the liquid reaches at least halfway up the sides of the fruit. Cover the slow cooker with its lid to trap the aromatic steam inside.Look for The liquid should be fragrant with the scent of bergamot and honey.Tip Use a high-quality loose leaf tea or standard tea bags for the best flavor profile.
Once the tea and honey mixture is added, the liquid should surround the pears without completely submerging them, which allows the steam to cook the upper portions gently.
The kitchen should begin to smell fragrant with the scent of bergamot and warm spices. Ensure the lid is securely in place to maintain the necessary internal environment for proper poaching.
Final Tenderization
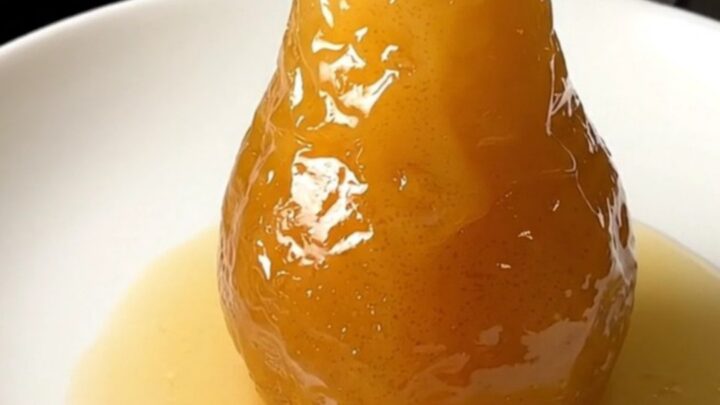
- Poach and serveCook the pears on a low heat setting for approximately three hours. Once the pears are tender when pierced with a knife, remove them carefully from the slow cooker. Allow the pears to rest for ten minutes before transferring them to a serving plate. Serve warm, optionally drizzled with a small amount of the reduced poaching liquid.Look for The pears should be soft and tender, glistening with the tea and honey glaze.Tip Avoid overcooking the pears, as they should hold their shape rather than turning into mush.
At the conclusion of the cooking time, the pears will have softened and taken on a rich, golden-brown hue from the tea. They should look plump and feel tender when tested. Check that the poaching liquid has reduced slightly and thickened, then allow the pears to rest briefly to stabilize their structure before transferring them carefully to the serving plates.
Common mistakes
A common mistake is using pears that are already overly ripe, which can lead to the fruit collapsing during the long cooking process. Another error is failing to ensure the honey is fully dissolved into the warm tea, which can result in uneven sweetness.
Finally, do not lift the lid of the slow cooker frequently, as this allows heat and aromatic steam to escape, which significantly increases the cooking time.
How to tell it’s done
The pears are considered done when they are tender throughout and can be easily pierced with a small paring knife with no resistance.
The color of the fruit will deepen slightly as it absorbs the tea, and the exterior should appear translucent and glistening. There is no specific internal temperature required for this fruit dish, but the texture should be consistent and soft, not mushy.
Up next · Part 3 of 3
2 variations · storage & make-ahead · 3 answers · printable card
Tips, FAQ & printable recipe (Part 3)← Back to the ingredients (Part 1)