Desserts · Part 2 of 3: Instructions
Easy Sugar-Free Turtle Lush Dessert Step-by-step instructions
- Prep
- Cook
- Total
- Serves
- 9
Before you start
Before beginning assembly, clear a flat workspace and ensure the red ceramic baking dish is clean and dry. Have the dark crust crumbs, fluffy cheesecake filling, rich chocolate pudding, and whipped topping measured and chilled.
Prepare the caramel, chocolate syrup, and chopped pecans so they are within easy reach when finishing the top layer.
Ingredients at a glance (7)
- 2 cups dark crust crumbs (store-bought or made ahead)
- 2 cups fluffy cheesecake filling (store-bought or made ahead)
- 2 cups rich chocolate pudding (store-bought or made ahead)
- 1 1/2 cups whipped topping
- 2 tbsp caramel drizzle
- 2 tbsp chocolate syrup drizzle
- 1/4 cup chopped pecans
Instructions
Base Preparation
- Press the Dark Crust BaseSpread the dark crust crumbs evenly across the bottom of a red ceramic baking dish. Press firmly into a compact, level layer across the entire bottom surface to establish a sturdy foundation for the dessert. Place the baking dish in the refrigerator to chill while preparing the next layers.Look for The crumbs should form a solid, firmly packed base with no visible gaps.Tip Use the flat base of a measuring cup to compress the crumbs evenly.
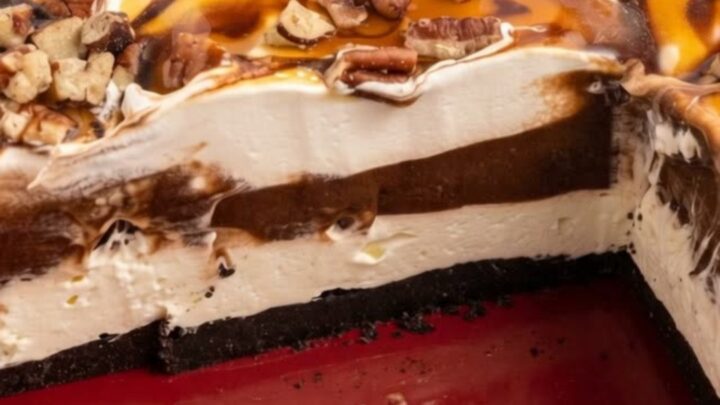
The dark crust should be firmly compacted across the entire floor of the baking dish, forming a solid and even chocolate base.
Ensure there are no loose crumbs along the edges before adding any fillings, as this guarantees clean foundation lines in the final slices.
Filling the Strata
- Layer the Cheesecake and Chocolate FillingsGently spoon the fluffy cheesecake filling over the compressed dark crust, spreading it into an even, smooth layer from edge to edge. Carefully pour the rich chocolate pudding over the cheesecake layer, smoothing the top with a spatula so the layers remain cleanly separated.Look for Each layer should form a distinct, horizontal stratum visible against the dish.Tip Spread gently with an offset spatula so the two creamy layers do not blend.
At the conclusion of this phase, you should observe two clearly defined layers: the pale, fluffy cheesecake base sealed completely beneath the smooth chocolate pudding. The pudding surface should be level and uniform all the way to the dish walls.
Topping and Garnish
- Top, Garnish, and ChillSpread the whipped topping smoothly over the chocolate pudding layer. Drizzle caramel and chocolate syrup across the top in a crosshatch pattern, then scatter the chopped pecans evenly over the surface. Refrigerate the dessert for at least two hours until fully set before slicing.Look for The dessert is ready when the layers are firm and slice cleanly with a metal spatula.Tip Wipe the serving spatula clean between slices to keep the visual layers crisp.
The completed dish will showcase a billowy blanket of whipped topping decorated with glossy ribbons of caramel and chocolate syrup and a blanket of pecans. The entire pan should look immaculate and structured, ready for the final chilling phase.
Common mistakes
A common mistake is spreading the pudding too aggressively over the cheesecake, which causes the two layers to swirl together rather than stay distinct.
Another issue is slicing the dessert before it has fully chilled, leading to collapsed pieces. Be sure to let the dish rest undisturbed in the refrigerator for the full recommended time.
How to tell it’s done
The dessert is fully ready after chilling in the refrigerator for at least two hours. You will know it is set when the pudding and cheesecake layers feel stable to a light touch and do not shift when the dish is gently tilted.
Clean slices should hold their square structure firmly when lifted with a metal spatula.
Up next · Part 3 of 3
2 variations · storage & make-ahead · 3 answers · printable card
Tips, FAQ & printable recipe (Part 3)← Back to the ingredients (Part 1)